In this guide we’ll show you how you can add date schedule targeting to your Chaty widget in a few super simple and quick clicks.
To learn more about how to use the Chaty plug-in click here, and don’t forget to check our entire Chaty knowledgebase to make the most out of it.
With this feature you can schedule in advance to show your Chaty widget on specific dates and in specific hours, for example for an upcoming campaign. This feature is also useful if you want to offer time-limited support over a specific channel or to start accepting inquiries from a specific date.
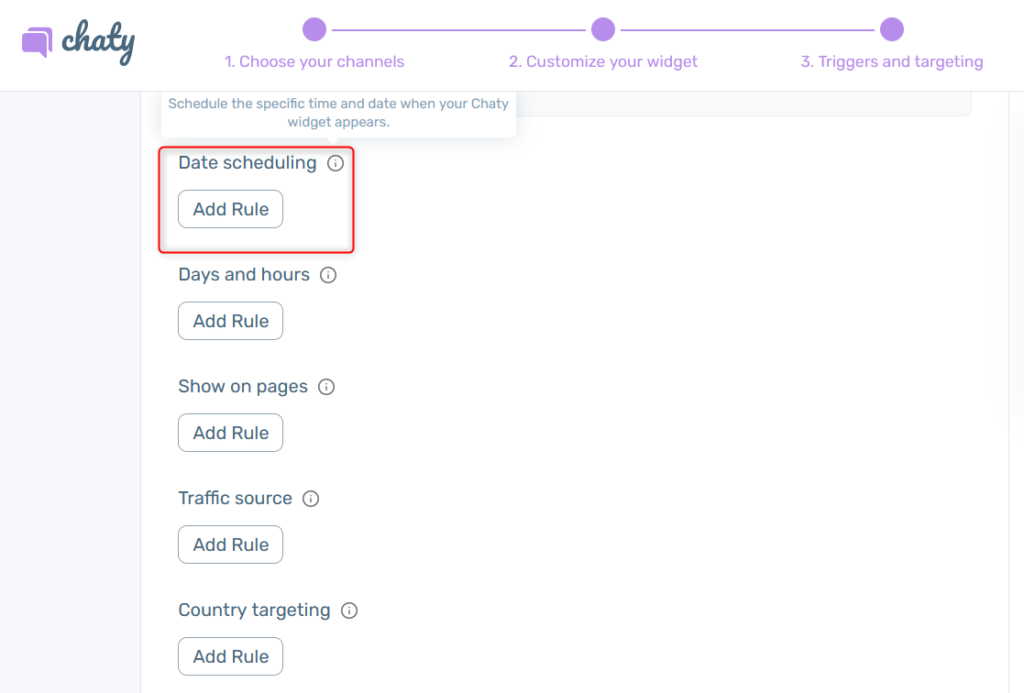
Let’s get right into it. First, open the Chaty settings and scroll down to ”Step 3: triggers and targeting settings”, then click on ”Add rule” next to ”Date scheduling”. Please note it’s available for pro users only.
Now you need to select your country or timezone and start and end date – the dates from which the widget will respectively start and stop to be displayed, keeping in mind the start and end dates are included.
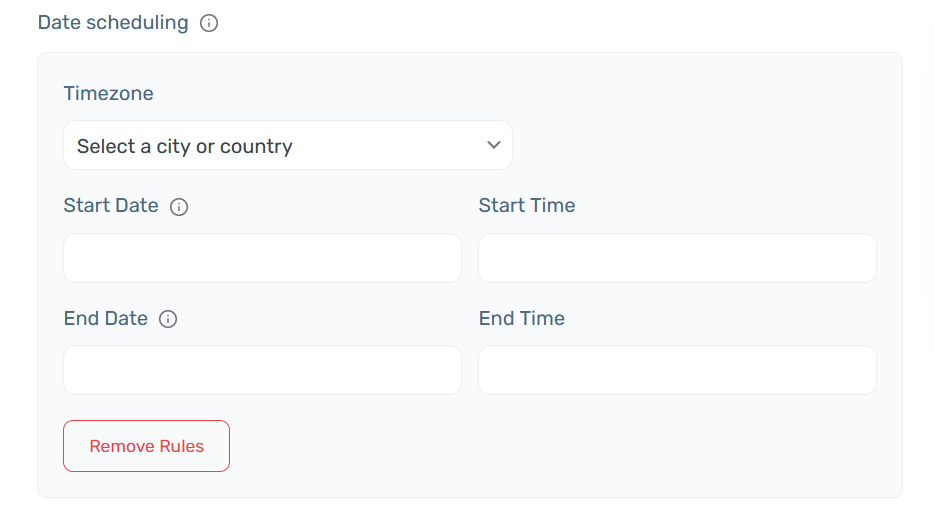
Then, add a start and end time of your preference keeping in mind to choose your timezone correctly from the ”Timezone” dropdown.
That’s it! When you’re done setting up your cart targeting settings, don’t forget to hit ”Save changes” at the bottom of the page. Easy as 1,2,3 😊
Now your Chaty widget will only be displayed starting from and unit the date and hour you have just selected.
Click here to read more about how to set up traffic source targeting to your widget.
Click here to learn how to show Chaty on specific pages only.
To learn how to display the Chaty widget on specific days and hours, click here.