In this guide we’ll show you how you can add traffic source targeting to your My Sticky Elements widget.
To learn more about how to use the My Sticky Elements plug-in click here, and don’t forget to check our entire My Sticky Elements knowledgebase to make the most out of it.
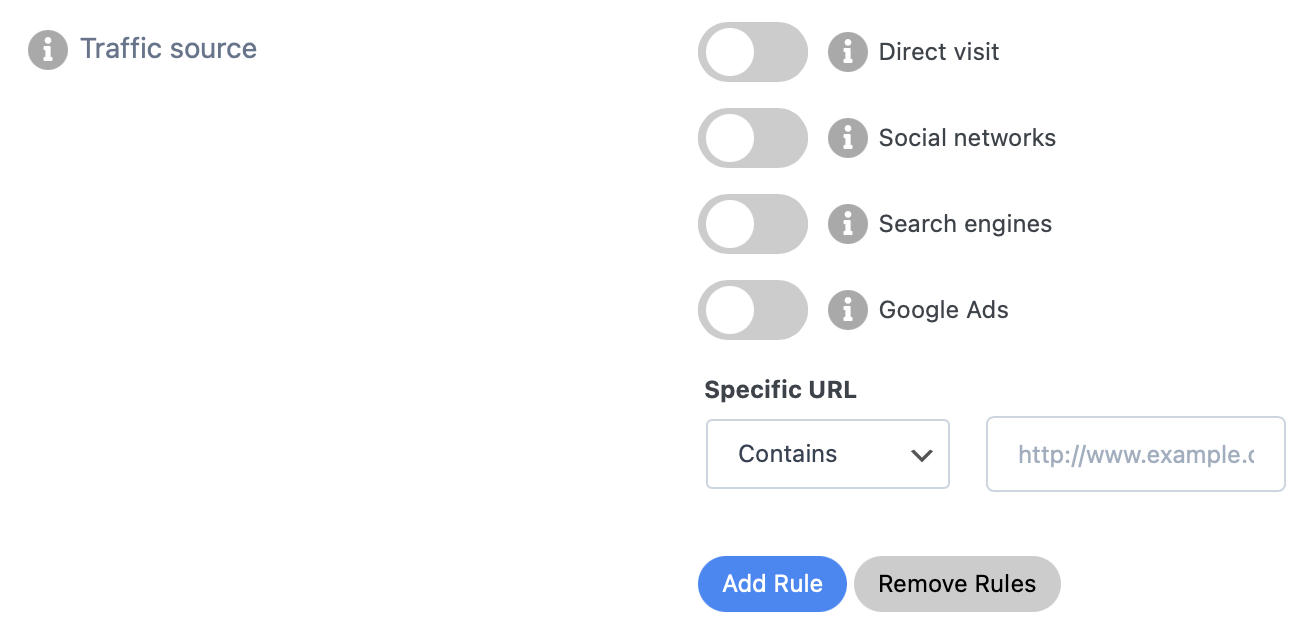
With this feature you can display a widget with specific channels only to users that came to your website from specific traffic sources including direct traffic, social networks (e.g. Facebook), search engines (e.g. Google), Google Ads or any other traffic source or website. Please note it’s available for pro users only.
To enable this option, open the My Sticky Elements settings in your WordPress dashboard. Scroll down to the ”General settings” menu and look for the ”Traffic source” option, then click on the ”Add rule” button.

Now you need to turn on or off each of the settings: direct visit (to show the discount code to visitors who arrived at your website from direct traffic), social networks (to show the discount code to visitors who arrived at your website from social networks), search engines (to show the discount code to visitors who arrived at your website from search engines), Google Ads (to show the discount code to visitors who arrived at your website through Google Ads), or choose to display your coupon code to traffic generated from a specific URL that contains or doesn’t contain a specific website. You can add more rules by clicking on the blue ”Add rule” button.
That’s it! When you’re done setting up your cart targeting settings, don’t forget to hit ”Publish” at the bottom of the page. Easy as 1,2,3 ☺️ Now your My Sticky Elements widget will only be displayed to visitors who meet the above criteria you have just selected.
Click here to read how to show your My Sticky Elements on specific pages.
Click here to learn how to display your widget on specific days and hours.