In this guide we’ll show you how to add a text block field to your My Sticky Elements contact form. You can use this feature to add a personalised title or message to your contact form, for example ”Got any questions? Get in touch now!” or even add a clickable link to another page. It will appear at the top of your contact form, before all fields.
Click here to read more about how to activate the contact form.
To learn more about how to use the My Sticky Elements plug-in click here, and don’t forget to check our entire My Sticky Elements knowledgebase to make the most out of it.
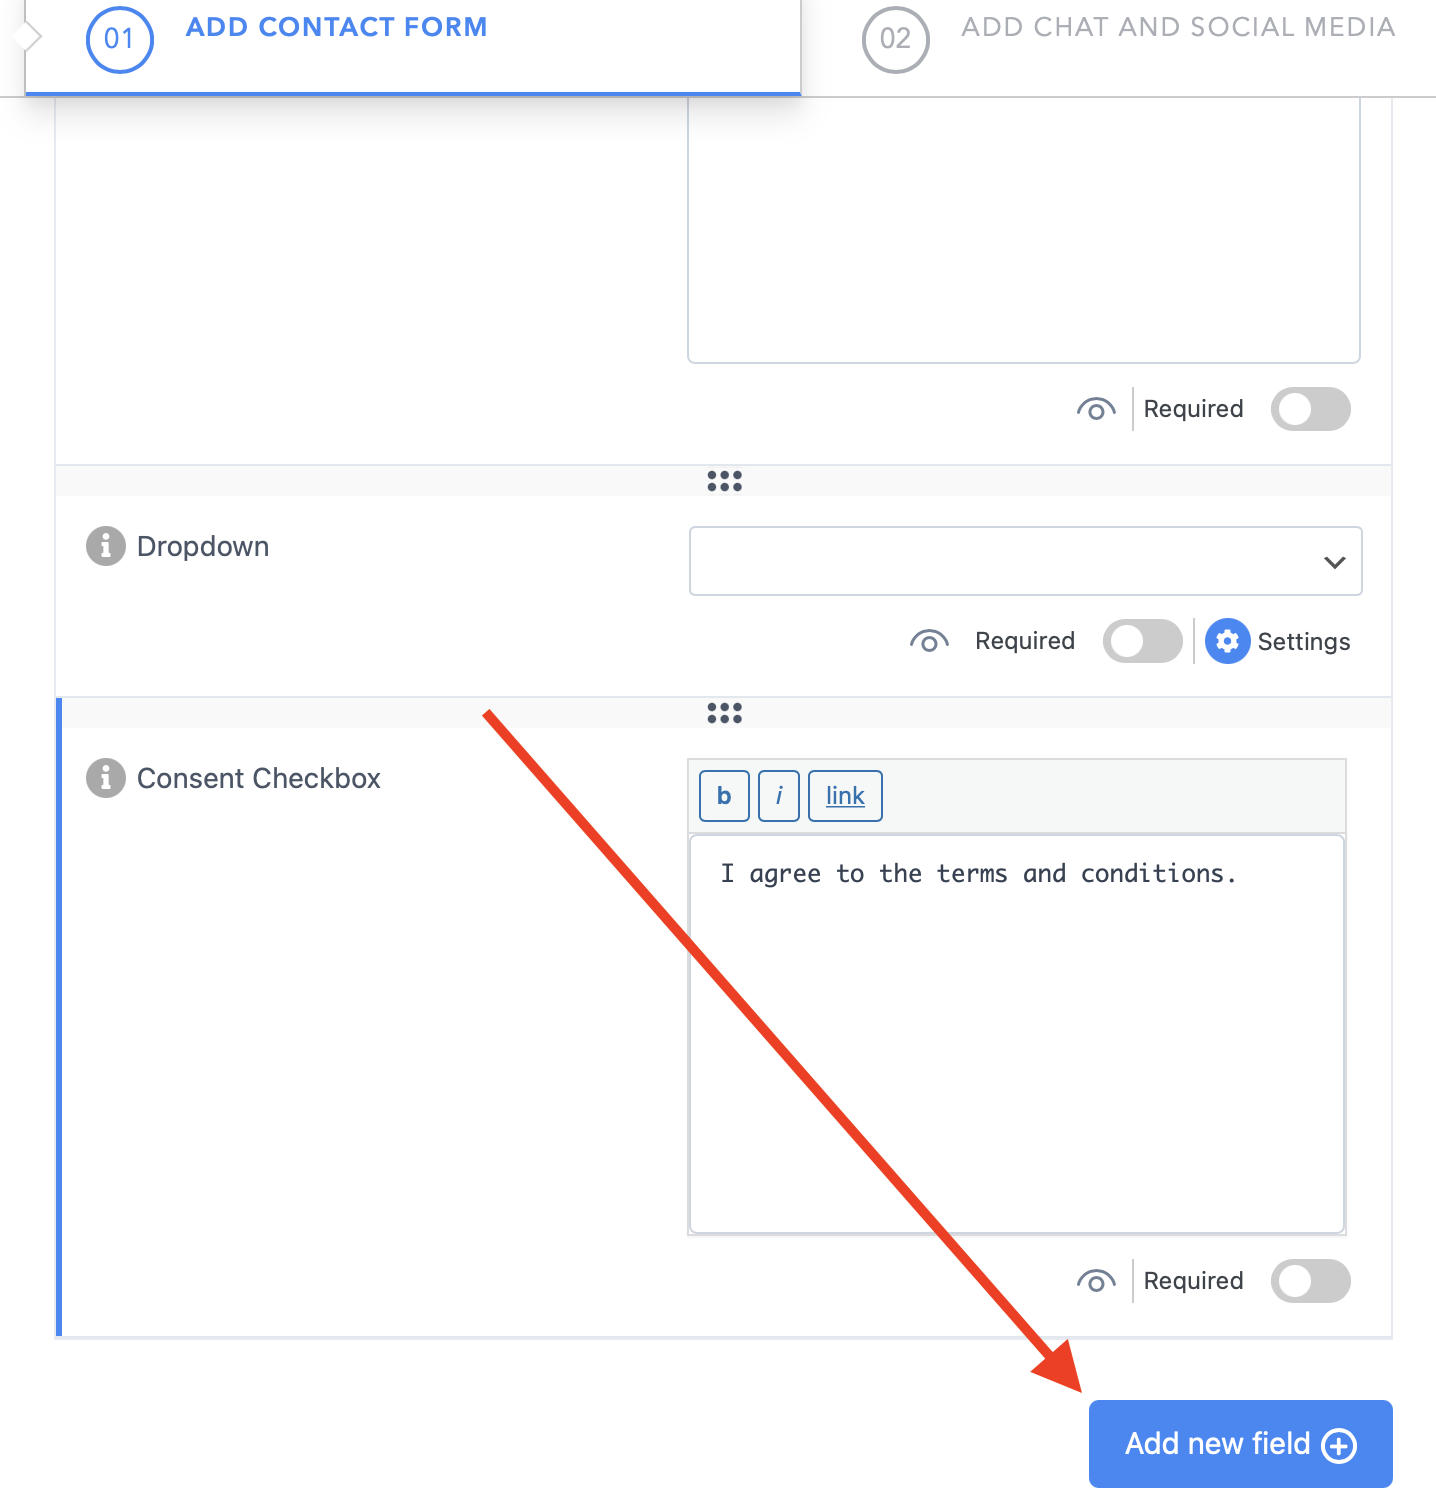
Let’s get right into it! First, open the My Sticky Elements plug-in from your WordPress dashboard and in step 1: ”Add contact form” settings scroll down and click on the ”Add new field” button.
Now you will see all custom field options. Important!: please note you can have no more than 6 custom fields at the same time.
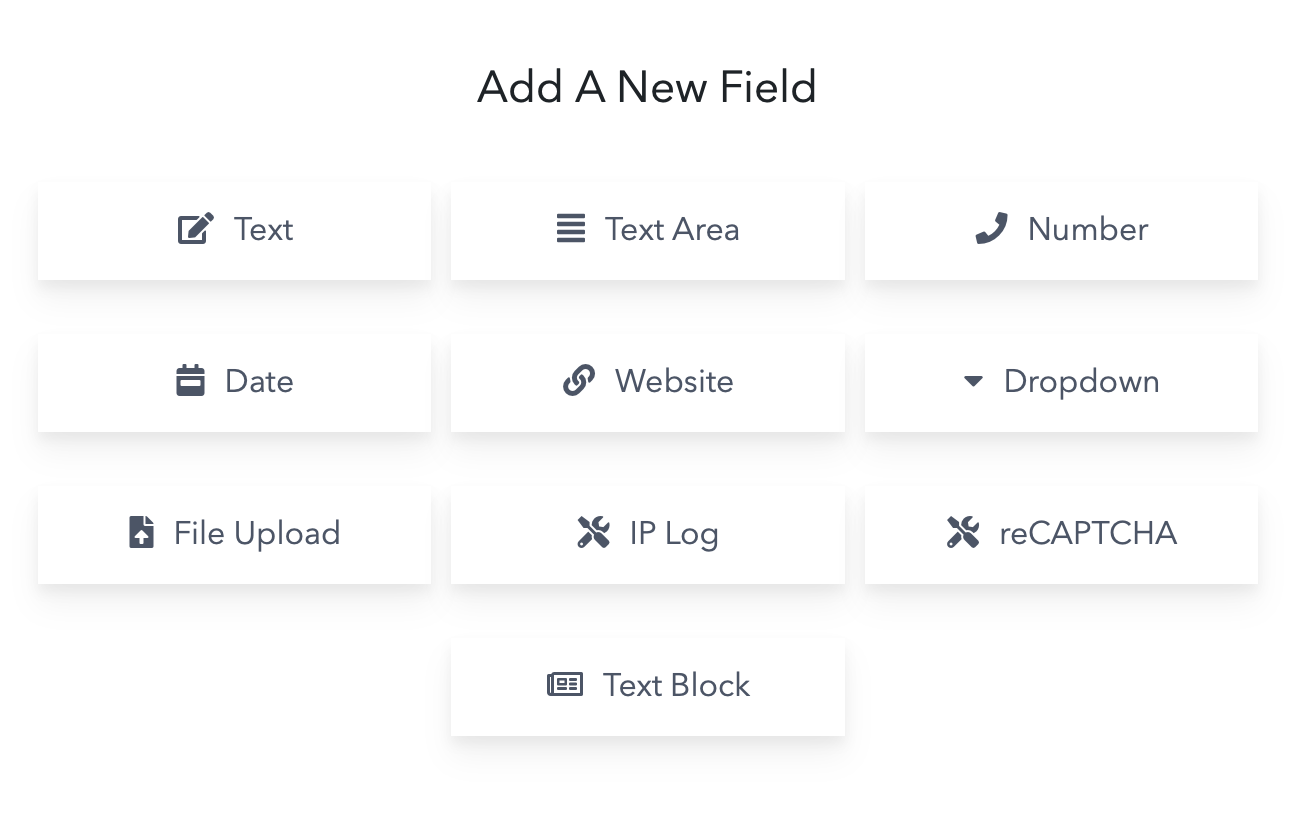
Click on the ”Text block” button to insert the feature to your contact form. It will appear at the top of your Contact Form Tab settings. To disable it, uncheck the eye icon at the bottom and to delete it, click on the trash icon.

This feature is meant to further personalise your contact form and engage your website visitors with a catchy message or direct them to another internal or external webpage. Your text will appear at the top of your contact form, on top of all fields. You can customise it to be in standard, bold, italic or underlined style from the buttons above the text block box, or add a clickable link.
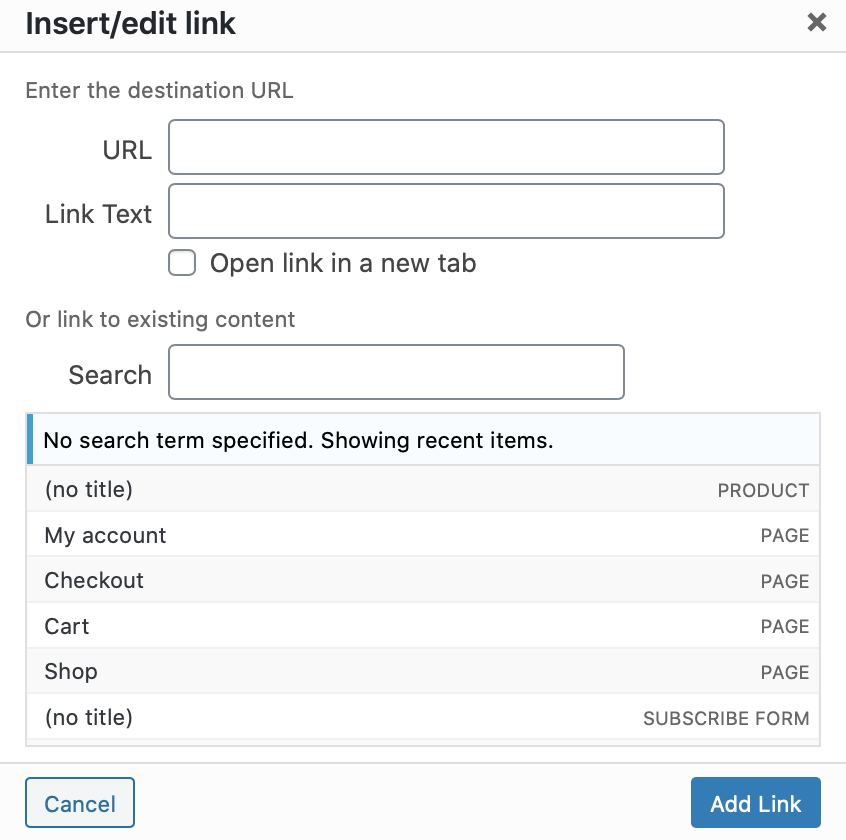
If you choose to add a clickable link to your text block, you will be asked to enter the destination URL (which can also be ”covered” by link text) or add a link to existing on your website content (e.g. another page).
If you want only part of your text to be clickable, you can highlight that part and apply the ”link” option to that specific part only. For example, if you text is ”Any questions? Have you checked our FAQ page”, you can add only the word ”FAQ” to contain a redirect link.
When you’re done, don’t forget to click on ”Save changes” at the bottom of the page. In the end, depending on your settings and personalisation, your contact form with a custom text block message/ link may look something like this:

Click here to learn how to add custom fields to your contact form.