In this guide we’ll show you how to track your Sticky Floating Contact Form widget clicks with Google Analytics. To learn more about how to use the app, click here.
Please note you need to have a Google Analytics account to take advantage of this feature and also add a JavaScript or Tracking ID from your Google account in your store settings. You can find more details on how to do this here:
https://help.shopify.com/en/manual/reports-and-analytics/google-analytics/google-analytics-setup
So let’s dive in. Open the Sticky Floating Contact Form app in your Shopify admin panel. The app settings menu will open up. Go to Step 3: Display & behaviour settings > Triggers & targeting and scroll down to ”Google Analytics Event” button:
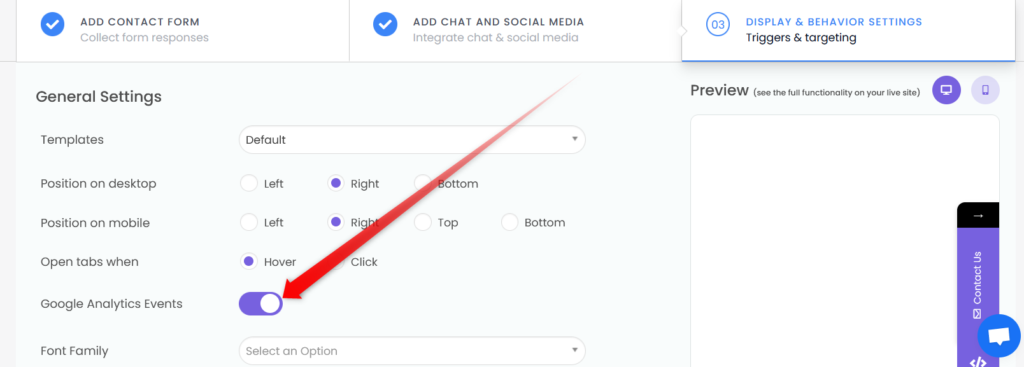
Don’t forget to hit the ”Save” button at the bottom of the page.
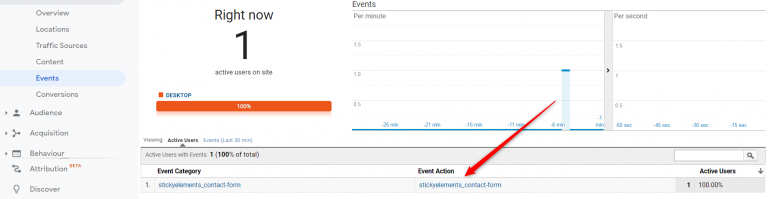
To make sure your new setting works correctly, click ”preview” to open your Shopify store website in another tab and fill in a test contact form. Then, go to your Google Analytics account, click on ”Realtime” under the ”Reports” section and choose ”Events”. Then make sure the click (”event”) appears there:
You can even add your ”events” as ”goals” by creating custom event goals and adding the right action in the respective field, based on the channel you’re tracking.

That’s it, easy as 1,2,3. ☺️ Now you can easily keep track of your widget usability.