In this guide, we’ll go through all the steps to activate Coupon X on your Shopify store. Please check our entire help documentation here to make the most out of the app.
Display your Shopify discount codes using Coupon X’s beautiful sticky widgets, and make sure your visitors never miss it out.
You can also use Coupon X to display your coupons after your visitors have submitted their email address.
Step 1 – Design Your Icon Tab
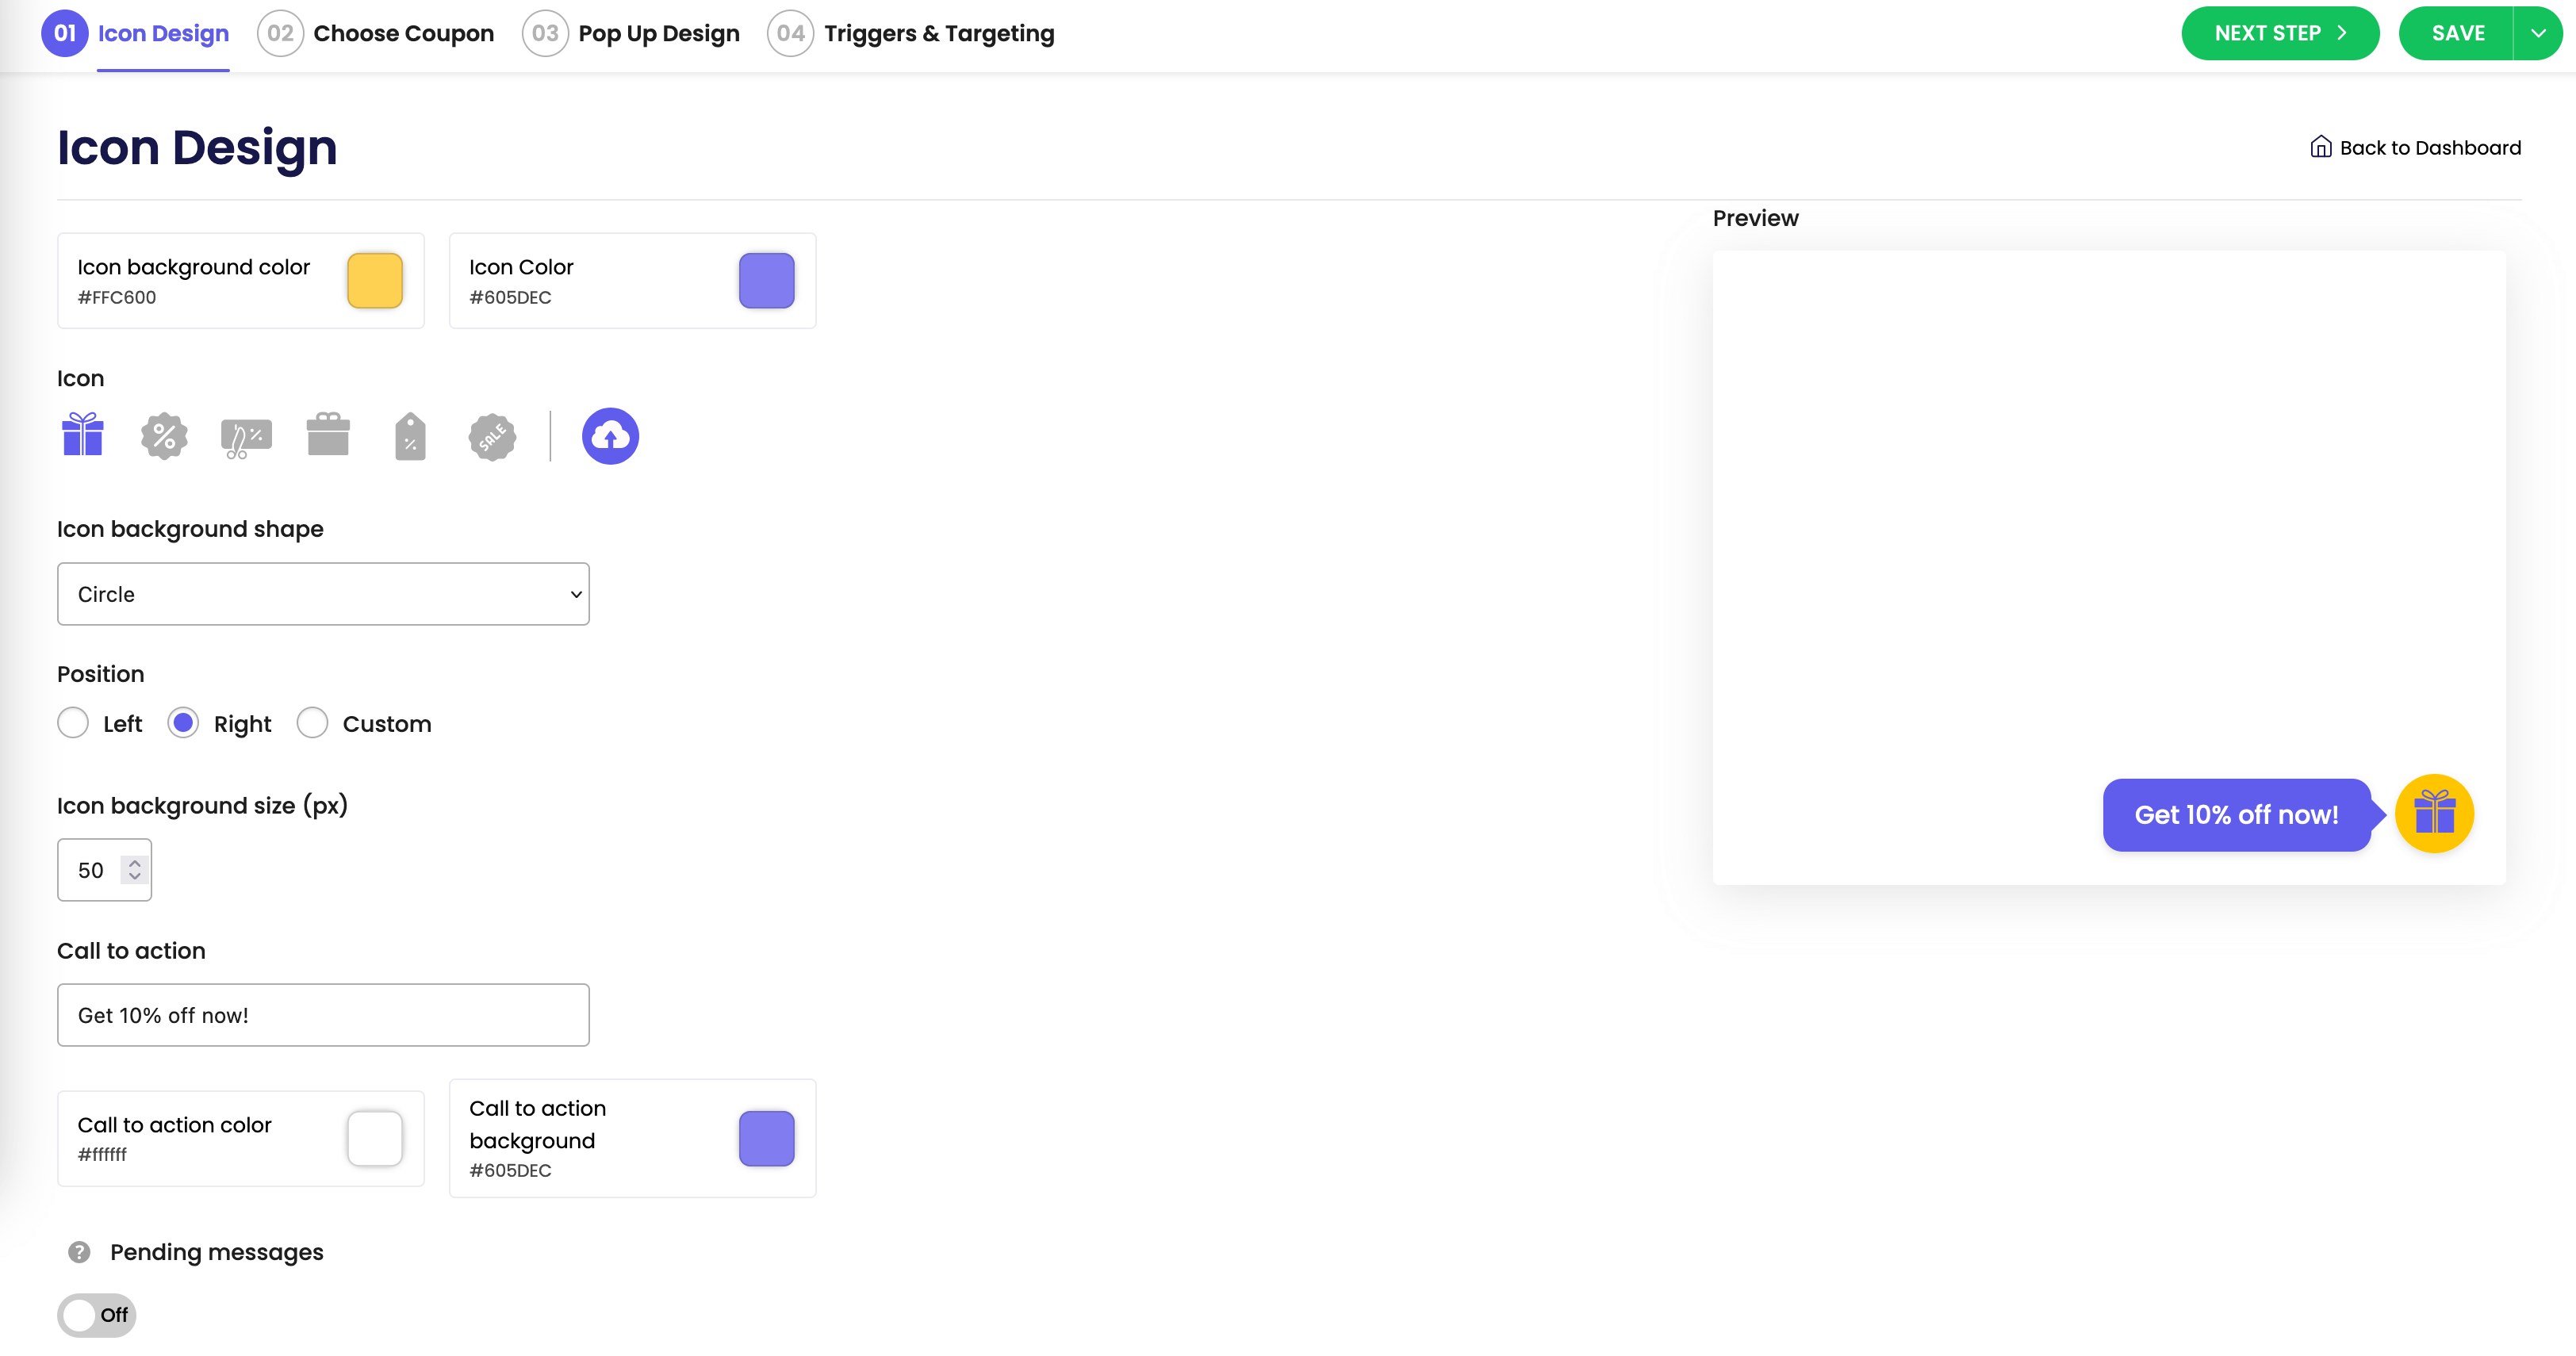
In the first step, you’ll be asked to design your widget. Select the tab shape and color (or upload your own custom tab), choose the call-to-action text, select you your font, attention effect, and tab size.
Make sure the design of your tab looks as good as possible, because you want to get your visitors to click on it so they can get the coupon code.
We suggest selecting a clear call-to-action message that’ll make sure your visitors understand what’s about to happen after they click on the tab
Step 2 – Choose your coupon
Now choose between 4 options – Create a new discount from the Coupon X app or Use an existing Discount from Shopify Discounts – with these options there will be an identical discount code for everyone, Generate unique coupons for each new user – with this option a new and unique code will be created for each visitor and stored in your Shopify discount code settings – or Don’t show a coupon code – with this mode you can use the widget to collect emails, display announcements or show promotional offers via an attention-grabbing widget. We’ll cover each of these options below.

Create a new discount from the Coupon X app
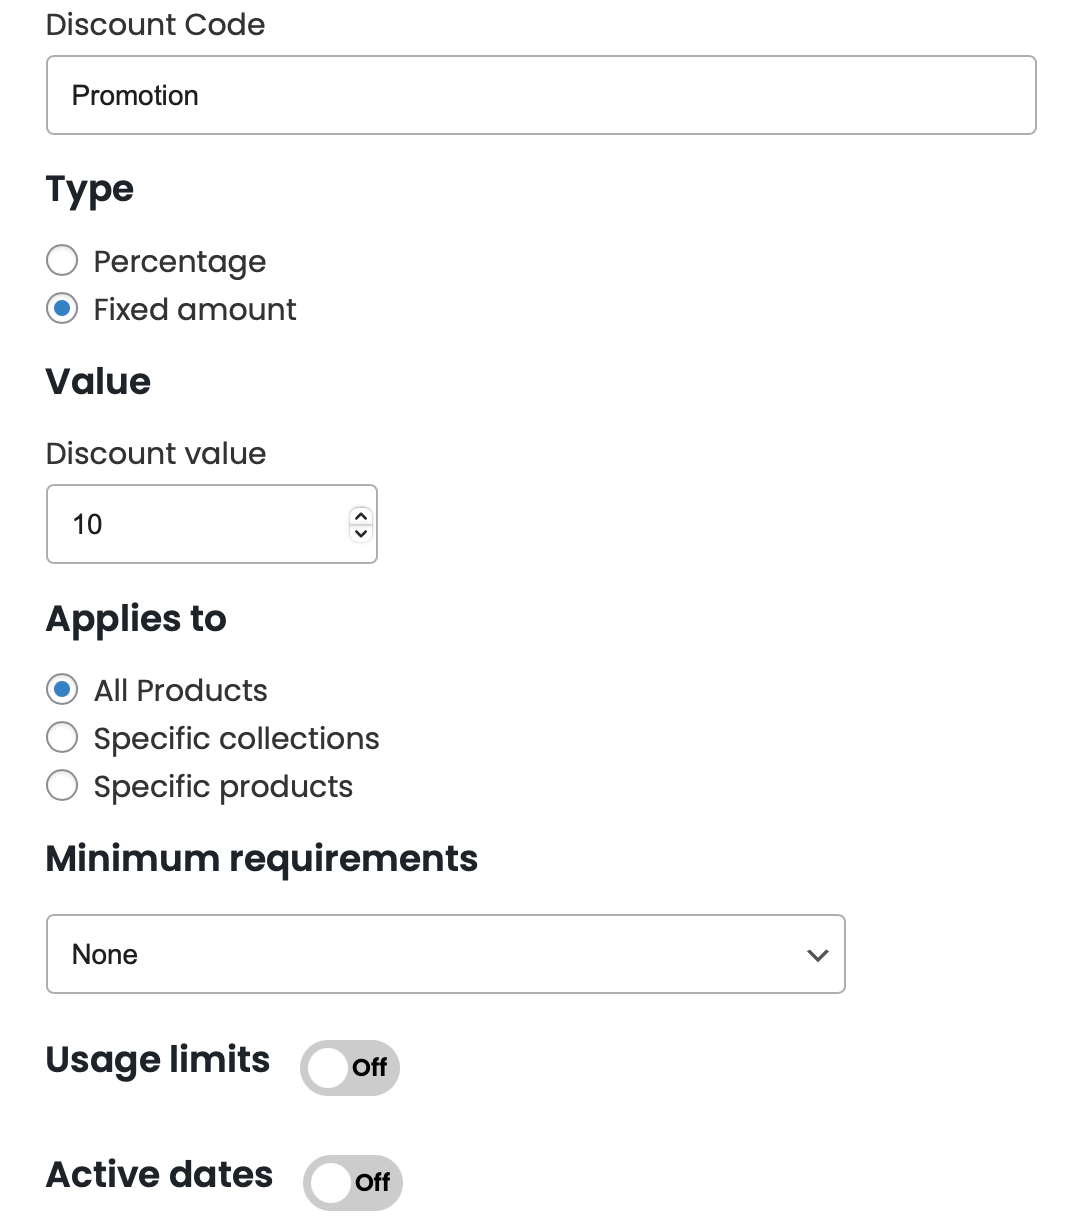
With this option you’ll create a new discount that the Coupon X app will display to everyone.
Start by giving a name to your discount code in the “Discount code” field. Then, choose the discount type – percentage or a fixed amount – and the value. Select if you wish the code to apply for all products or just specific products or collections and add any minimum requirements such as a minimum purchase amount. Lastly, you can add usage limits – to limit the number of times the discount can be used in total per discount code (for example, if you set 5, the customer can use the code for a maximum of 5 times in total) or to limit the code to one use per customer (meaning if a customer has already bought something with the code, they won’t be able to use the code more than once) – and active dates (for time-limited promotions with a start and end date).
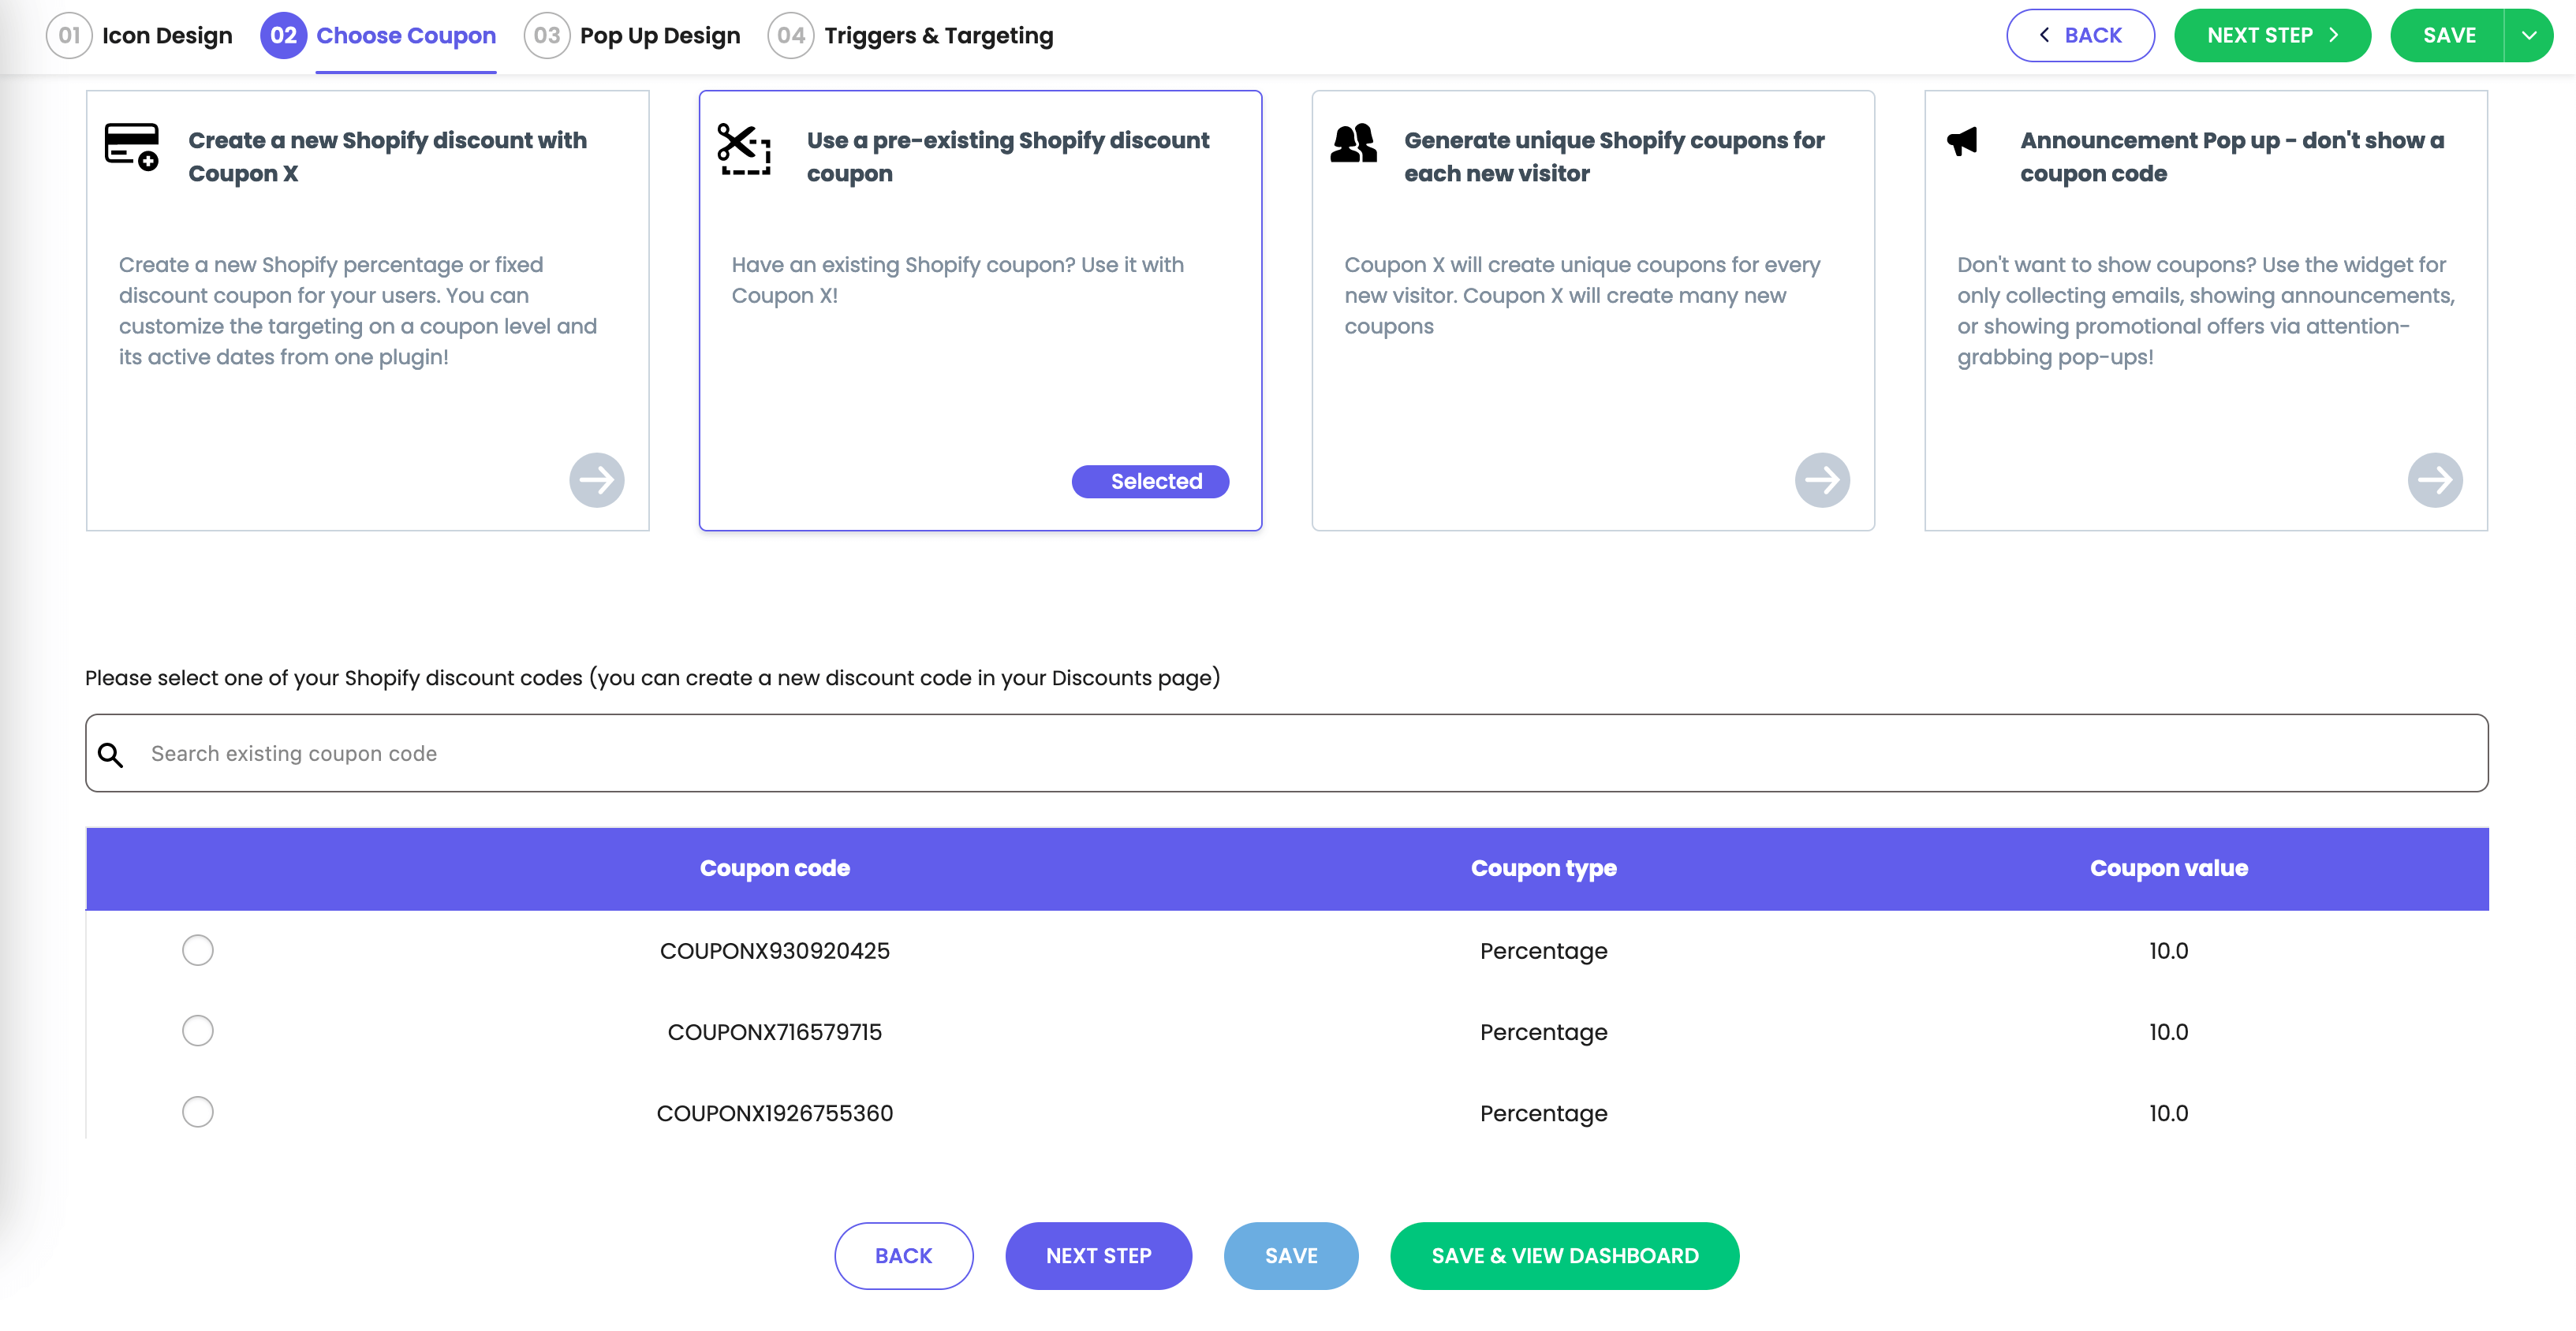
Use an existing Discount from Shopify Discounts
With this option you can use an already created discount that the Coupon X app will display to everyone. If you select this option, a table with all your existing codes will appear, so you can choose one of them. If you can’t see the code you’re looking for, use the search bar.
Generate unique coupons for each new user
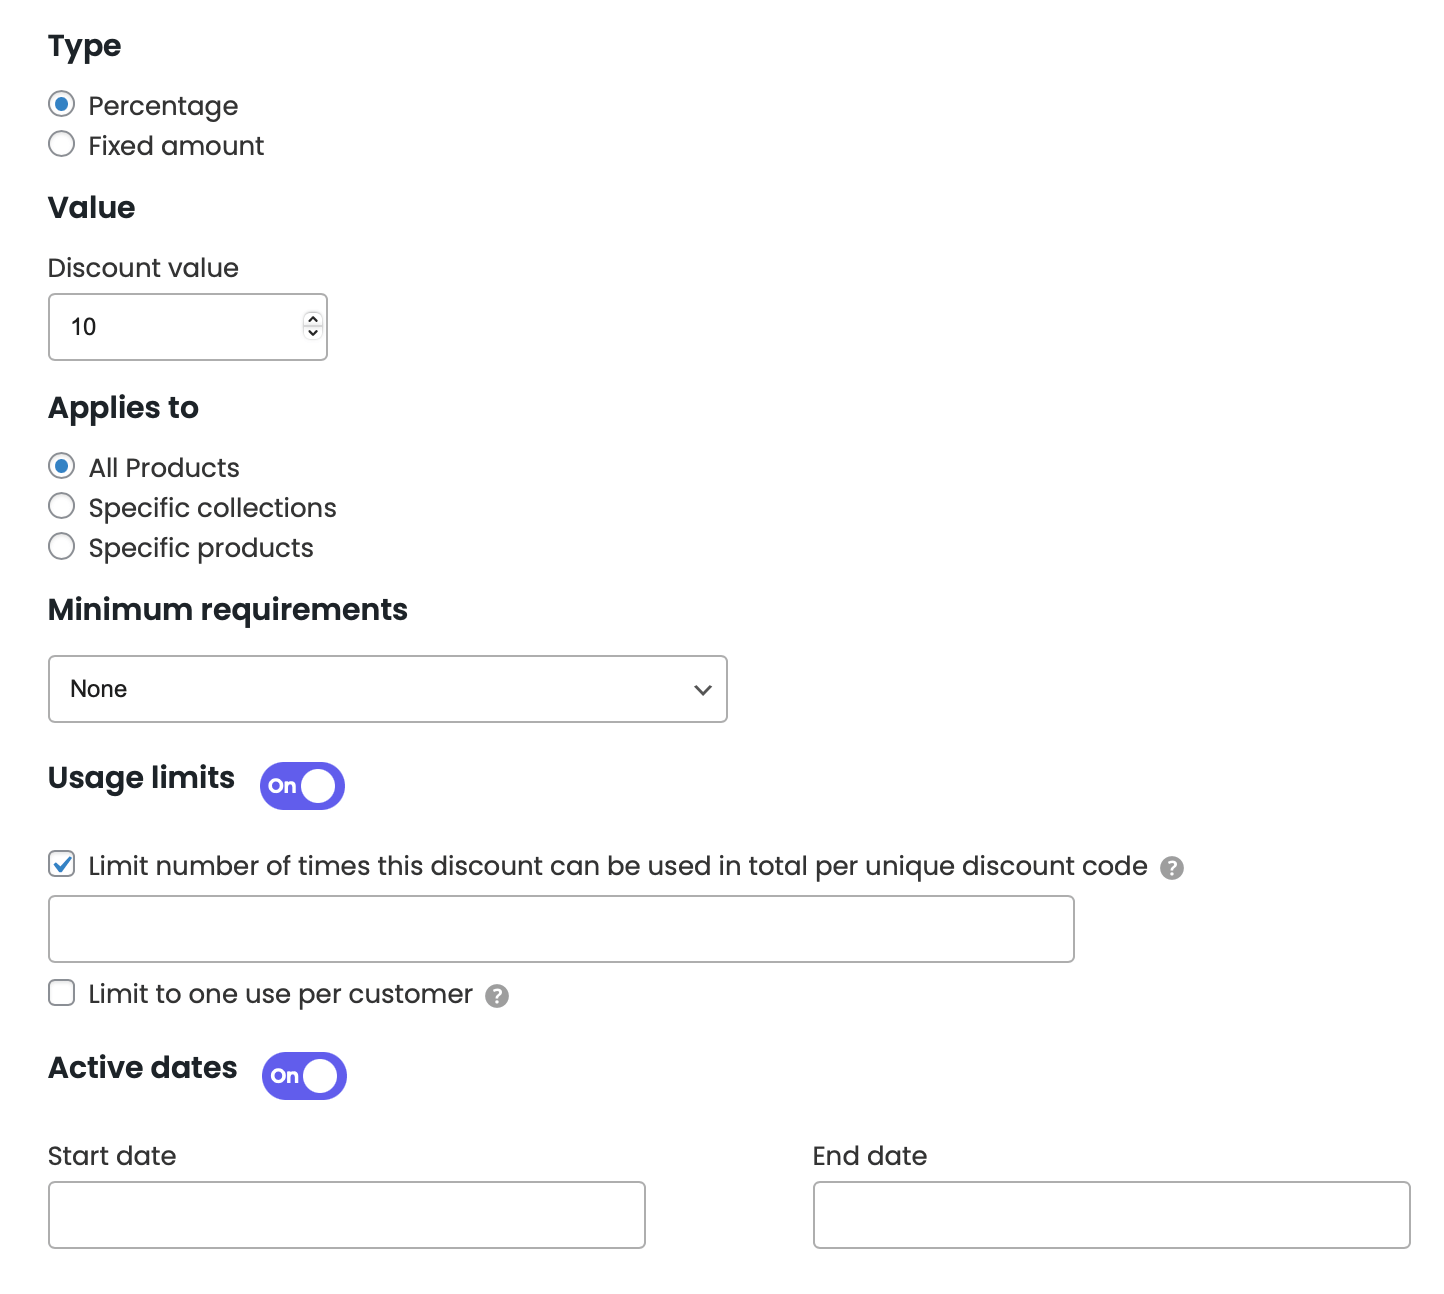
With this option a new unique code will be generated by the app for every new visitor. Please note that many new codes will be generated by the plug-in in your Shopify Discounts section. For this option, you can’t give a custom name to your code as the app generates codes automatically. They will look something like this: couponx5915233012. Proceed with setting up the code settings by choosing the discount type – percentage or a fixed amount – and the value. Select if you want the code to apply for all products or just specific products or collections and add any minimum requirements such as a minimum purchase amount. Lastly, you can add usage limits – to control the number of times the discount can be used in total per discount code (for example, if you set 5, the customer can use the code for a maximum of 5 times in total) or to limit the code to one use per customer (meaning if a customer has already bought something with the code, they won’t be able to use the code more than once) – and active dates (for time-limited promotions with a start and end date).
Announcement pop-up – Don’t show a coupon code
If you select this mode, you can use the widget to collect emails, display announcements or show promotional offers via an attention-grabbing widget. After selecting this option, there will be no further settings on this step.
Step 3 – Design Your Popup
The popup is the part the appears after your visitors clicks on the tab. This is the place where your visitors actually see the coupon.
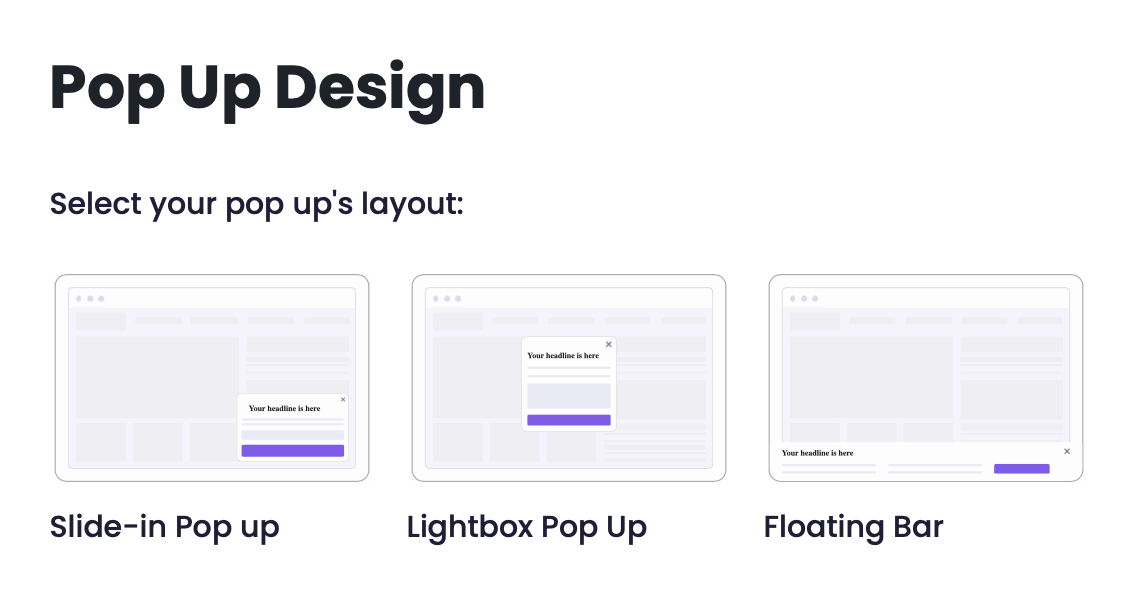
First, you can choose what type of widget you want – lightbox, floating bar or slide-in pop-up.
Next, you need to select between 3 options:

A. Show a coupon code with a Copy button – this option is good if you want to show the coupon right away, after the use clicks on the tab

B. Collect email first, then show the coupon – use this option if you want the visitor to first enter their email address before you show them the coupon
Before the visitors fill out their email:

After the visitors fill out their email:

All your subscribers will be synced with your Shopify Customers tab. You can also view the list by clicking on the link icon beside your widget:

C. Link to any page, or use sherable discount link – you this option if you want to link to your internal page, or use a shareable discount link (click here to learn how to do it)

After you decide which widget type suits you, you can add a countdown timer to your widget. You can enable this feature to increase conversion by suggesting a time limit and exclusivity of your discount offer. The timer can count to a specific time and date (the so-called specific date and time), or from the moment that the pop up appears (the so-called popup appearance), for example counting down from 5 minutes, from the dropdown. You can read more about it here.
Next, go ahead and change the text and colors of your widget. You can customise all colours of course as well as add a consent checkbox if you choose the Collect email first, then show the coupon option.

For more advanced customisatios, click on “Advanced settings” to set message that will display after copy, an error message (the message visitors will get if they try to add the same email more than one time), custom CSS as well as to enable automatic closure of the widget after conversion (after the visitor clicks on the Copy button).
Step 4 – Triggers and Targeting
This is the stage where you decide if you want to display your tab on mobile/desktop, how you want the widget to be launched (on click, hover, or opened by default), set triggers (time-based or scroll-based), and decide if you want to show the widget on specific pages and for specific countries.
Once you’ve created your first widget, this is how it’ll appear on your store (of course, depends on your customization):

Still got questions? Email us at [email protected], ping us on Facebook Messenger, or visit our Facebook group.