In this guide we’ll show you how to change the colors in Folders.
What can you do with this feature? You can change the colors of the general Folders layout so it matches your desired backend arrangement, as well as the colors of buttons or specific folders and subfolders. You have the ability to set a color for a parent folder, so that all subfolders take that color as well. This would make it even quicker to recognize all the various folders and categories and improve your efficiency and workflow by allowing you to find what you need at a glance.
For example, if you have different authors on your blog, you can set different colors for each author’s folders in Posts.
Free users can choose from our pre-set colors for both the Folders layout and the folders icons, and paid users can also add custom colors of their choice.
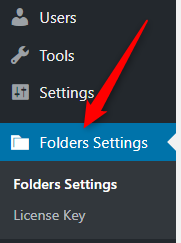
Step 1: Let’s get right into it. First, open the Folders settings in your WordPress admin panel.
Step 2: In the screen that will open, choose “Customize folders”, like so:

Step 3: Now you can set the colors for the folders background, “New Folder” button, “Bulk Organize” button, “Replace File” button for the Media library as well as the folders dropdown.
You can choose from the preset colors – hot pink, blue and dark grey, or click on the “Custom” button – available for paid users only – to set a color of your choice by typing the desired color HEX code.
Step 4: Next on, the “default icon color” setting – from here you can set the default icon color for Folders. Each folder and subfolder icon can have a different color, which you can change in the folder settings. Set one or more default icon colors from the pre-set ones or add a custom one (available for paid users only) by clicking on the “Edit default colors” button.

From there you will be able to change or remove existing default colors as well as add a new one by clicking on the “+” button and typing the desired color HEX code.
Step 5: Make sure you save the changes with the “Save” button.
Step 6: Now, navigate back to your Media library, Pages or Posts sections, or whatever post type you’re using Folders with.
From here, you can now change the icon color for each folder from the menu and change the default icon color from the Folders settings.
Right-click on any folder or subfolder of your choice to expand the settings menu and click on “Icon color”. Now you will be able to choose any of the colors you added in the previous step or add a new one from the multicolor circle (this option is available for paid users only). Now that folder and all its belonging subfolders will have the color you just selected.

That’s it. Easy as 1,2,3! Navigating through your files has never been easier. Check out our knowledgebase to make sure you make the most of your Folders plug-in!