In this guide we’ll show you how to add a discount code to your Coupon X widget.
To learn more about how to use the Coupon X plug-in click here and don’t forget to check our entire Coupon X knowledge base.
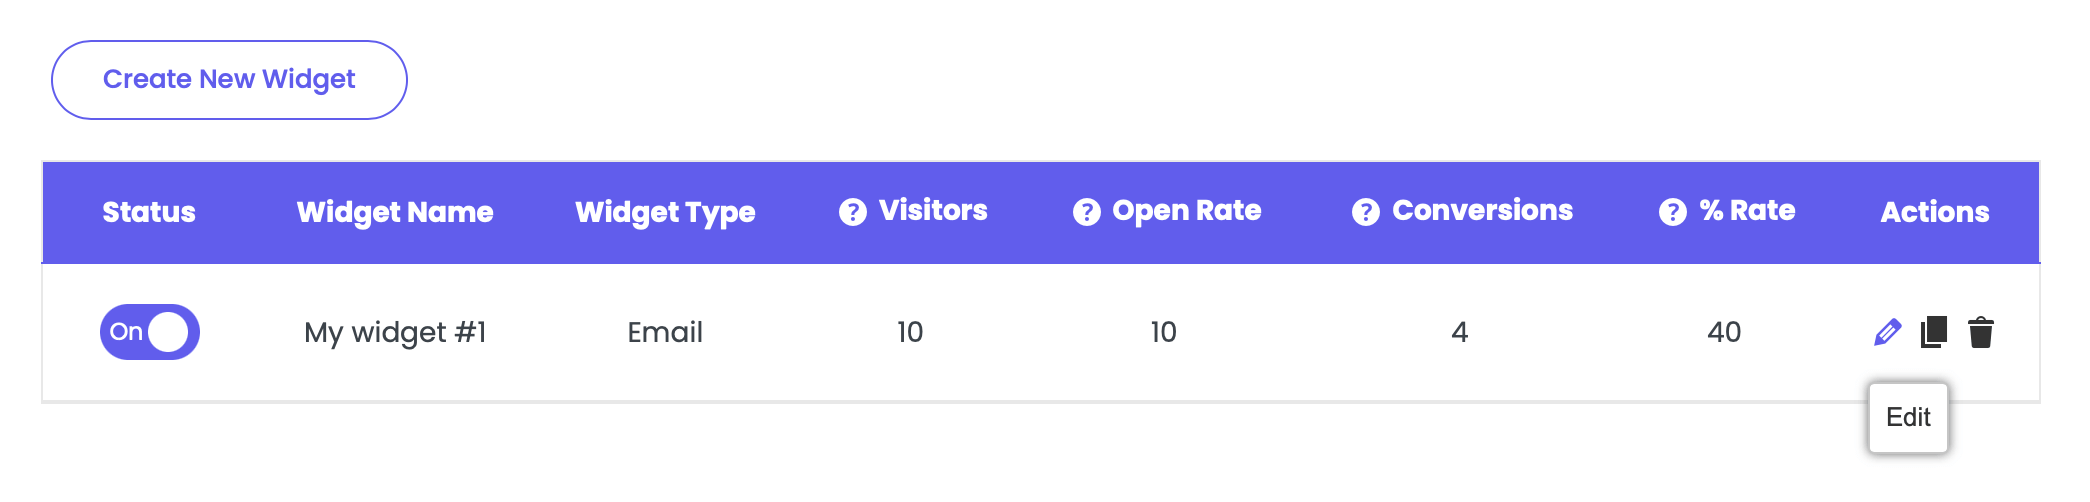
Let’s get right into it. First, open the Coupon X plug-in dashboard from your WordPress admin panel and click on the “Edit” button next to your widget.
Click on Step 2: Choose coupon. You will be able to choose between 3 discount code options – Create a new discount from the Coupon X plug-in, Use an existing Discount from WooCommerce Discounts or Generate unique coupons for each new user. The 4th option – Don’t show a coupon code does not feature a discount code and instead can be used to collect emails only, display announcements or show promotional offers via an attention-grabbing widget. Let’s cover each of the discount code options below.
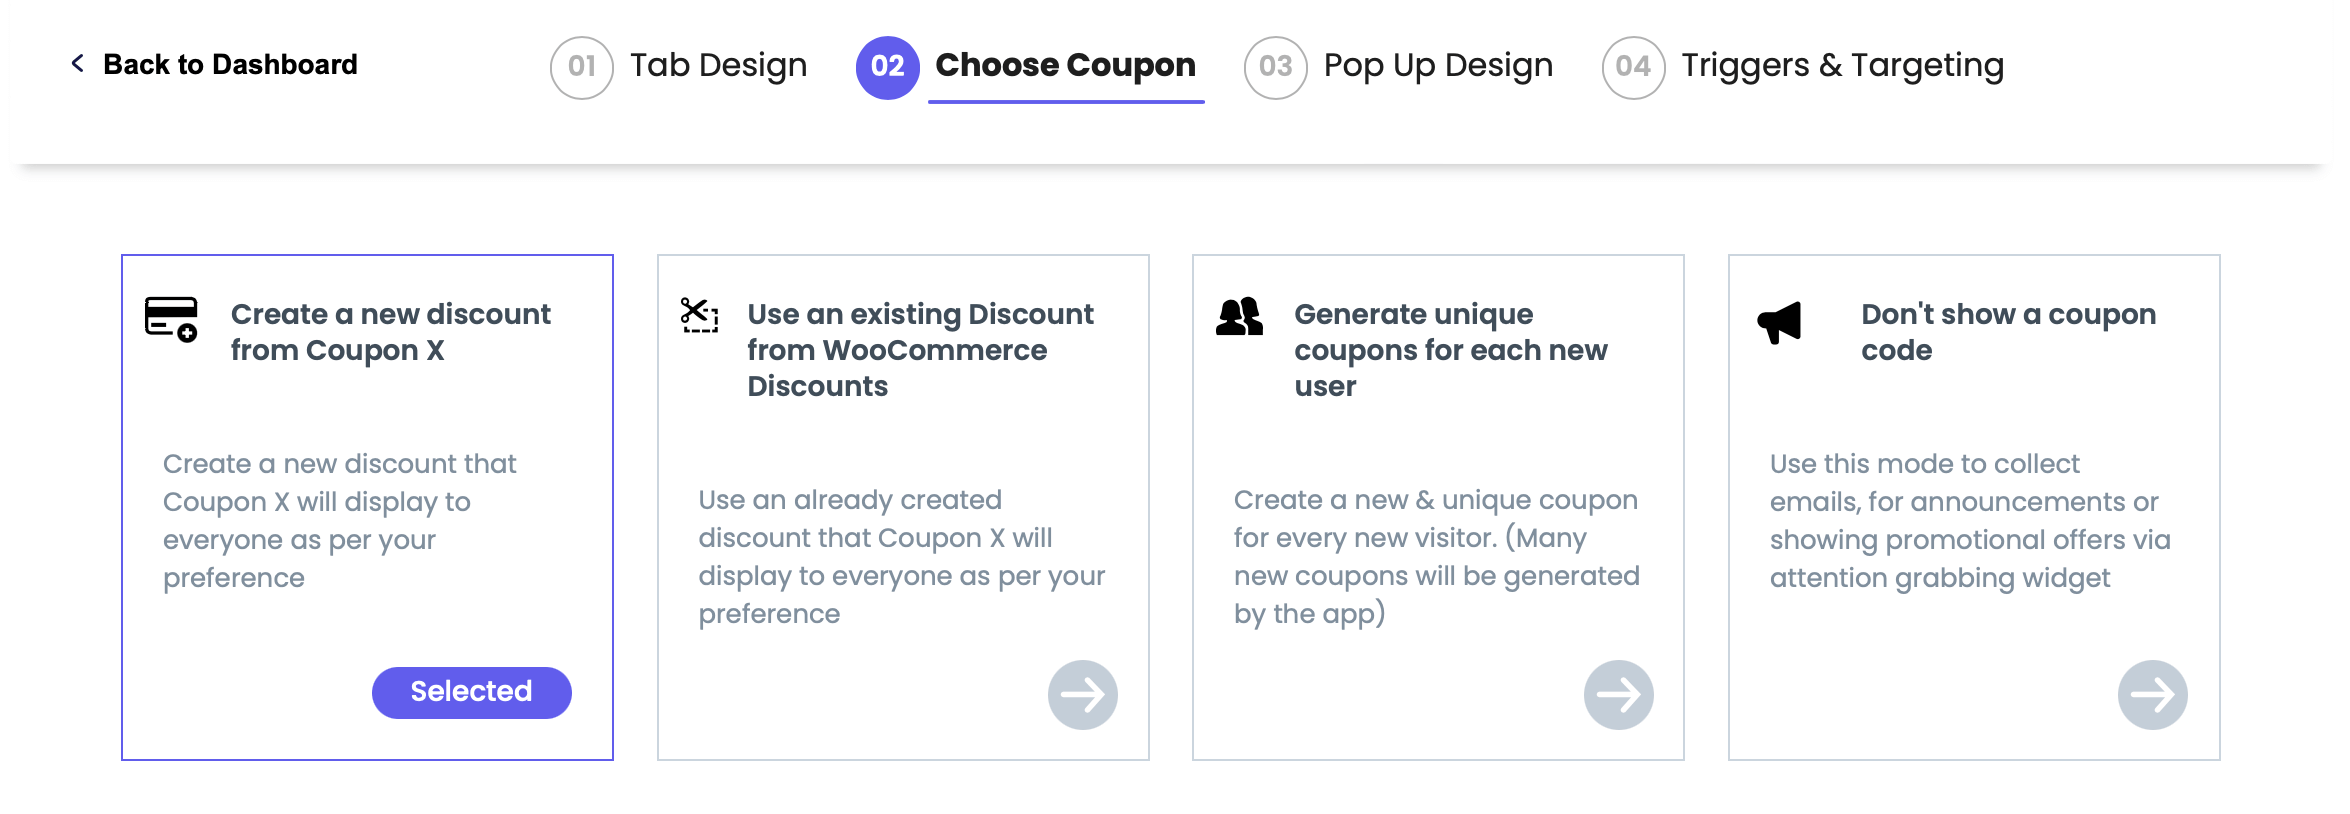
Create a new discount from the Coupon X plug-in
With this option you’ll create a new discount that the Coupon X plug-in will display to everyone as per your preference. The code will be identical for all customers.
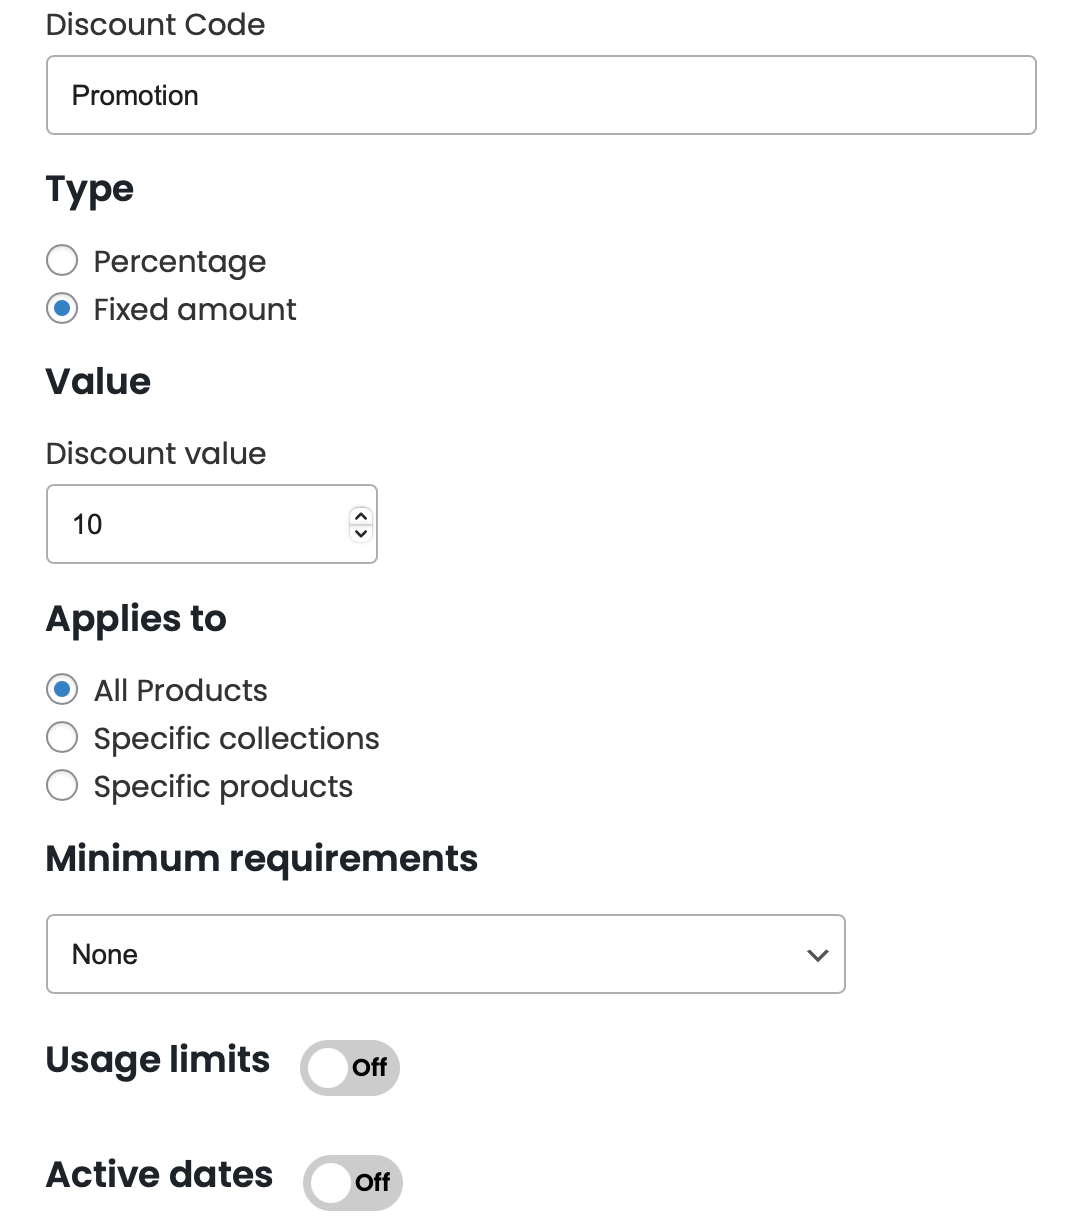
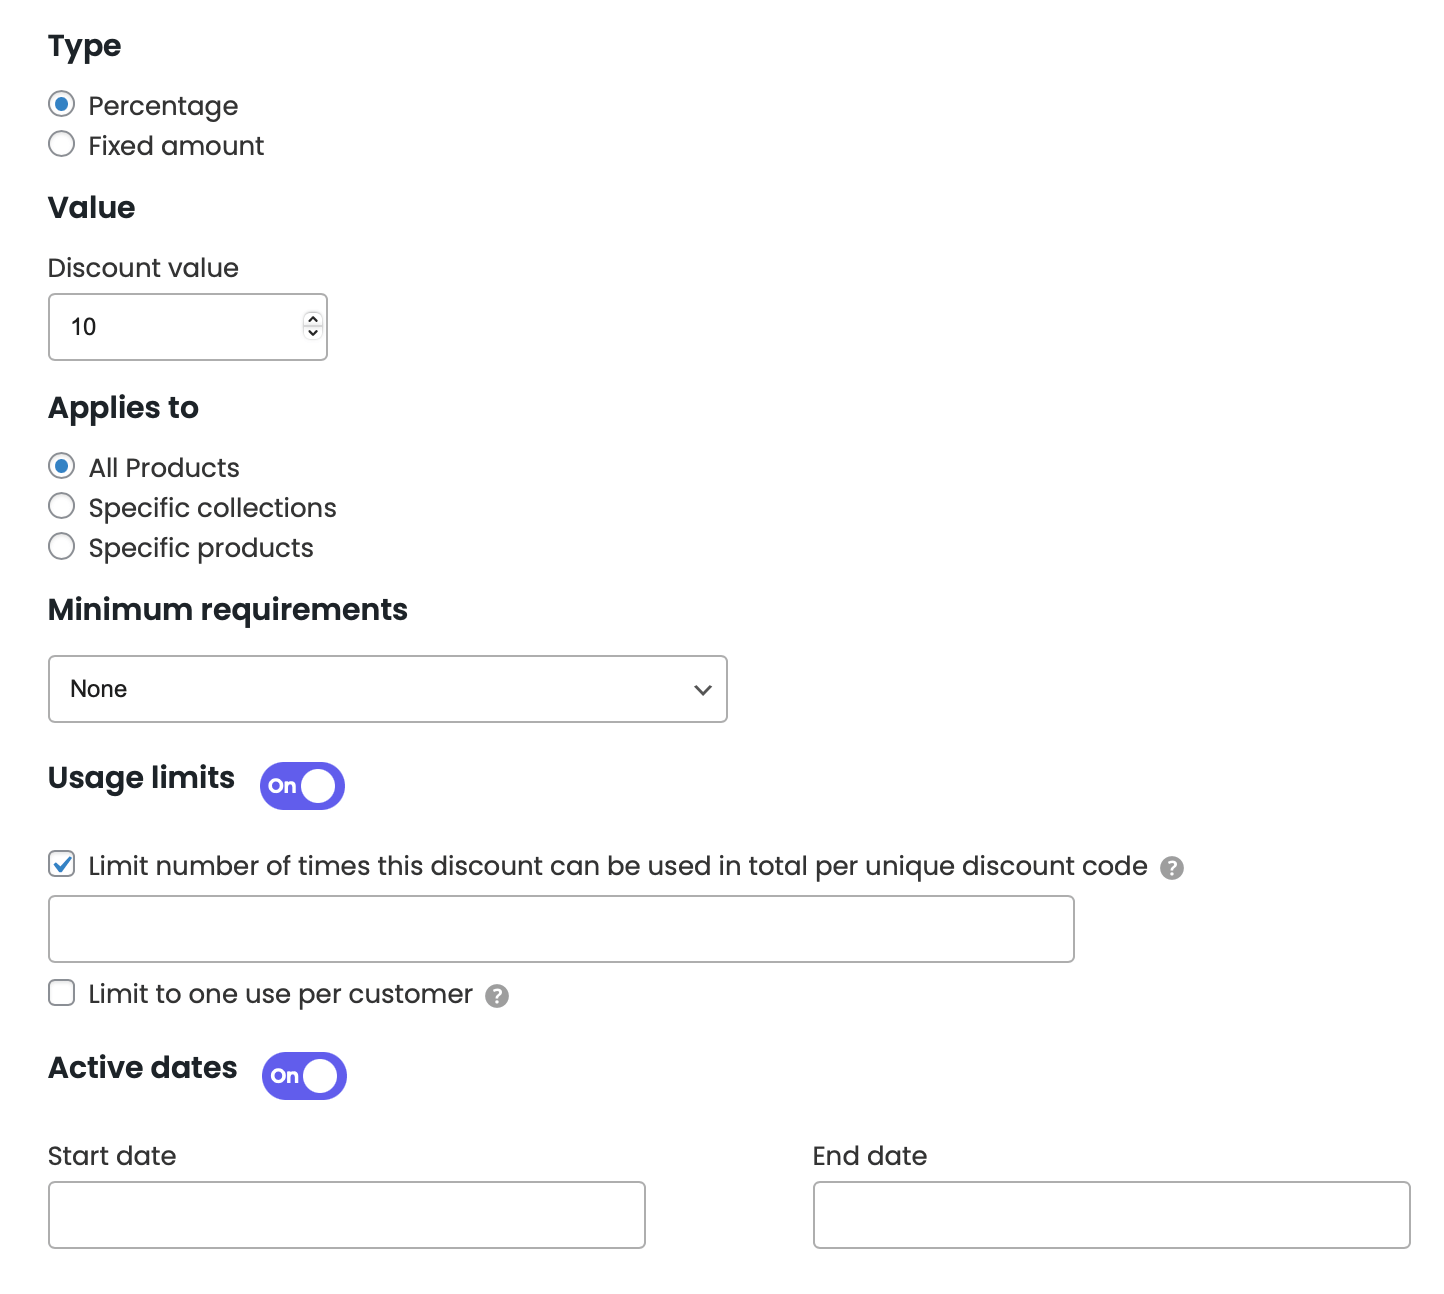
First, type the desired name of your discount code in the “Discount code” field, then choose the discount type – percentage or a fixed amount – and the discount value.
Select if you want the code to apply for all products or just for specific products or collections and add any minimum requirements such as a minimum purchase amount. These two are optional.
In the end, you can add usage limits (optional) to control the number of times the discount can be used in total per discount code (for example, if you set 3, the customer can use the code for a maximum of 3 times in total) or to limit the code to one use per customer (meaning if a customer has already purchased something with the code, they won’t be able to use it again) – and optional active dates (for time-limited promotions with a start and end date), unless your promotion has no expiry date.
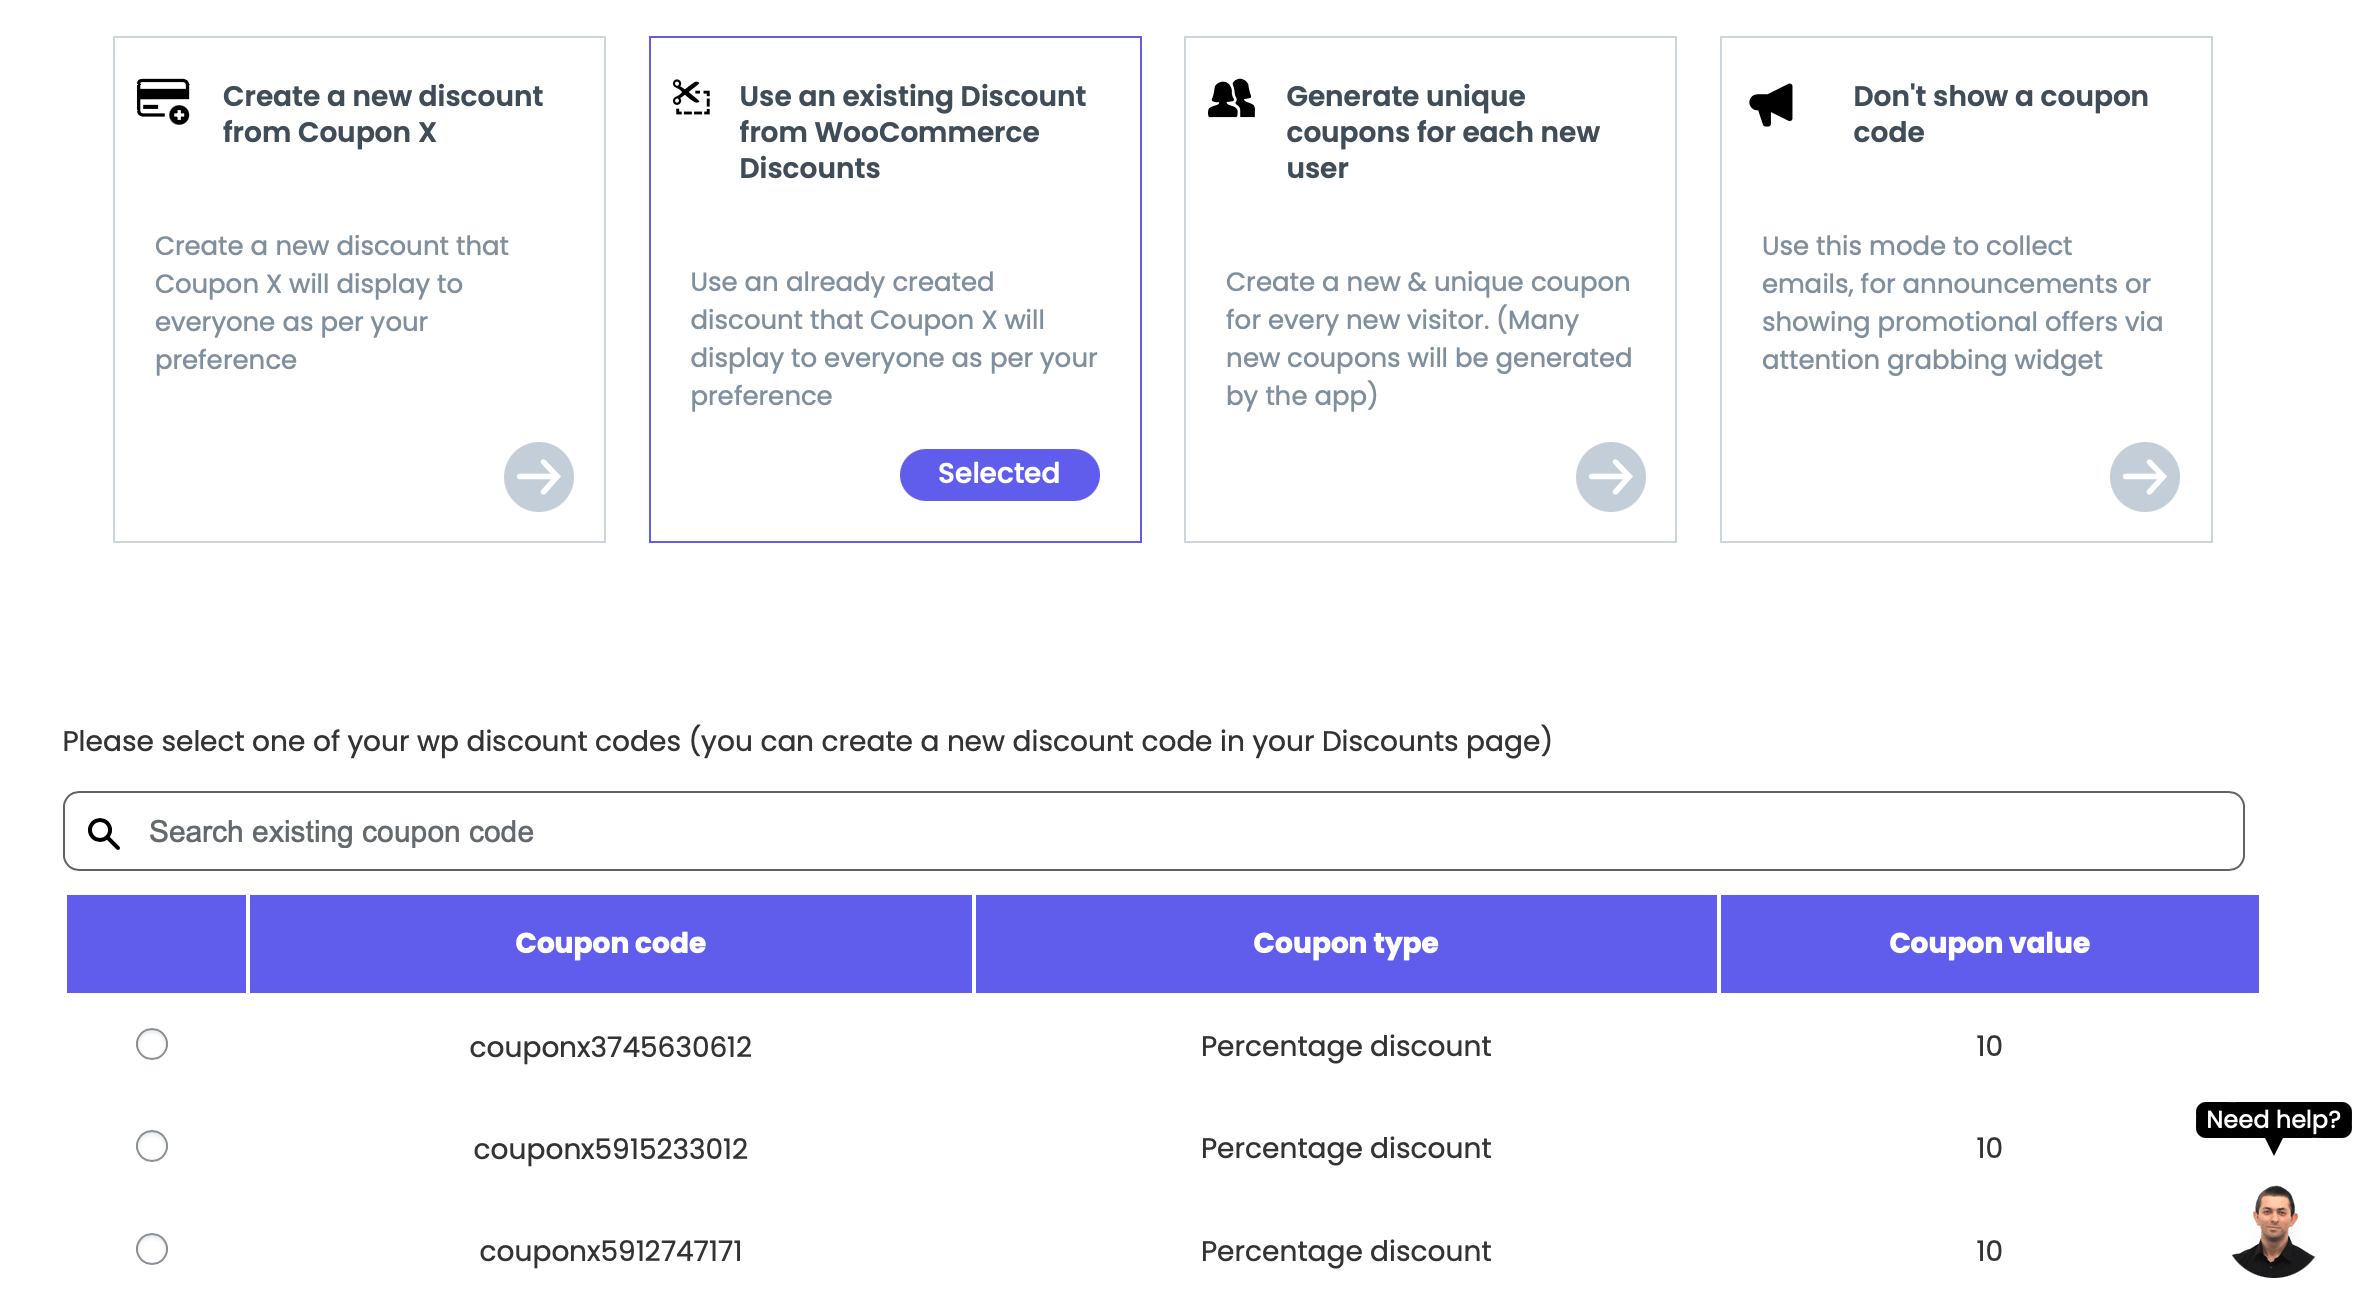
Use an existing Discount from WooCommerce Discounts
If you choose this option, you can use an already created discount from your WooCommerce discounts that the Coupon X plug-in will display to all customers as per your preference.
A table with all your existing codes will appear, so you can choose one of them by scrolling or typing for the code you’re looking for in the search bar.
Generate unique coupons for each new user
With this option a new/ unique code will be generated by the Coupon X plug-in for every new visitor, therefore many new codes will be generated by the plug-in in your WooCommerce Discounts section.
If you go with this option, you won’t be able to give a custom name to your code as the plug-in generates the codes automatically. They will look something like this: couponx5915233012.
Start off by setting up the code parameters by choosing the discount type – percentage or a fixed amount – and the code value.
Choose if you want the code to apply for all products or just for specific products or collections and add any minimum requirements such as a minimum purchase amount (this is optional).
Finally, you can optionally add usage limits, meaning to control the number of times the discount can be used in total per discount code (for example, if you set 3, the customer can use the code for a maximum of 3 times in total) or to limit the code to one use per customer (meaning if a customer has already bought something with the code, they won’t be able to use it again) – and active dates (for time-limited promotions with a start and end date).
That’s it – your discount code will be automatically activated according to the conditions you have set. You’re ready to proceed with the next step!