Here in this Help Guide, We will try to explain how to create Custom Fields and a Dropdown field for MySticky Elements plugin.
Here we have used the WordPress Website Dashboard to explain.
Follow through the following steps below :
For Dropdown Field
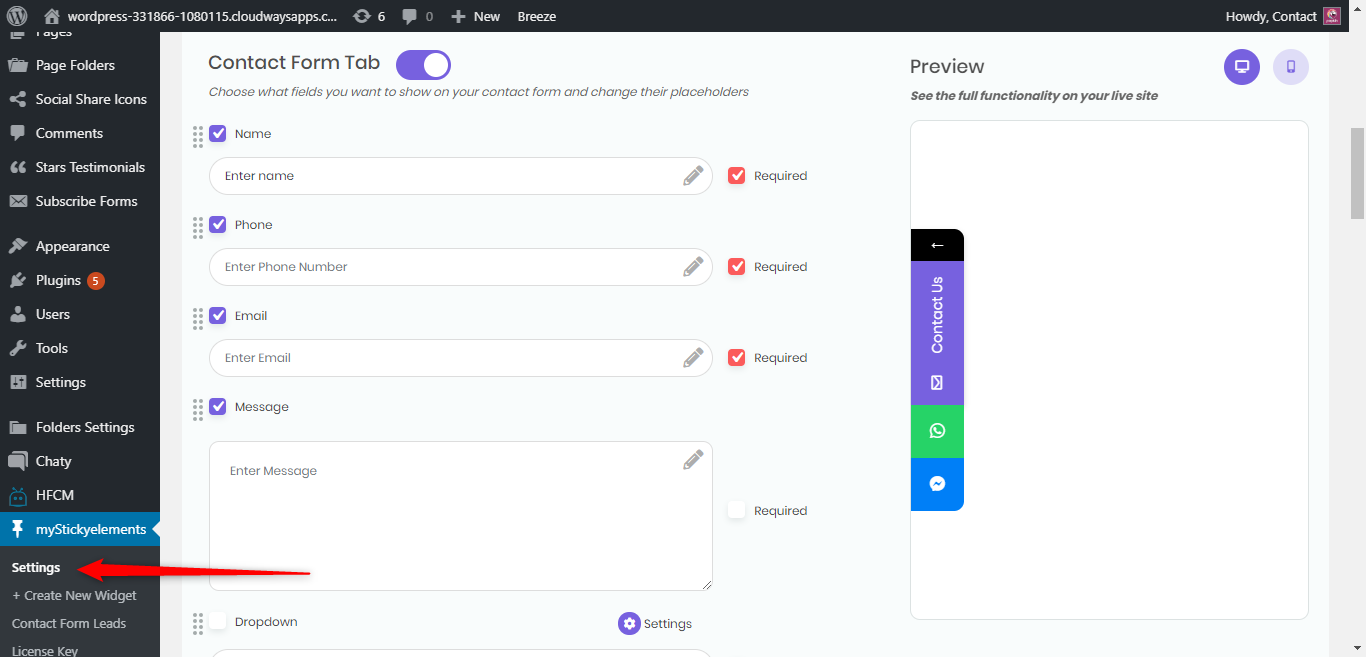
- Go to MySticky Elements > Settings through the dashboard menu on the left
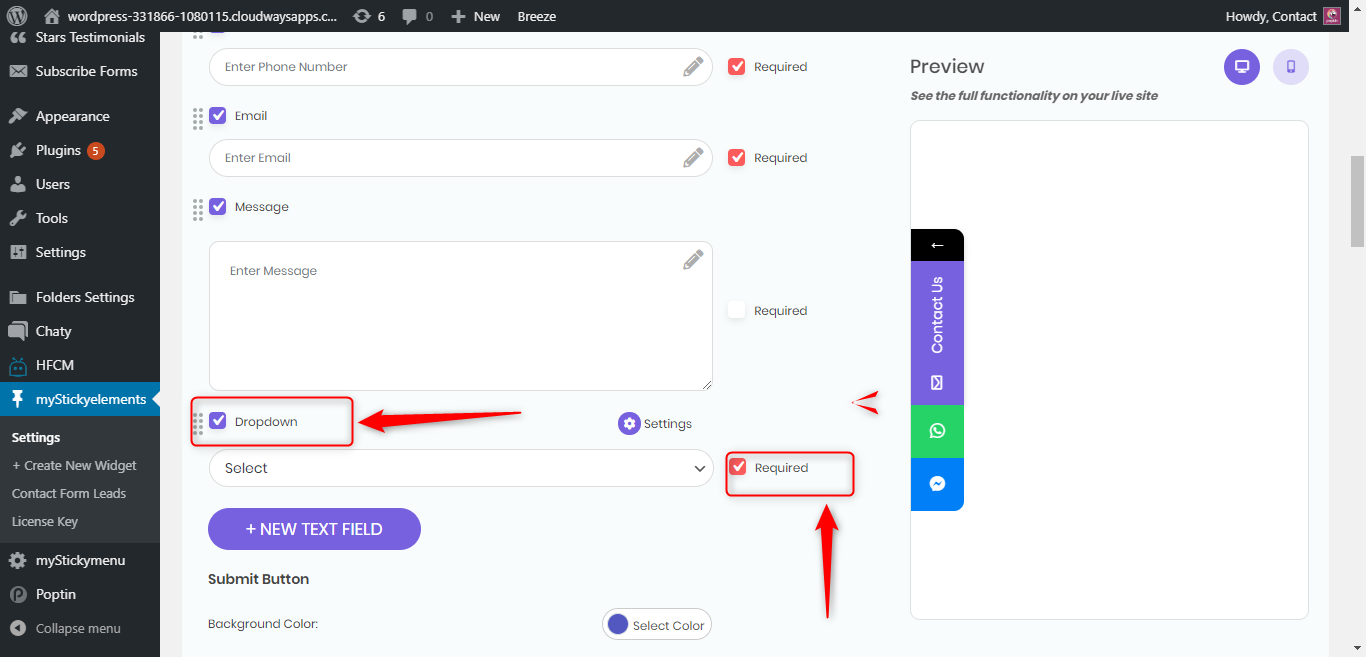
- Now, Scroll down and tick the box for Dropdown option as well as the Required option (if it needs to be a compulsory field):
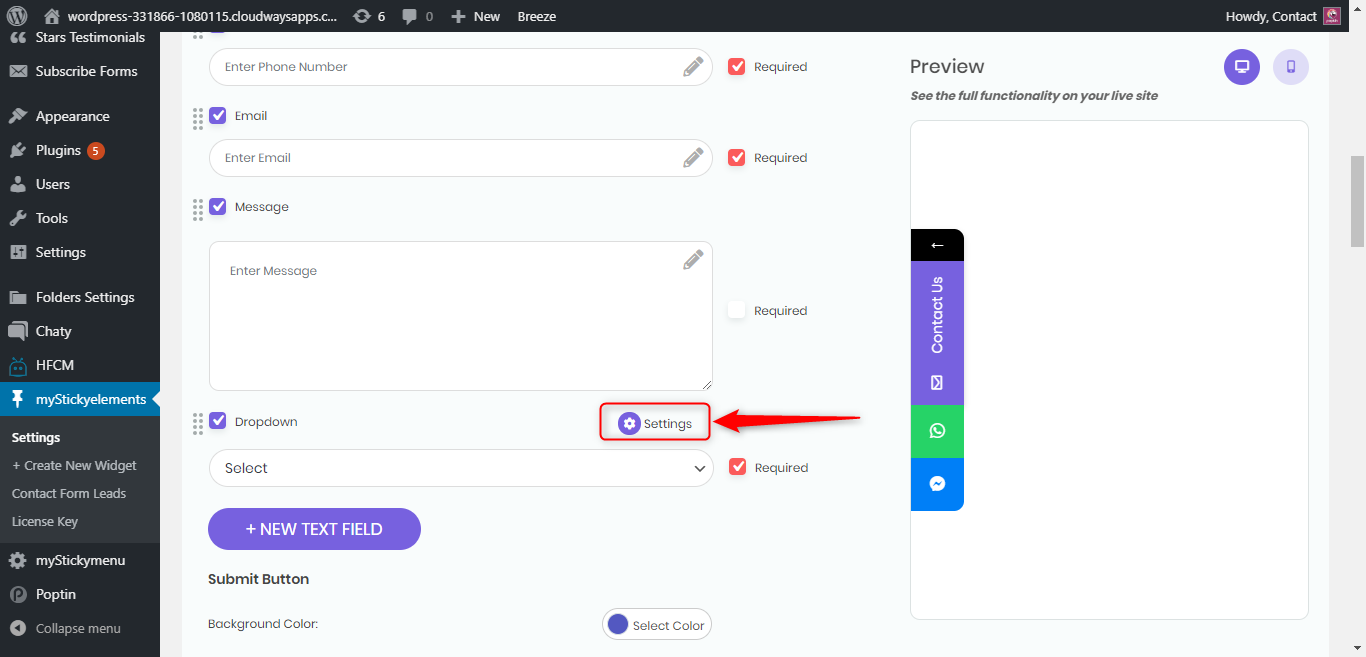
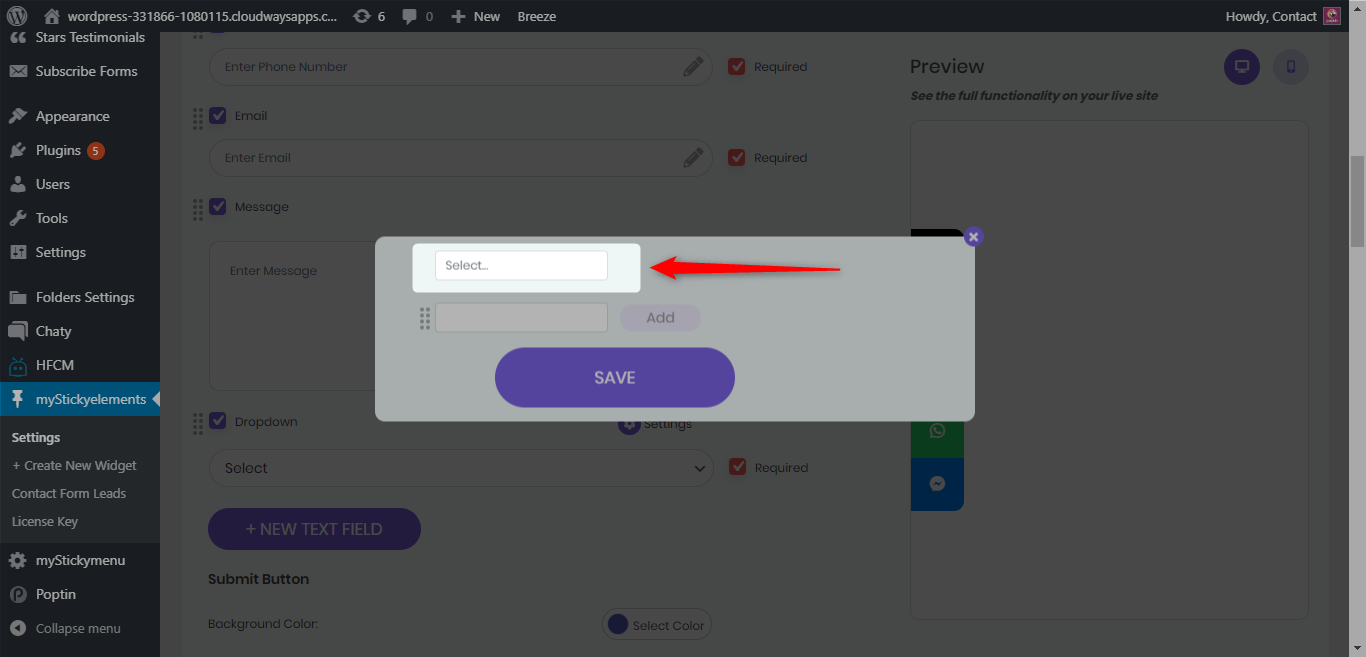
- Now, click on Settings icon :
- Once the settings window pops up, from here, you can Edit the Main Dropdown dialogue box :
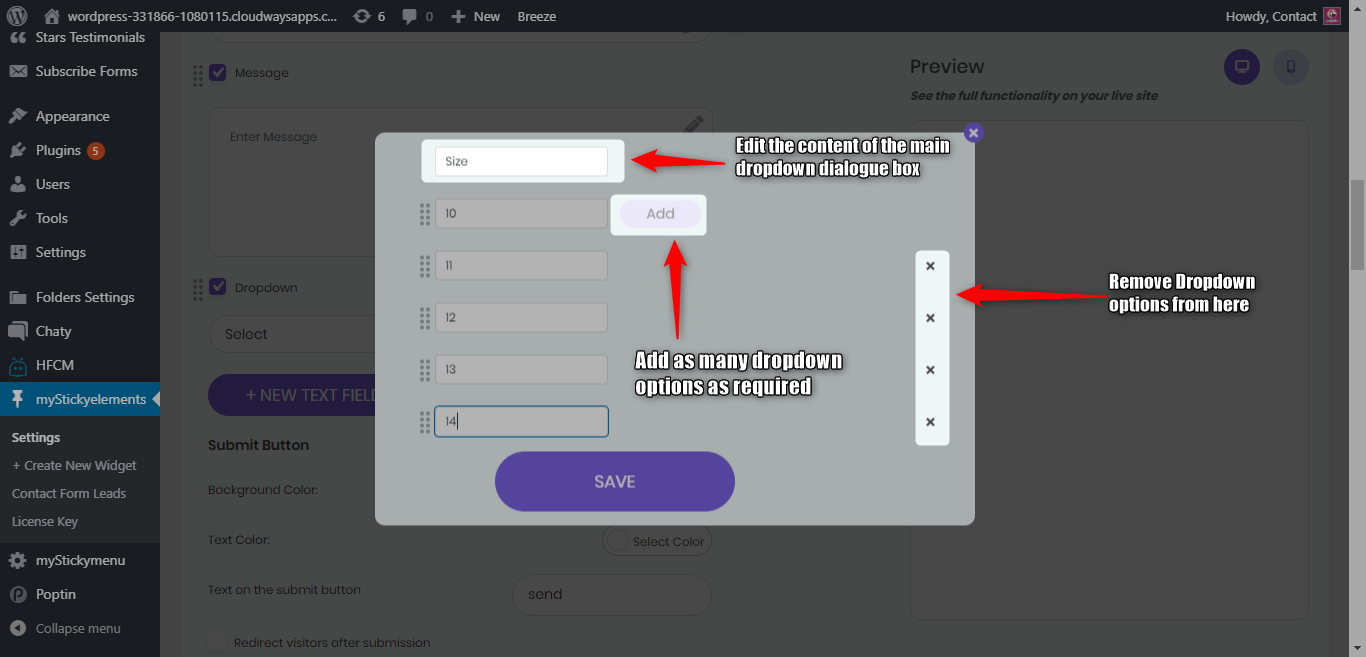
Next on, you can Edit the content of the main Dropdown dialogue box. Add as well as Remove as many dropdown options as required :
For Custom Fields
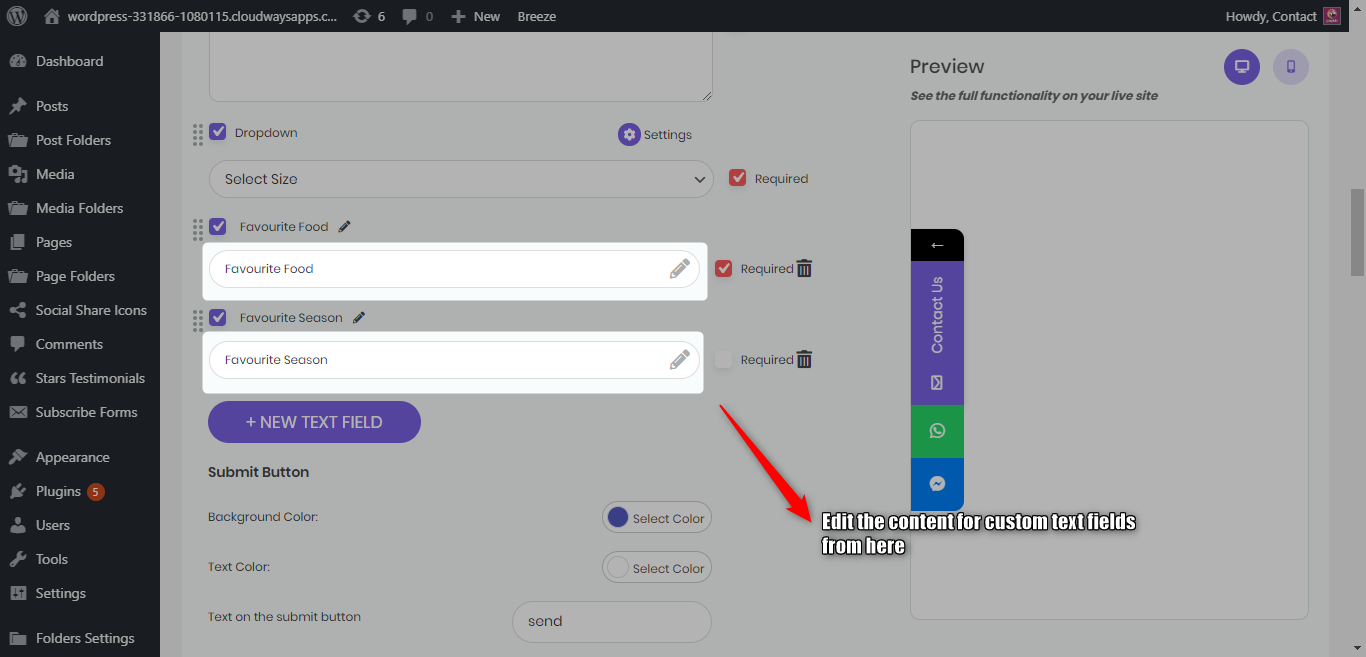
- For adding a custom text field, tick the box for Custom Fields, then click on the pencil icon to change the name of the custom field:
- Next on, you can add as many custom fields required, select if they are compulsory or not by ticking the Required box,
Edit the messages on the custom text fields, as well as Remove unwanted custom fields by clicking on the Bin icon :
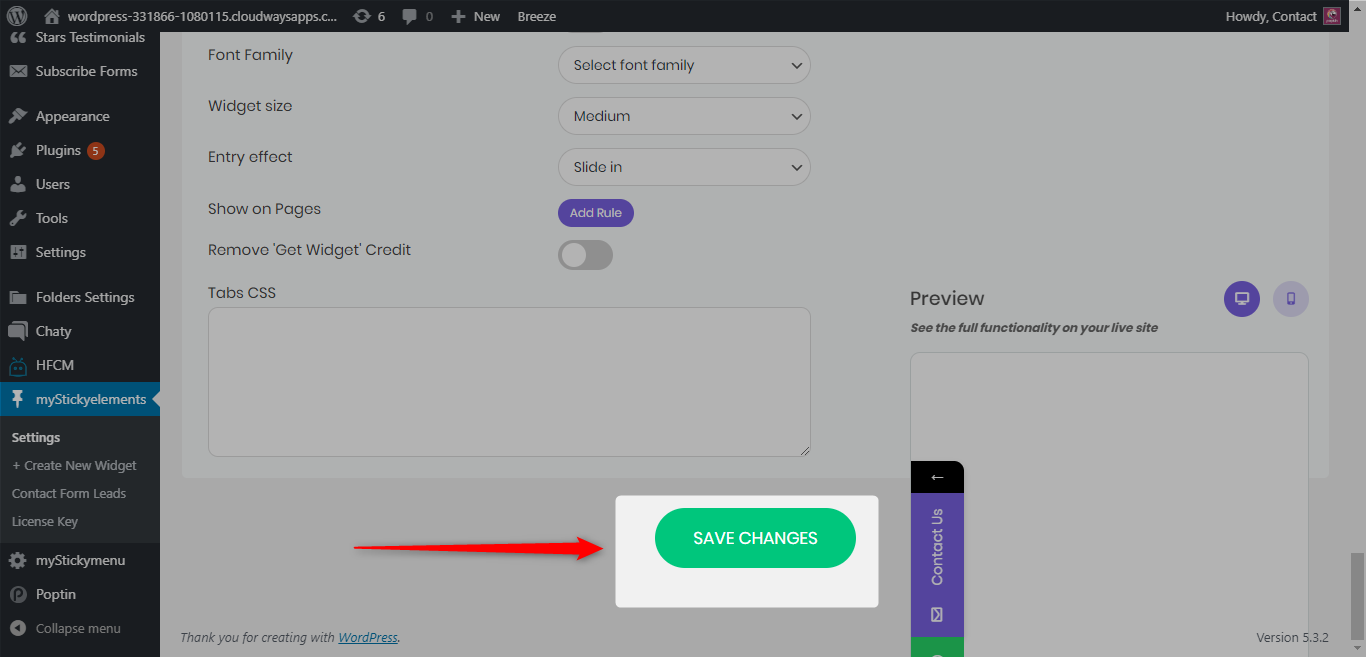
- Once you have all the necessary changes, just scroll to the bottom and hit Save Changes :
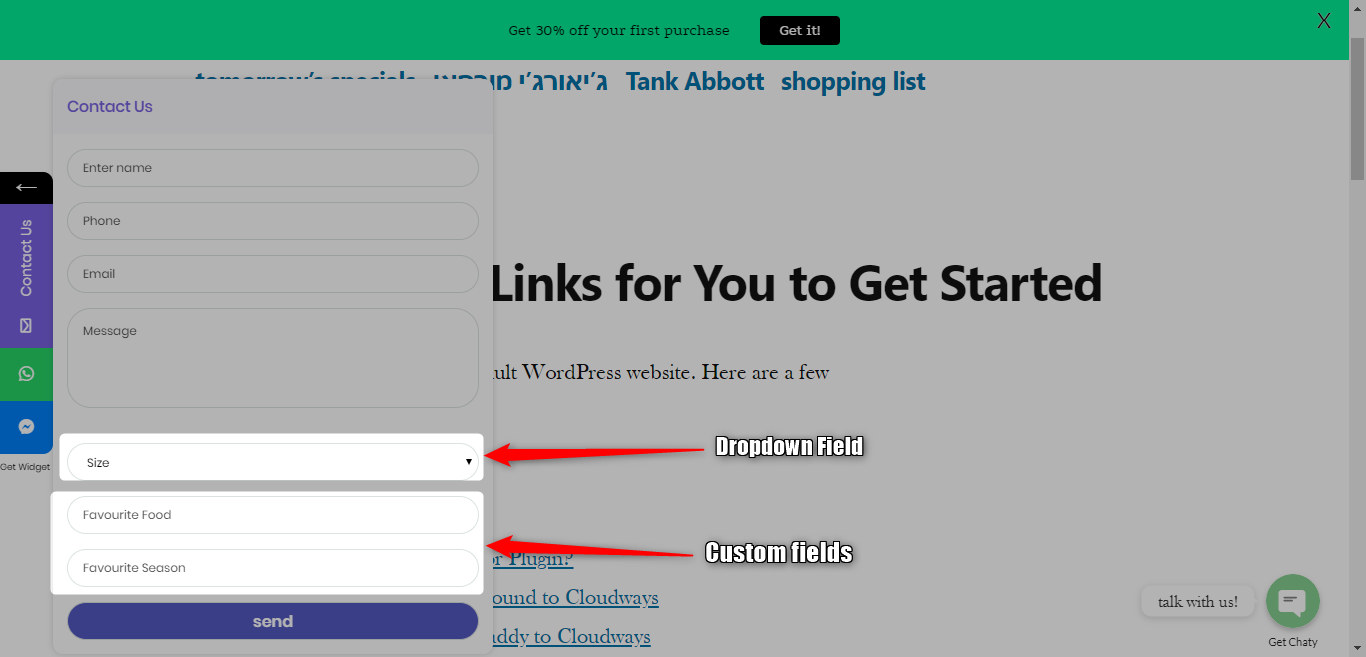
- After saving all the changes, you can visit your website to check the final results.
For Example, this is how the fields may look :