In this guide we’ll show you how to add a contact form to your My Sticky Bar Welcome Bar.
With this feature, you can offer a fast and easy way for your visitors to contact you in a few clicks and you will receive the leads either in your local database or by email – but please note the latter is a Pro feature.
1. Start by navigating to your welcome bar settings from your WordPress dashboard. Click on “Edit” next to the welcome bar you want to edit or create a new one.
2. Scroll down to the “Collect leads” setting. Next, just toggle the button to enable the feature.

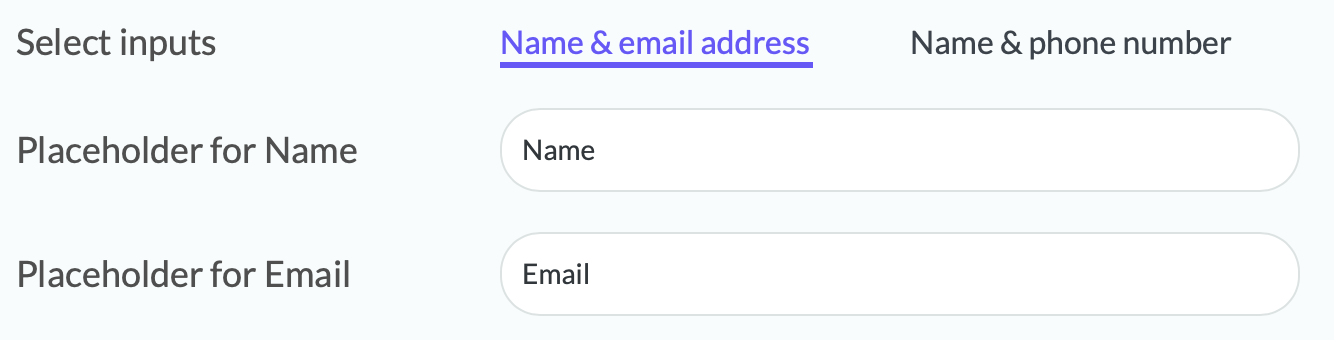
3. Next, select your preset – “name and email” or “name and phone number”. Depending on which preset you choose, you will need to add your relevant placeholder text for name and email or phone.
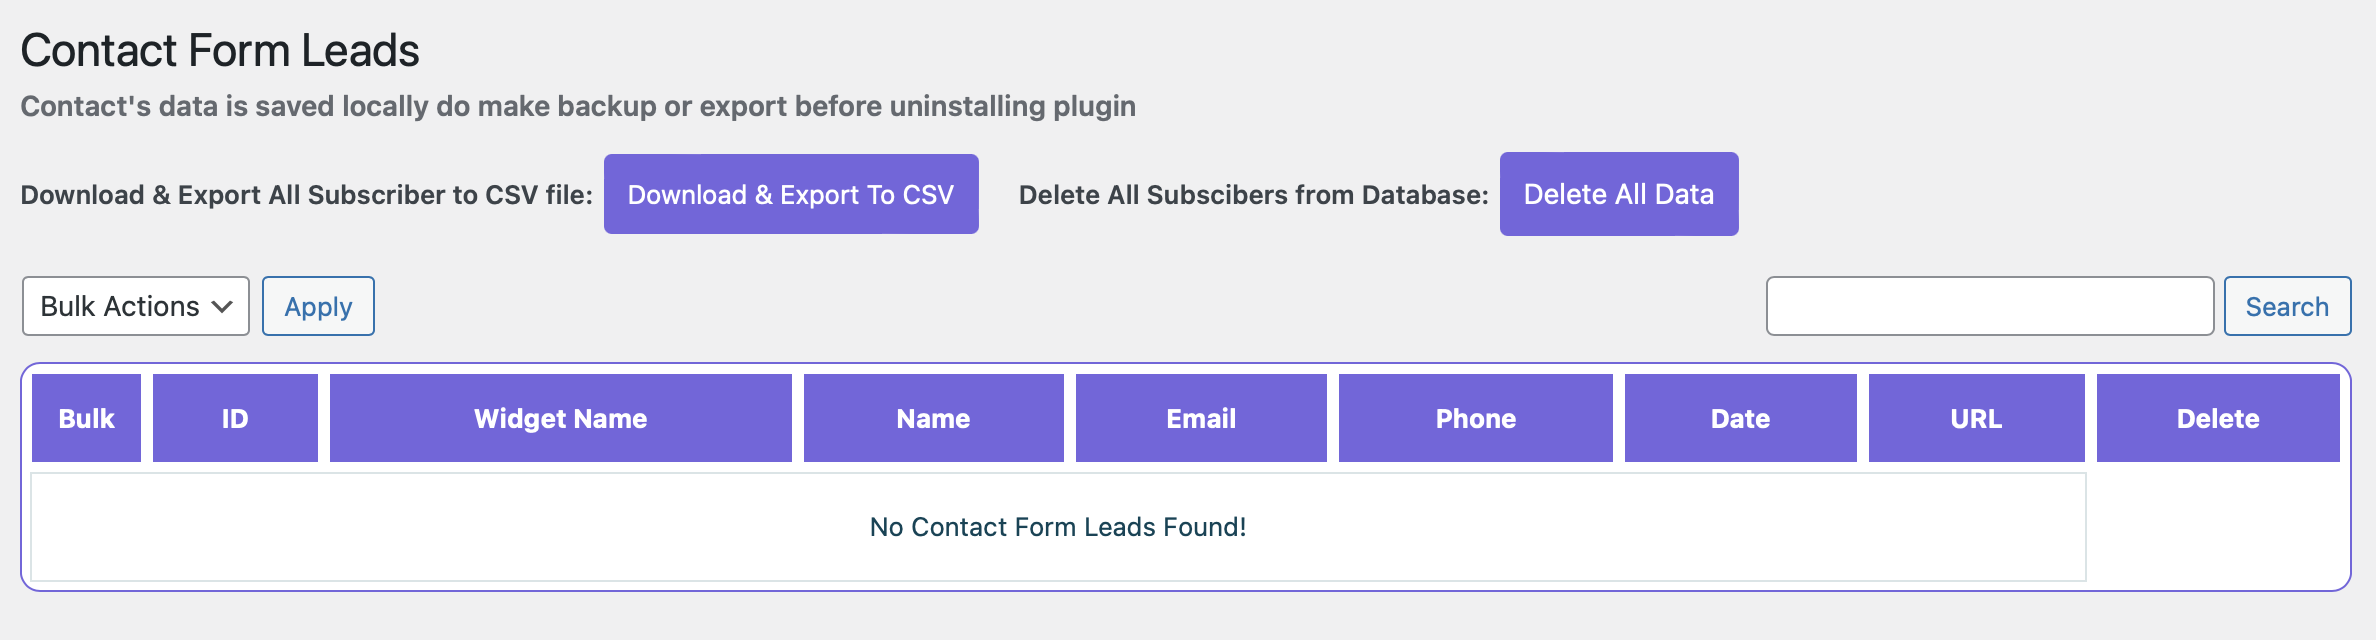
4. Once you get a lead, it will automatically be stored in your local database (nested under the My Sticky Bar settings > Contact form leads)
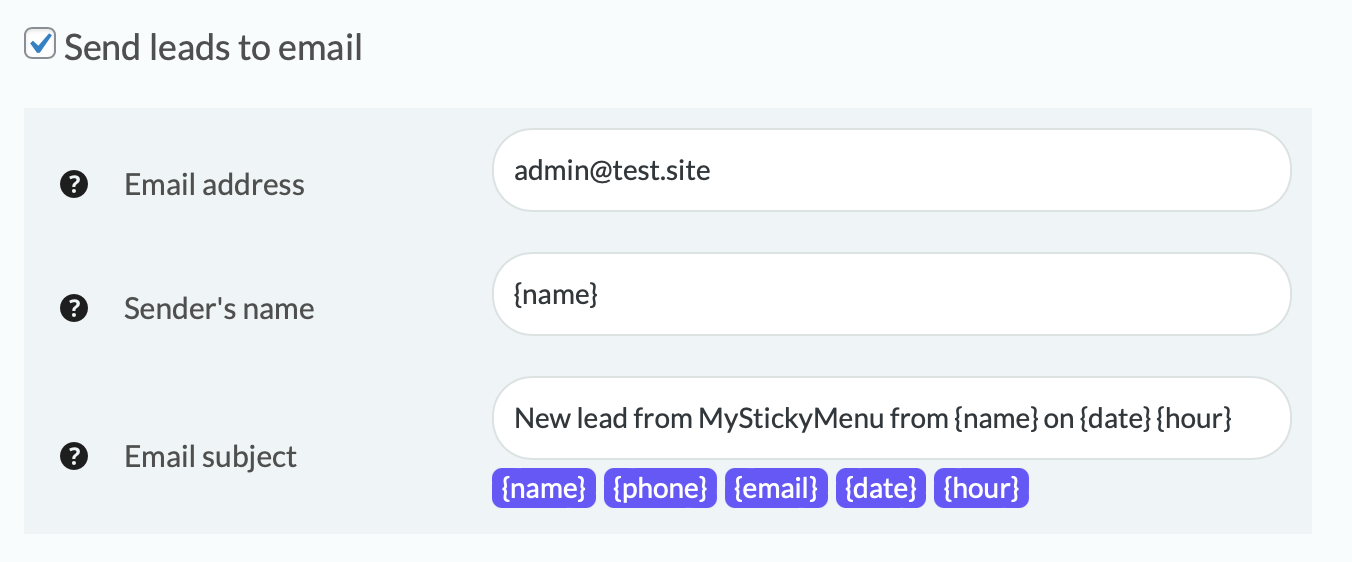
5. If you are a Pro user you can also choose to send leads to email by checking the “send leads to email” setting and filling in the email address you want to receive leads to, the preferred sender address and email subject with name, phone, email date and hour merge tags.
6. Proceed with customising your welcome bar further. If you need any further assistance with this, check this guide.
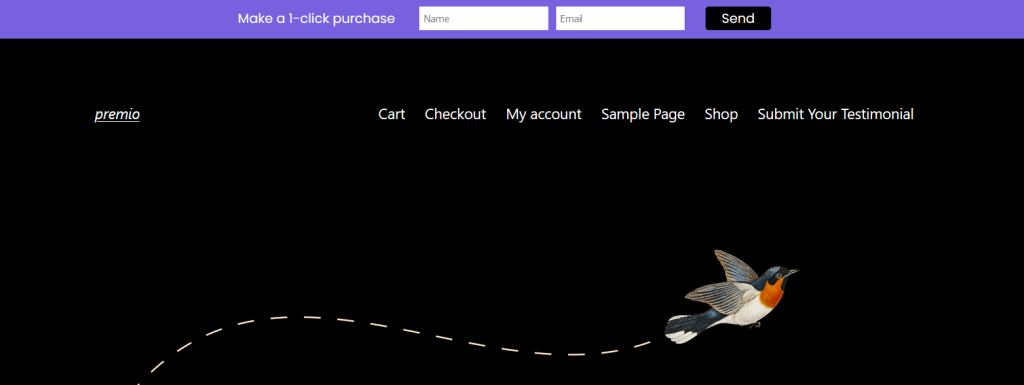
And that’s in! In the end, it may look something like this: