In this Support Article, we will try to illustrate how to add GDPR Consent Box to My Sticky Elements?
Click here to read more about how to activate the contact form.
To learn more about how to use the My Sticky Elements plug-in click here, and don’t forget to check our entire My Sticky Elements knowledgebase to make the most out of it.
Follow through the steps below to understand the process:
Step 1: go to the My Sticky Elements settings from your WordPress Admin Dashboard.
Step 2: in step 1: ”Add contact form”, scroll down to find the Consent Box setting. You can edit the text message for the Consent Box and also choose if you want to keep it as a required field or not. To disable the consent checkbox, uncheck the eye icon at the bottom.
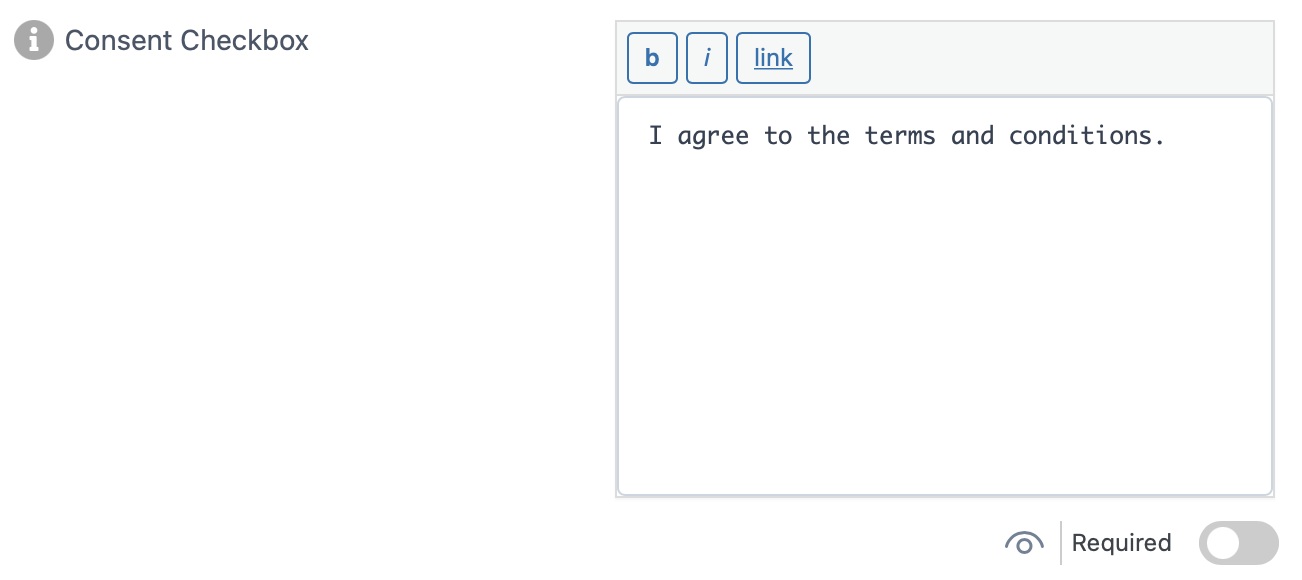
Step 3: Scroll down below once you are satisfied with the changes, hit on Save.
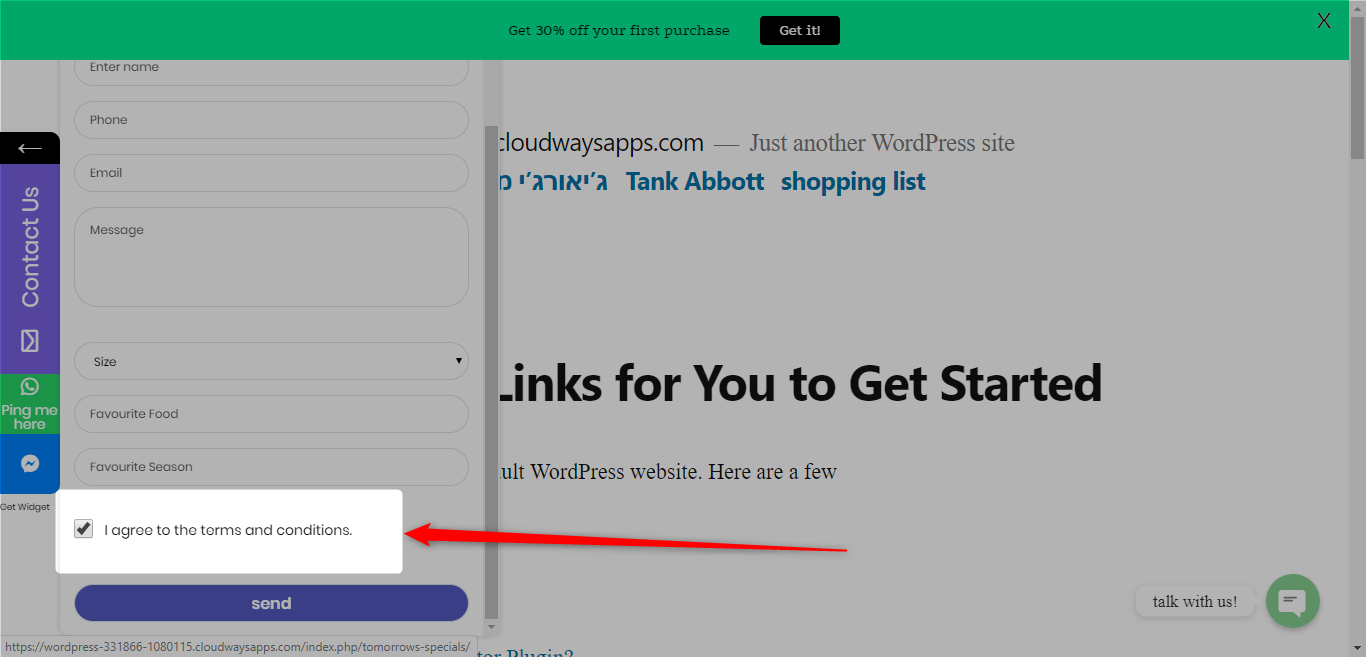
Step 4: This is how this feature might look on a real website. You can change the text that appears next to the consent checkbox.
- This feature is available in the Pro version of My Sticky Elements.
To learn more about how to add reCaptcha to your site, click here and click here to learn how to add custom fields to your contact form.