In this guide we’ll show you a different use case of Coupon X – how to display a notification or announcement popup with Coupon X.
This mode can be useful if you’d like to use the widget to collect emails (with no further action after this), display announcements or notify of promotional offers via an attention-grabbing widget.
So let’s get right into it.
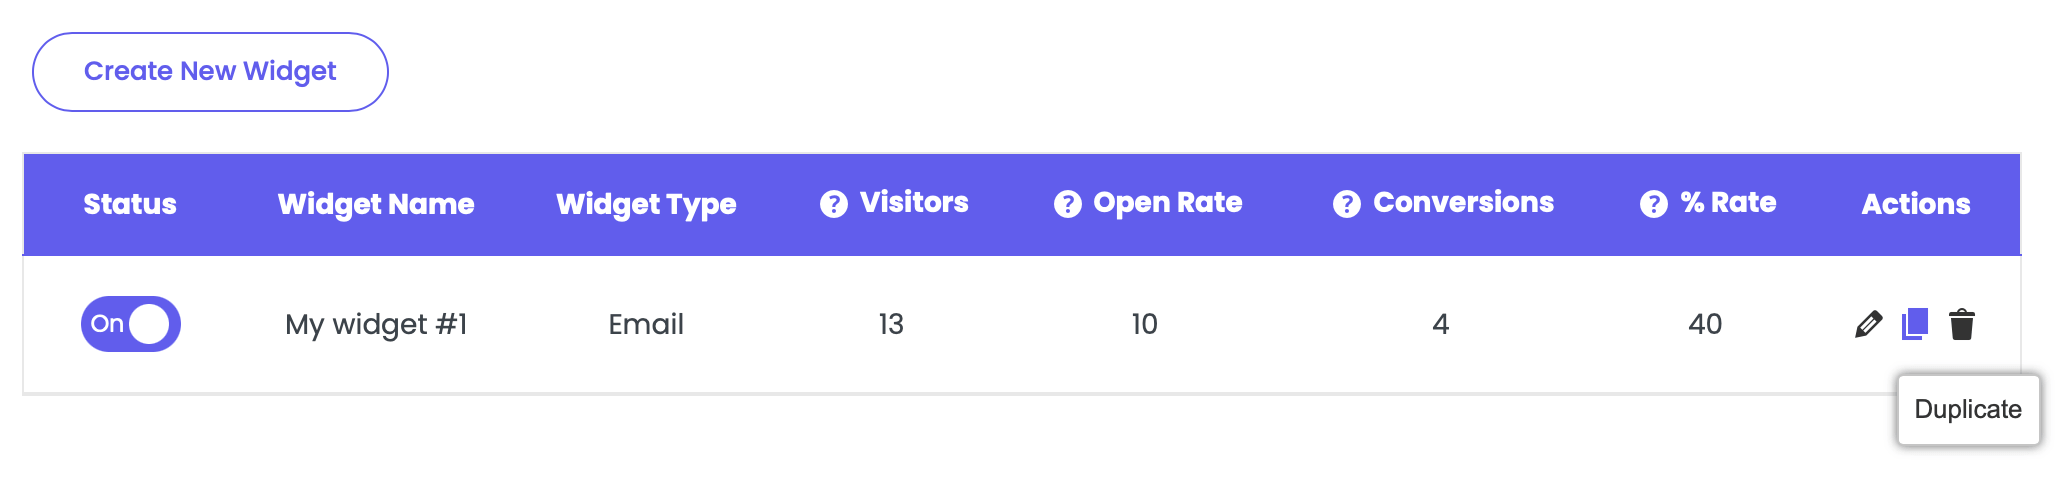
Step 1: Open the Coupon X app settings from your Shopify or Wix Apps section and click on edit next to the widget you wish to work with.
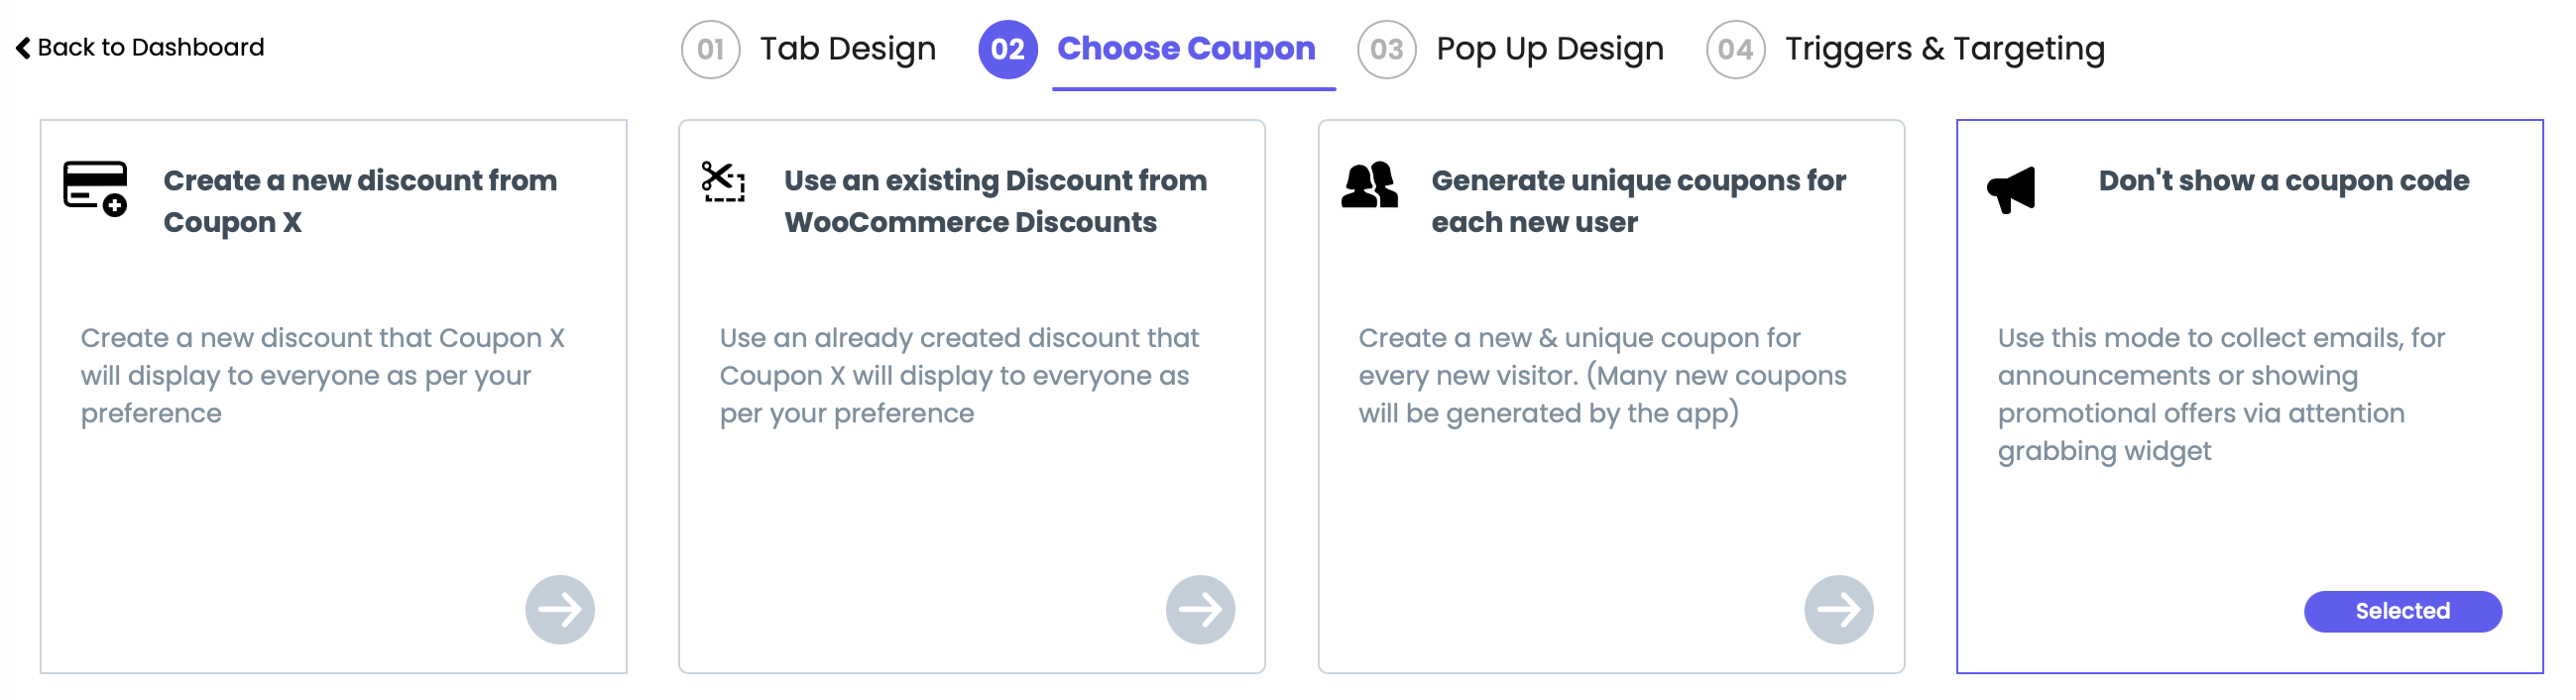
Step 2: Navigate to Step 2: Choose coupon in the app settings and select “Don’t show a coupon code”. Once you select this option, there will be no further settings on this step.
Step 3: Move on to Step 3: Popup design in the settings and start setting up your announcement popup.
Step 4: First, you can select between three types of layout – Slide-in Popup (the widget will be displayed at the bottom corner of your page), Lightbox Popup (the widget will be displayed in the middle of your page) or Floating bar (the widget will be displayed at the top or bottom of your page.). You can read more about each here.
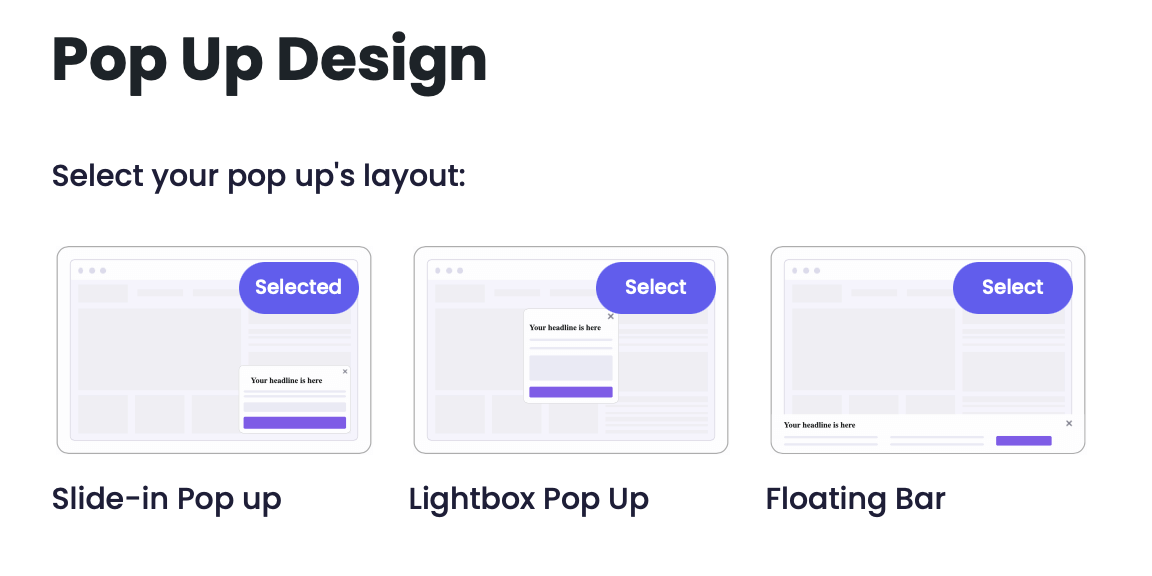
Regardless of which option you choose, you can see how your choice will look in the live Preview to the right of the page. To change your current selection, simply hover on any of the other layouts and click on “Select”.
Step 5: Now, move on to the behaviour of the popup – you can choose from two options – Show announcement screen right away or Collect email first, then show the announcement.

If you choose the first option, you’ll need to add custom “headline” and “description” texts. You can also choose to add a button if you’d like (with custom button text and action on button click – hide the widget or redirect to another URL).

If you choose to collect emails, you’ll get two options – “main screen” and “announcement screen”.

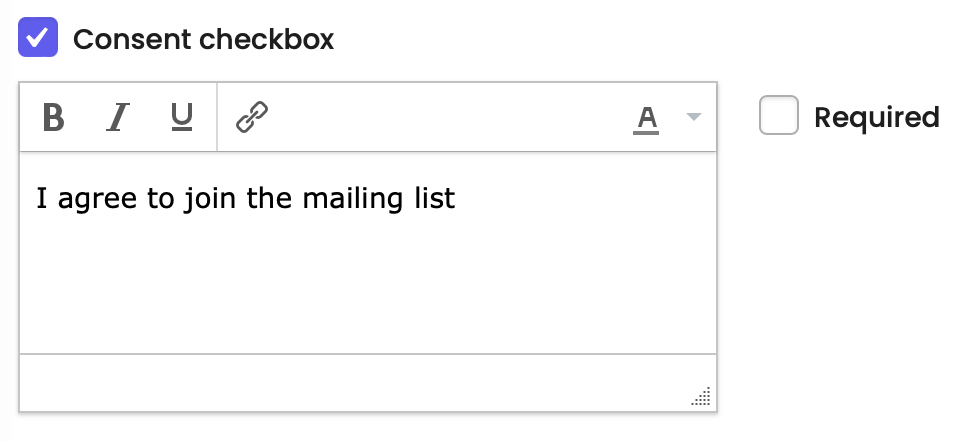
In the “main screen” part, which is the popup where your visitors will put their email, you get to customise the “headline”, email field, “description”, button text. You’ll be able to add a consent checkbox with custom text, e.g. “I agree to join the mailing list”.
In the “announcement screen” you can customise the popup visitors will see after submitting their email. You can add custom “headline” and “description” texts, button text and choose to add a button if you’d like (with custom button text and action on button click – hide the widget or redirect to another URL). For convenience, you can also choose to use the same styles like the email collection “main screen” by toggling the relevant button.

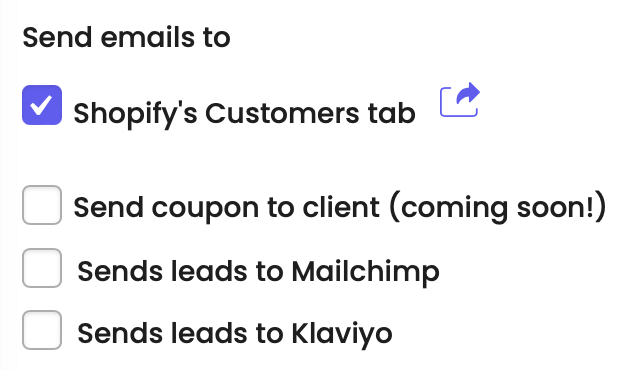
Also, you can choose to add customer tags for customers that submit their email using the popup form, e.g. “Shopify Customer tags”.

You can fully customise the popup colours and also select where to store clients’ emails, choosing from the Shopify Customers tab (enabled by default) or to push data to MailChimp or Klaviyo.
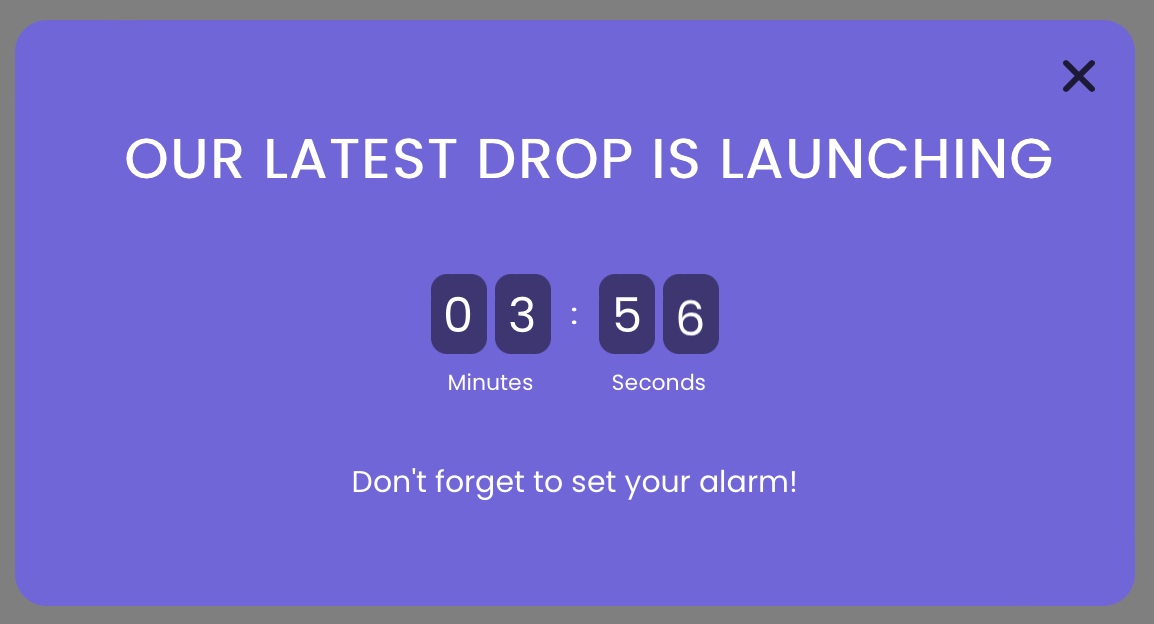
Step 6: You can also choose to display a fully customisable countdown timer element to your Coupon X popup to increase conversion rate. You add a timer to a specific time and date, or just add count from the moment that the popup appears. Click here to learn more.

Step 7: Finally, by clicking on the “More settings button”, you will be able to add custom CSS (optional), choose to close the popup automatically after conversion and/ or add an error message text (relevant for the “collect email first” mode only).

And that’s it. You can now proceed to the next step and add triggers and targeting rules of your choice for your new Coupon X widget!
In the end, depending on your settings, it may look like this:
When you’re done, don’t forget to hit ”Publish” at the bottom of the page. That’s it! Easy as 1,2,3 ☺️