In this guide we’ll show you how to create another Coupon X widget. You can have different widgets to use on different pages, or you can even have more than one widget on the same page. It’s totally up to your preferences! Let’s get right into it.
Click to read more about how to use Coupon X for Shopify or Wix.
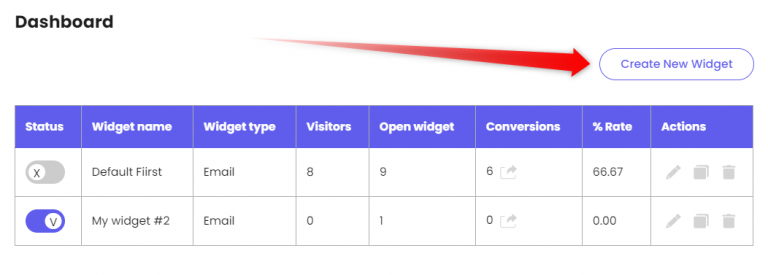
Start by opening the Coupon X app in your Shopify admin panel. In your app dashboard you’ll see a ”Create New Widget” button as well as a table with your current widgets and their statistics. You can activate or deactivate a widget from the ”Status” option to the left of the table. To create a new widget, click on the ”Create New Widget” button.
You’ll be automatically redirected to the widget customization and configuration settings.
Note: when you return to your dashboard, you’ll notice the widget you just created will show up at the bottom of the table, below your previously existing widgets.
You can fully customize your tab appearance according to your needs and preferences from the ”Tab Design” page, including giving your new widget a name (it will be automatically named ”My widget #”) and customizing it in terms of screen position, icon, colours and text.

You can find a step-by-step guide on how to do this here:
Next, move on to the ”Widget design” page. This is where you get to configure how your widget works.

Note: whichever option you choose, you’ll be asked to select a coupon code from your currently existing Shopify discounts, so make sure you already have at least one discount available. Alternatively, you can create a new one from the ”Discounts” page in your Shopify admin panel. You can find more detailed instructions on how to create and manage your Shopify discount codes here: https://help.shopify.com/en/manual/discounts/create-discount-codes
You can choose whether you want to simply display your visitors a discount code with a ”Copy” button, collect visitors’ e-mails before displaying the discount code or even share a link to a different page/ use a shareable link discount.
You can find separate guides on how these features work here: https://premio.io/help/coupon-x/how-to-collect-e-mails-with-coupon-x-for-shopify/
and here: https://premio.io/help/coupon-x/how-to-create-a-shareable-coupon-link-in-coupon-x/
Whichever option you choose, you will then again be able to customize your widget in terms of text and colours.
Finally, you can set custom triggers and targeting rules from the ”Triggers & targeting” page. This is the most useful for your new widget page, since the difference between your widgets will mostly be in howyou targetthem. You can select whether to show your widget on desktop or mobile devices, or both, as well as what the default state of the widget will be (whether it’s always open or visitors need to click/ hover to open it) and if you wish to have a time delay or page scroll in displaying the widget (for example to show it after a few seconds on the page or after the visitor has scrolled a certain percentage of the page).
You can add cart targeting (display the widget only for visitors who meet a certain condition, e.g. visitors who have more than 10 items in their cart), days and hours targeting (display the widget on specific days and hours only, based on your working hours, for example), page targeting (show or don’t show the widget on specific pages) and country targeting (target your widget to specific countries).
Important!: if you have more than one widget, but don’t want to display multiple widgets on the same page, you should exclude this page from the other widgets you have. For example, if you set ”Show on pages that contain {{something}}” for Widget A, make sure that you set ”Don’t show on pages that contain {{something}}” for Widget B.
You can find separate guides on how these features work here: https://premio.io/help/coupon-x/how-to-display-coupon-x-on-specific-days-and-hours/, here: https://premio.io/help/coupon-x/how-to-display-coupon-x-on-specific-pages/, here: https://premio.io/help/coupon-x/how-to-display-coupon-x-for-specific-countries/ and here: https://premio.io/help/coupon-x/how-to-set-cart-targeting-for-your-coupon-x-discount-code/
When you’re done setting up your country targeting, don’t forget to hit ”Publish” at the bottom of the page. That’s it! Easy as 1,2,3 ☺️