In this guide, we’ll show you how you can collect your Shopify or Wix store visitors’ e-mails in a few super simple and quick clicks.
To learn more about how to use the app, click here.
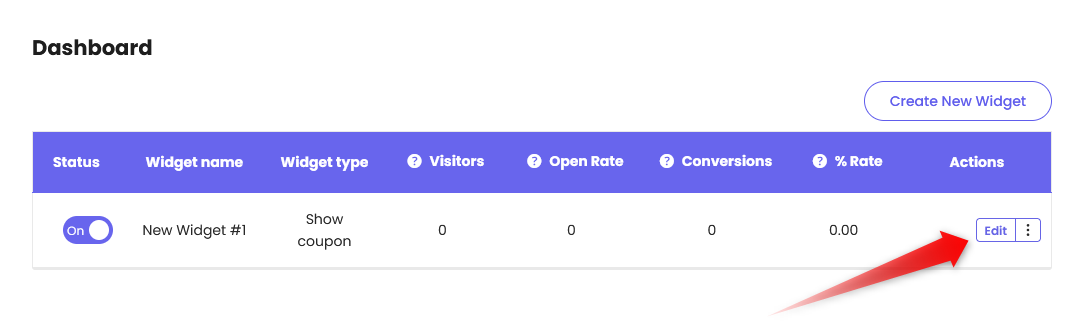
Step 1: Create a new widget or make changes to an existing one by clicking “Edit“.
Step 2: Click on “Pop Up Design” on the page that will open.

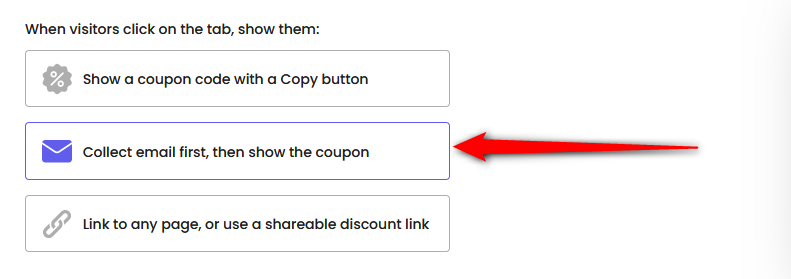
Step 3: To collect your visitors’ e-mails before displaying a discount code, select the “Collect email first, then show the coupon” option. It will get highlighted.
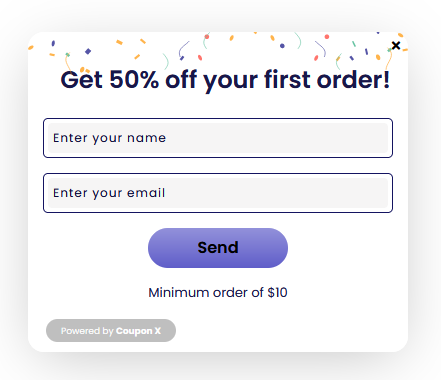
Step 4: Fill in the main widget screen from the customization menu that will show up below. This is how your customers will see the widget before they give their e-mail in order to get the coupon code.
You can add a countdown timer, edit the headline text, collect the customer name, and edit the email placeholder text.

You can also edit the Description text (e.g. minimum spend applicable),Text inside button – what text you wish to be displayed in the action button, for example, “Send“, use a larger send button, and add a consent box so that visitors can confirm they agree to join your mailing list.
There’s also an option to add customer tags (for Paid plans only) and to add a background image to your Coupon X Popup.

As usual, you can also fully customise your widget in terms of colours to match your preferences.
In the end, it should look something like this:
Each visitor who gives you their e-mail in order to get the coupon code will be synced with your Shopify or Wix Customers tab.

After your customers leave their emails, you can even assign customer tags to each of them. To read more about how to do this, click here.
Don’t forget to check the coupon screen page as well. This is how your customers will see the widget after they give you their e-mail.
You can select a coupon code from your existing Shopify or Wix discount codes or create a new one in your Discounts page.
Then, you can add a headline, a description (e.g. minimum spend applicable), a text for the action button (for example ”copy”) and what message to be displayed after your customers copy the code, like ”copied”.
Here too you can customise your widget colours to match your website appearance.
In the end, it should look something like this:

When you’re ready setting up, just click on ”Publish” at the bottom of the page. That’s it! Easy as 1,2,3 ☺️
Here is how the final result should look in action on your website, of course depending on your settings and customization.
