In this guide we’ll show you how to create a shareable coupon link for your Coupon X widget.
To learn more about how to use the Coupon X plug-in click here and don’t forget to check our entire Coupon X knowledge base.
You can select this option if you want to link to any page of your choice. For example, you can choose to link to any URL of your choice (internal or external) or opt for the discount code to be applied automatically to your customer’s cart.
This can be beneficial if you want to promote your discount on different pages (e.g. on your social media channels, on landing pages, by e-mail) or to direct customers to your site homepage or to a specific page of a product/ products.
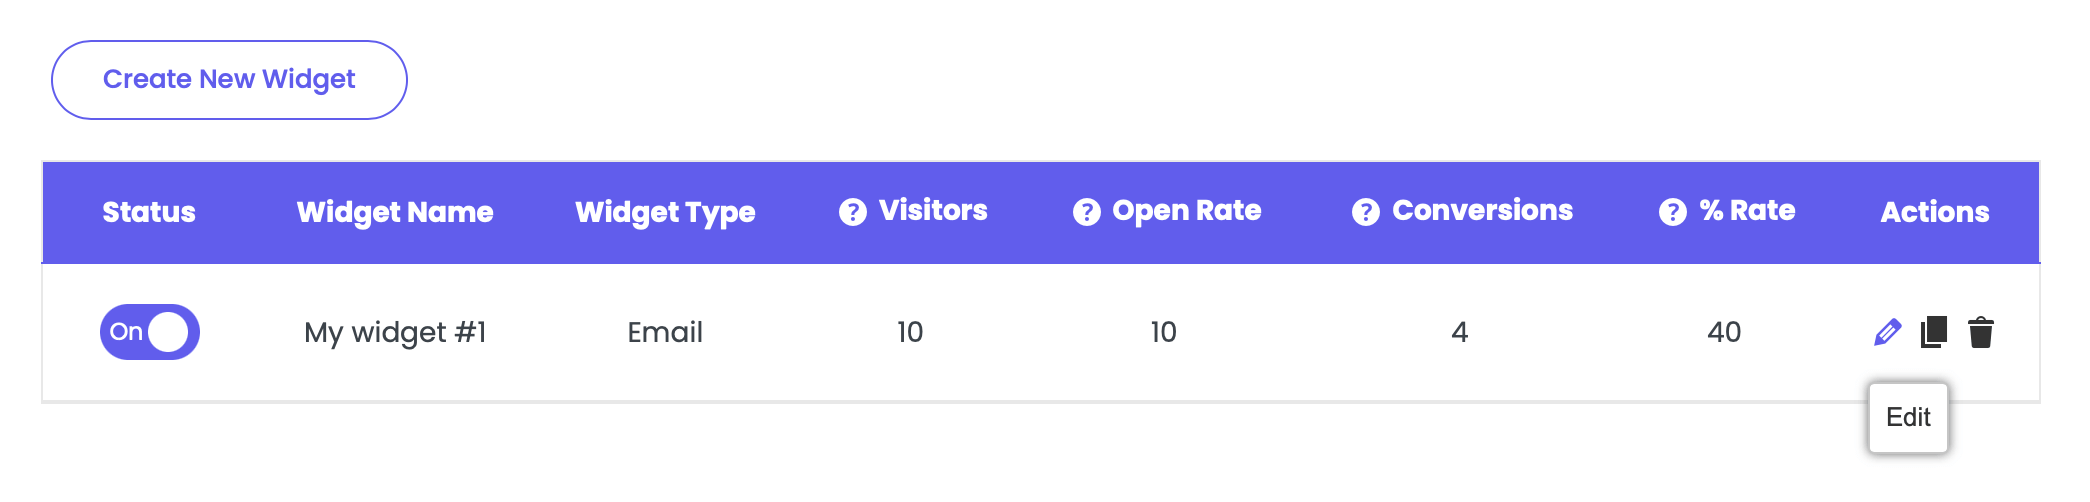
Let’s get right into how to set it up. First, open the Coupon X plug-in dashboard from your WordPress admin panel and click on the “Edit” button next to your widget.
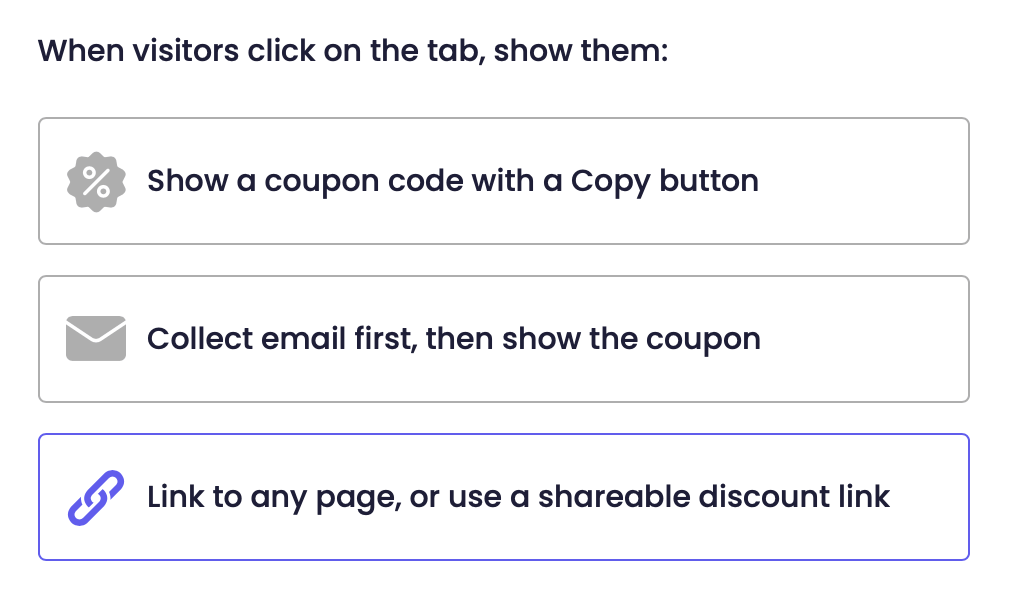
Click on step 3: Popup design from the settings navigation, scroll down to the “When visitors click on the tab, show them” setting and select “Link to any page, or use a shareable discount link”:
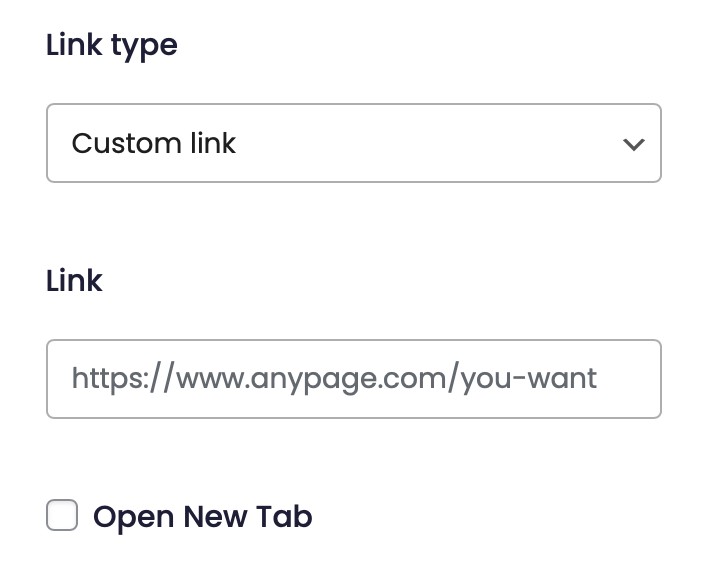
Next, you need to choose your link type from the “Link type” dropdown menu.
You can choose the custom link type – you will then need to add the link to any page of your choice, for example a product page or even an external page, and then choose whether you want the page to open in a new tab or not.
You can also choose to show a shareable discount link with any of your currently existing discount codes. The code that will be used for the functionality will be the one you have selected already in the previous step: “Choose coupon”. (link will be added here).
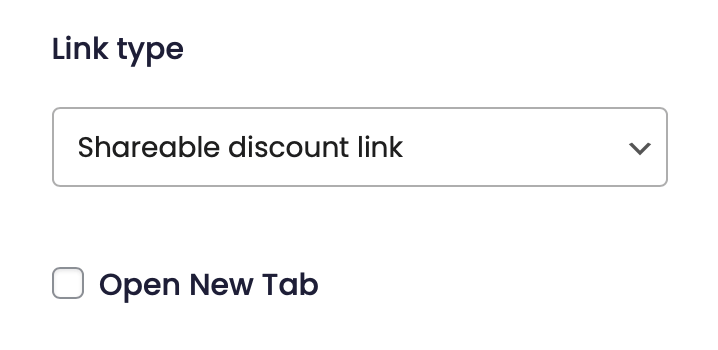
Once your website visitors click on the button, the discount code will be automatically added to their cart. Again, you can select if you want the page to open in a new tab.
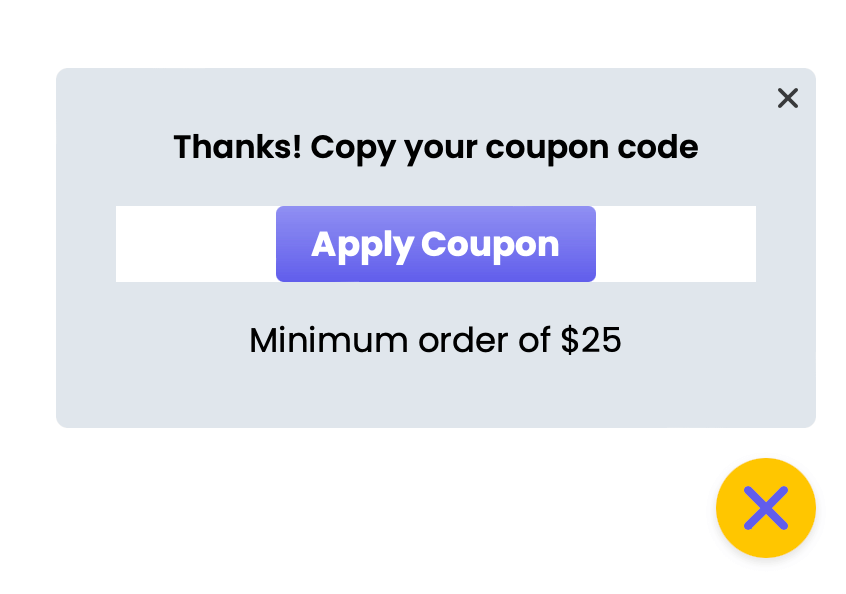
Finally, proceed with filling in the headline (the text above the “Apply” button), button text and description (the text below the button) and choose the desired colours for each of the settings.

In the end, it should look something like this:
You’re now ready to proceed to the next step! ☺️