In this guide we’ll show you how to launch Comm100 live chat through Chaty. Comm100 is an omnichannel customer service platform with live chat, email, social media, AI chatbot, etc.
To learn more about how to use the Chaty plug-in click here, and don’t forget to check our entire Chaty knowledgebase to make the most out of it.
So let’s dive in. First, install the Comm100 plug-in for WordPress here: https://wordpress.org/plugins/comm100-live-chat/
Then, follow the steps in this easy guide on how to install and activate Comm100 on your website here: https://www.comm100.com/livechat/knowledgebase/get-started-with-comm100-live-chat.html
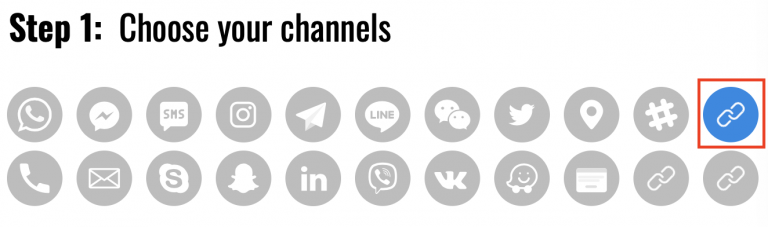
Now, open the Chaty settings from your WordPress dashboard. In the first step, add a new custom link channel:
In the field that will show up below, add this code:
javascript:Comm100API.open_chat_window();
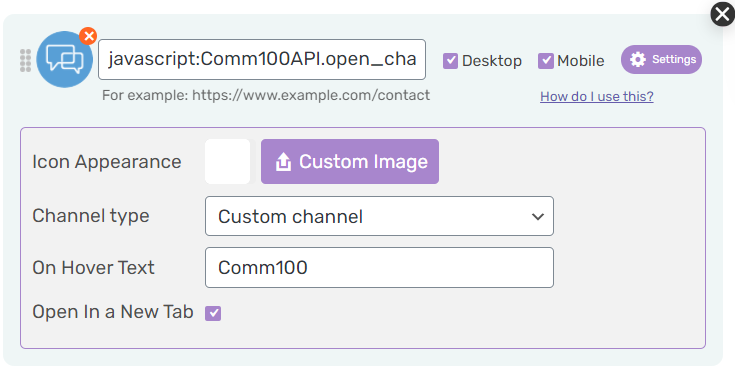
Select whether you want your Comm100 live chat to be displayed on desktop or mobile devices, or both. You can then customize the channel appearance by uploading a custom icon – for example the Comm100 logo. You can change its (background) colour. You can also add an on hover text, for example ”Comm100”.
Note: if you want to hide Comm100 live chat on load so that the widget is launched through Chaty, you need to go to your Comm100 dashboard > Campaign > Chat button, then select Text Link type. When you’re done, don’t forget to hit the ”Save changes” button.
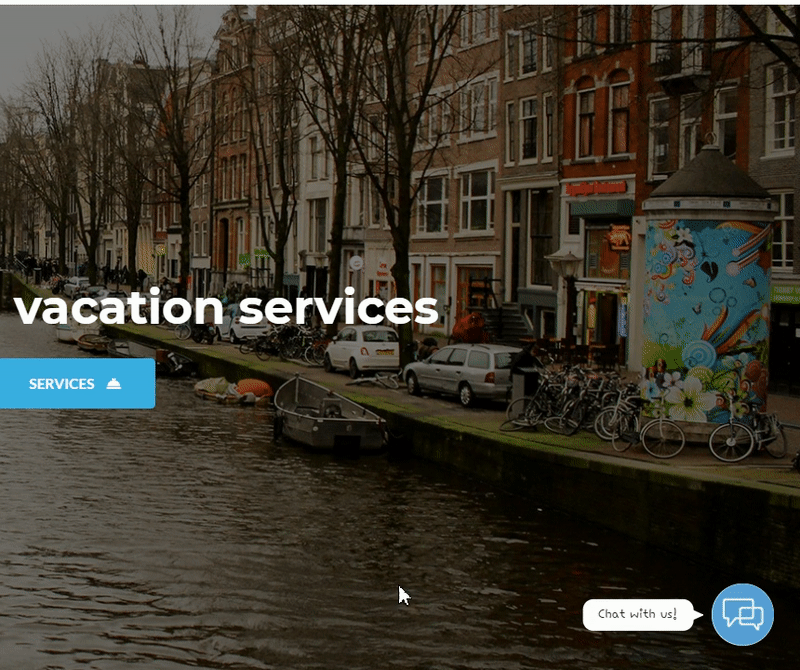
That’s it! When you’re done, don’t forget to hit the ”Save changes” button to make sure your settings will be displayed accordingly. In the end, depending on your settings and customisations, it should look something like this: