In this guide we’ll show you how to install Chaty on a Jimdo website.
But first, keep reading to find out what Chaty does and how it can improve your business.
Chaty offers your website visitors with an easy click-to-chat connection to various platforms that you’re available on.
Having a single widget with various channels is helpful in improving your customer service and increasing your possibilities for conversions and sales.
You can use the Chaty app with more than 20 common channels such as phone, email, WhatsApp, Facebook Messenger, Instagram, Telegram, Twitter, TikTok, Slack, Skype, Vkontakt, Viber, SMS, LinkedIn, Google Maps, Line, WeChat, Snapchat, Waze, Poptin, a contact form or you can even add custom channels.
Don’t forget to check our entire Chaty knowledgebase to make the most out of the app.
So let’s dive in on how to install Chaty on a Jimdo website. First, you will need to create an account for the Chaty app here or if you already have an account, you can log in instead.
Next, proceed with setting up and personalising your Chaty widget with your desired channels such as WhatsApp, Facebook Messenger, Instagram, Telegram and so on:
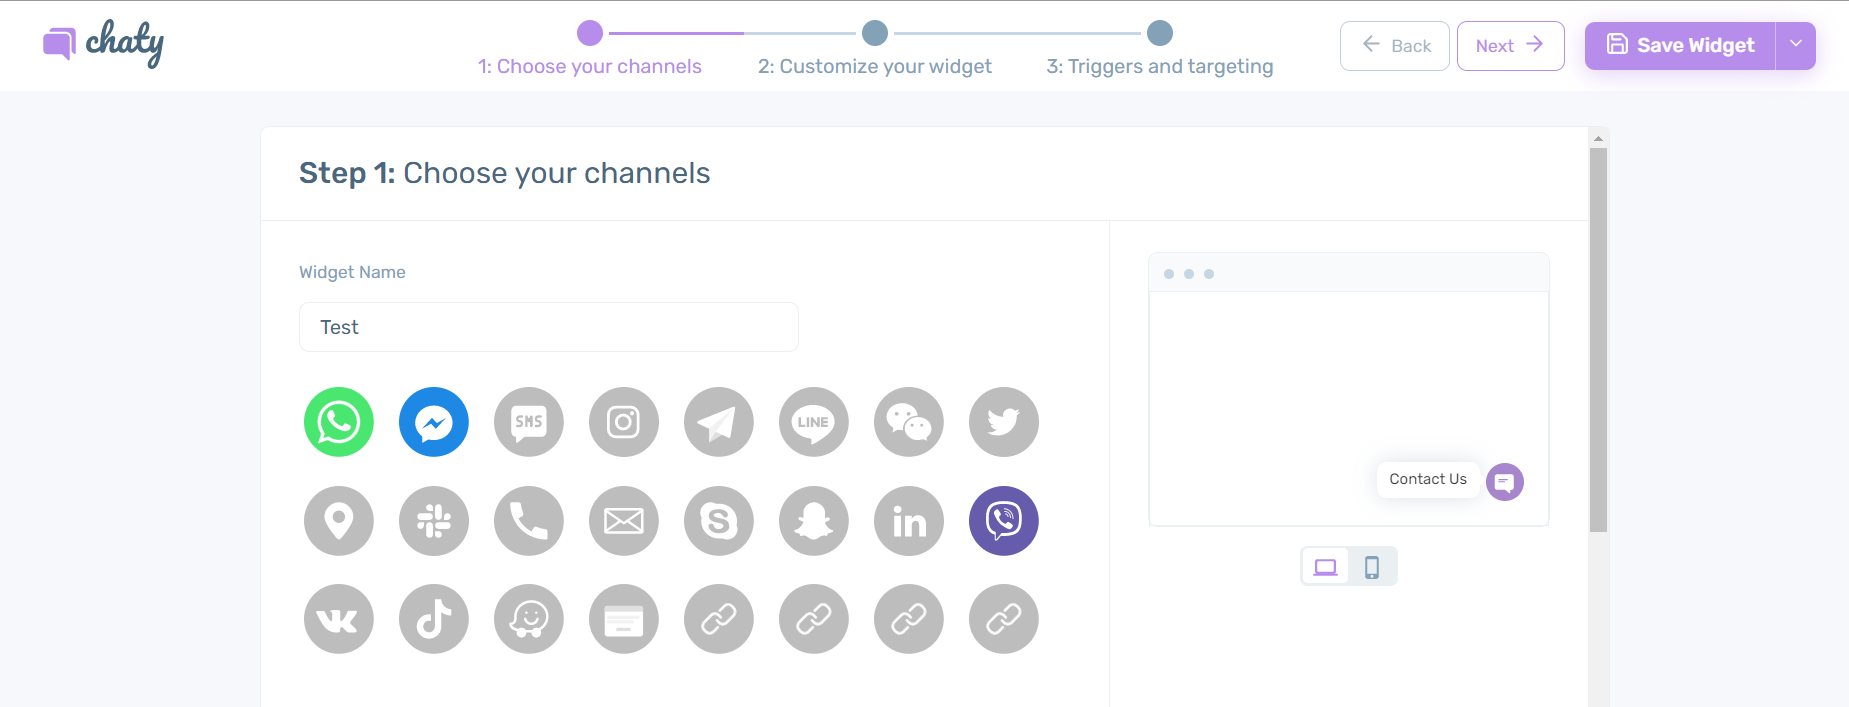
After you are done, copy the installation code:
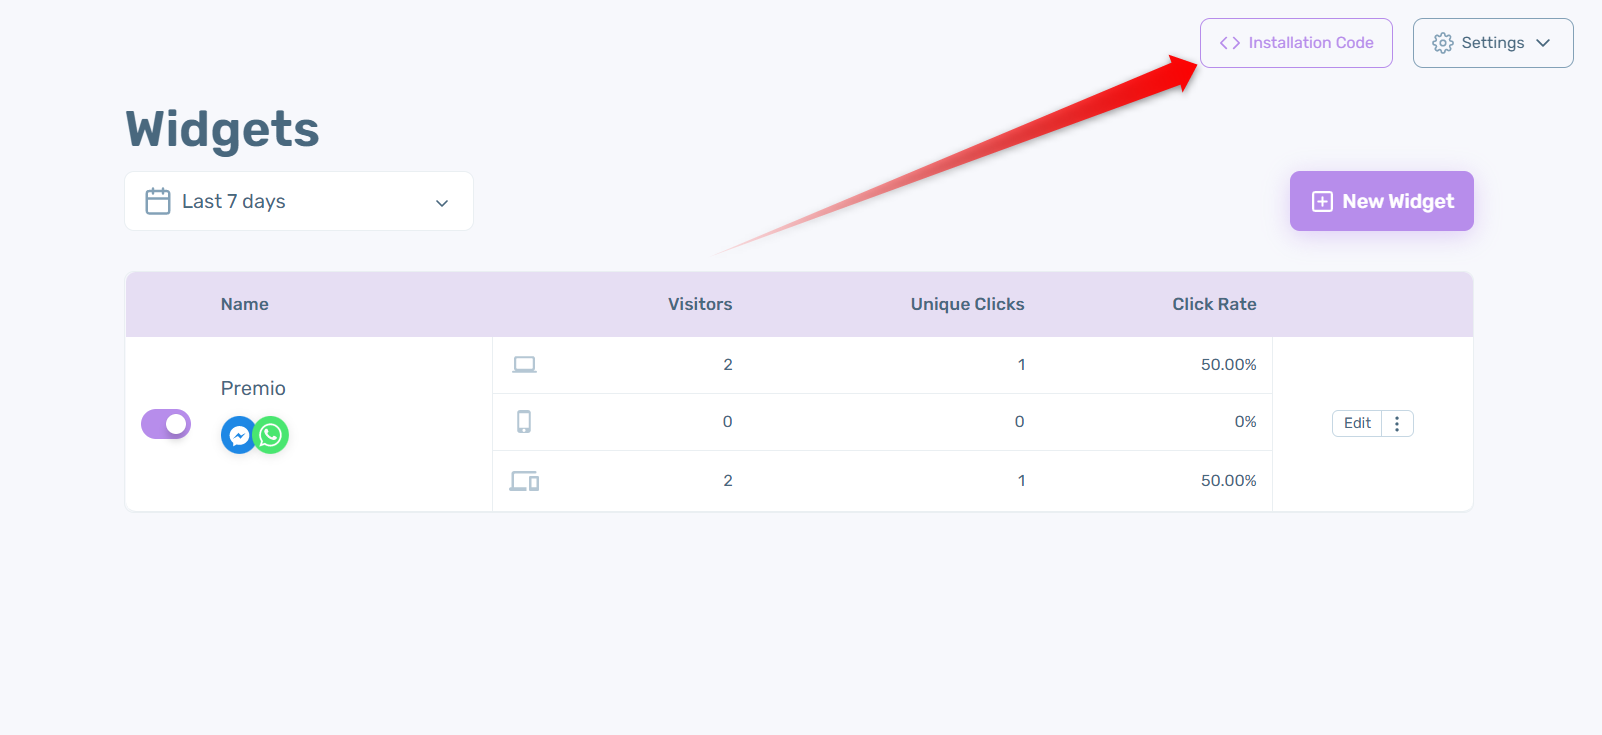
And now it’s time to connect Chaty to your Jimdo website.
To install the Chaty code on the entire site, log in to your Jimdo account, choose the correct site you wish to install Chaty on and click on Actions > Edit.
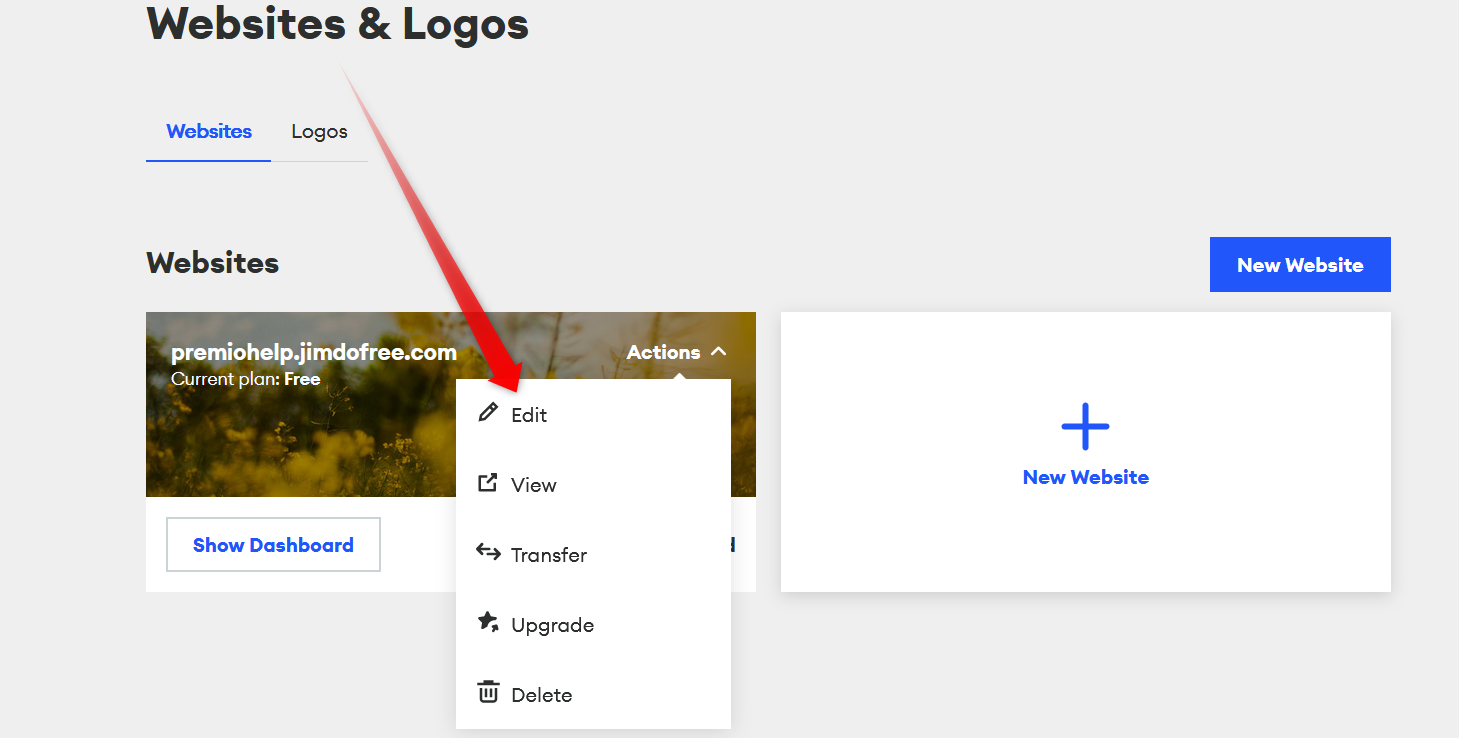
Once you open the page builder, click on Menu and go to Settings:

Place your Chaty installation code in the Edit Head section of your Jimdo Creator website. You’ll find this section under Menu > Settings > Edit Head:
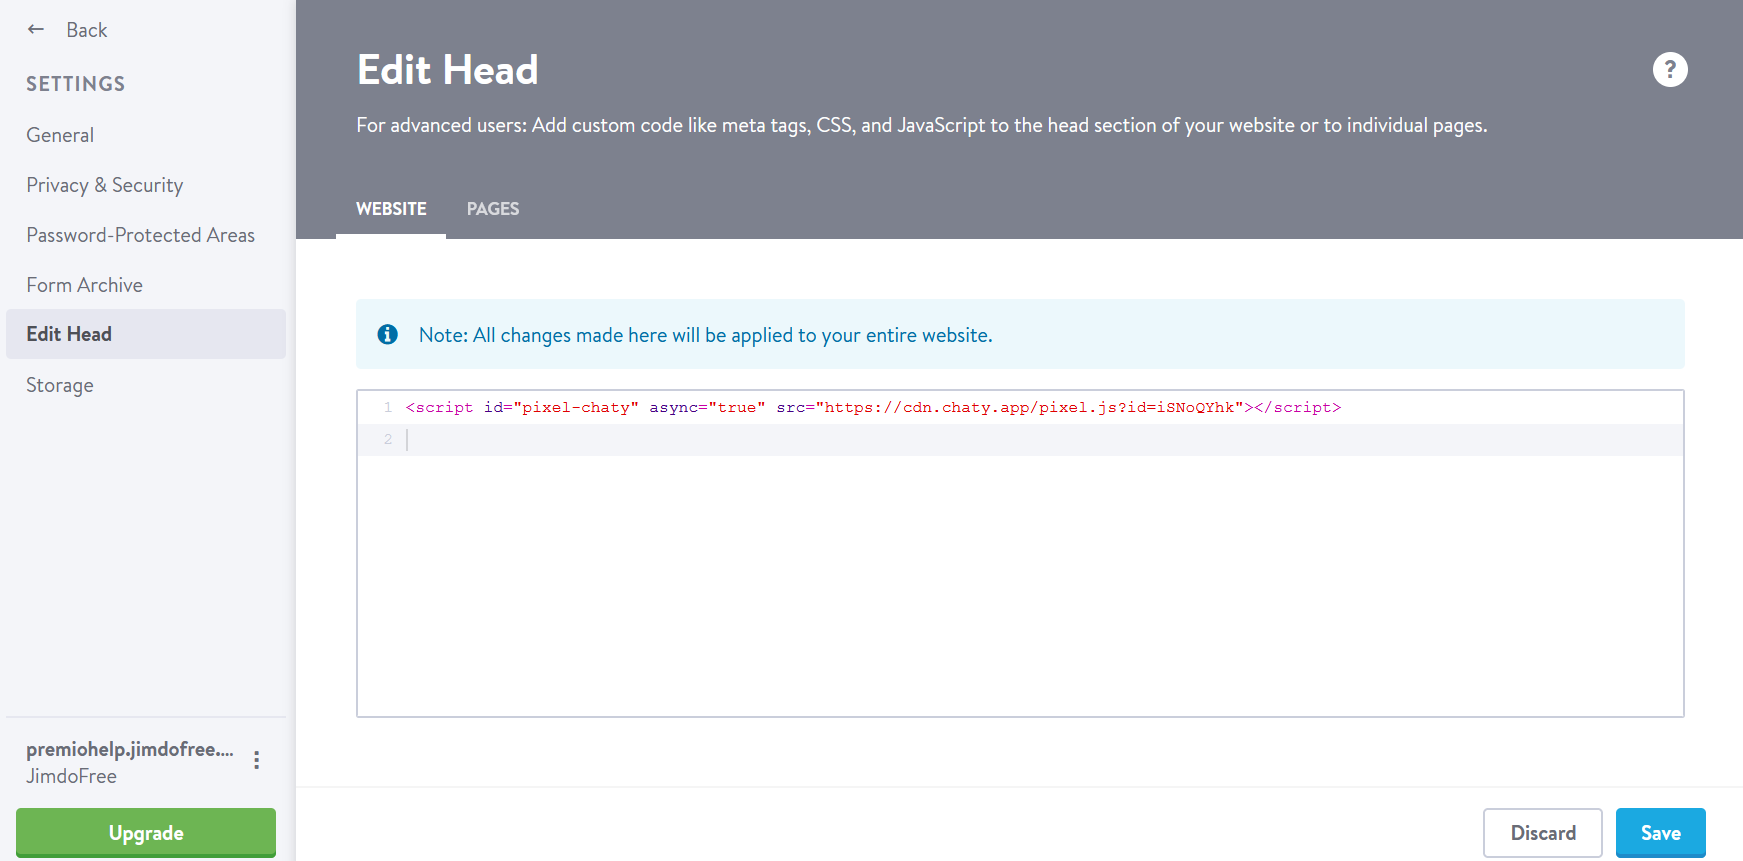
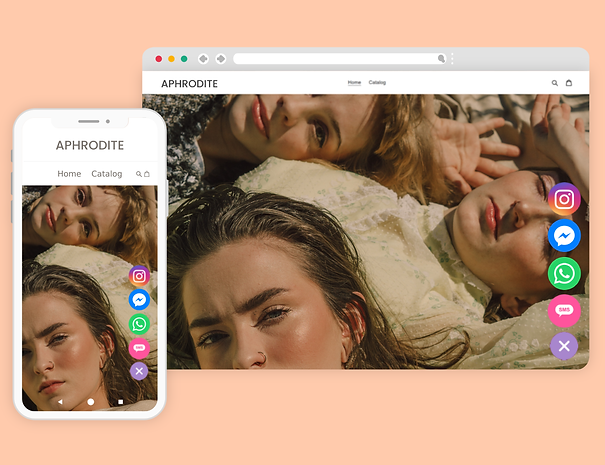
And that’s it! Now you have the Chaty widget on your entire Jimdo website. In the end, depending on your settings and customisations, it could look something like this with channels such as Instagram, Telegram, WhatsApp, phone or anything of your choice:
If you any assistance with configuring this, please don’t hesitate to reach out to our support team!