In this guide, we’ll show you how to add an embedded WhatsApp chat window to your website through Chaty.
You can use this feature to show your website visitors an inviting embedded WhatsApp window with a welcome message, encouraging your customers to start chatting with you. Once they type their message, they’ll be redirected to the WhatsApp app to continue the conversation.
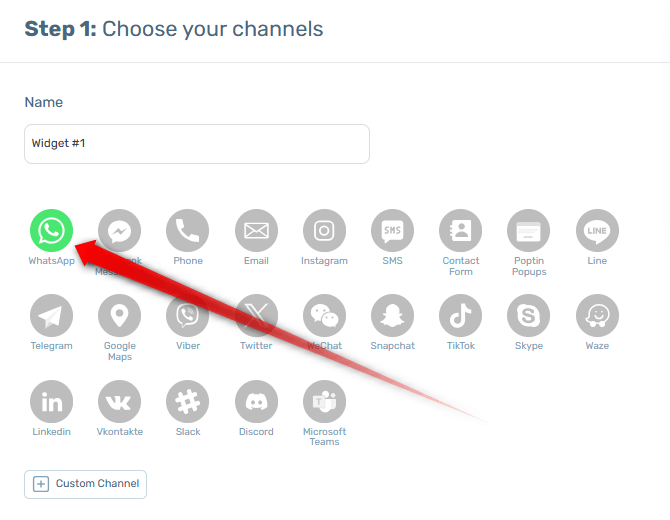
So let’s dive in. First, open the Chaty settings from your WordPress dashboard and add a WhatsApp channel from “Step 1: Choose your channels”.
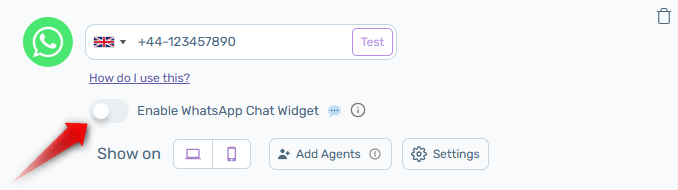
Next, add your WhatsApp number in the correct way as shown in this guide and select whether you want the channel to appear on desktop or mobile, or both.
To enable the embedded window feature, toggle the “Enable WhatsApp Chat Widget” feature:
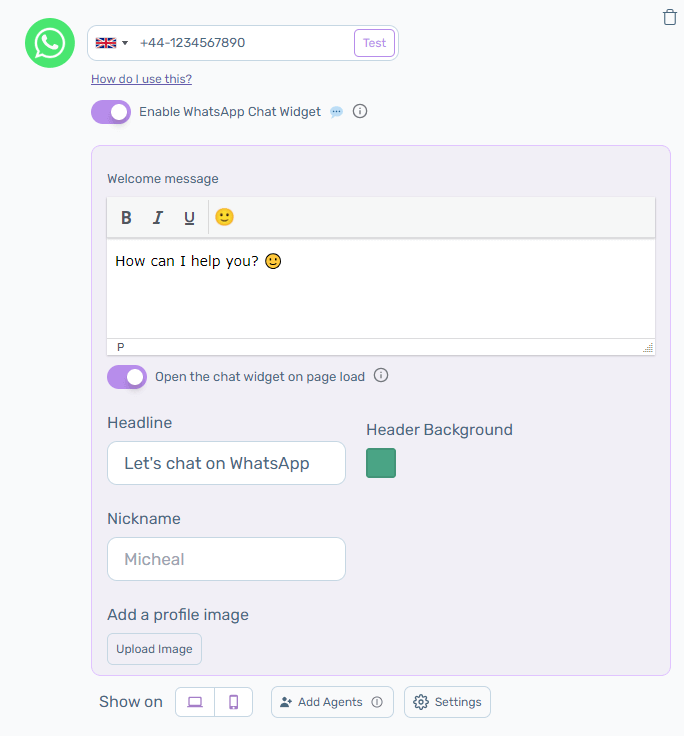
You will be asked to type a custom welcome message of your choice and you’ll be able to select whether to open the embedded window by default or only when your website visitors click on it. If you activate the “Open the chat widget on page load” feature, the popup will open on page load and after your website visitors sends a message or closes the popup window, it will stay closed to avoid disruption.
Last but not least, by default after typing a message on a desktop device, your website visitors will be redirected to a new window asking them to continue the chat on the WhatsApp desktop app if they have it installed on their device, or to an official WhatsApp desktop app download link. If you select the “Use WhatsApp Web directly on desktop” feature from the WhatsApp settings, the new chat will open in WhatsApp Web in their browser.
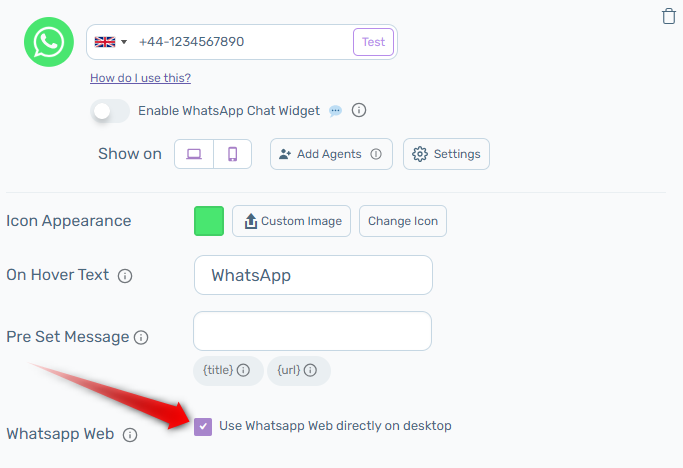
You can also add a pre-set message to your Chaty widget and title or URL merge tags. Click here to learn how! Also, if you are using Google Analytics to track clicks on your website, you can now track the clicks not only on the initial click on the WhatsApp channel, but also on the “Send” button of the popup.
That’s it! Easy as 1,2,3 ☺️ You can go ahead and further personalise your Chaty widget following the instructions in this guide, explaining how to use the plug-in: https://premio.io/help/chaty/how-to-use-chaty/ or find our entire help documentation here: https://premio.io/help/chaty/
When you’re done personalising the widget according to your needs and preferences, don’t forget to hit the “Save changes” button.
In the end, depending on your settings and customizations, it should look something like this on your website:
