In this help guide, we will try to explain how to add a Waze Icon to Chaty?
Here we have explained how it works on WordPress.
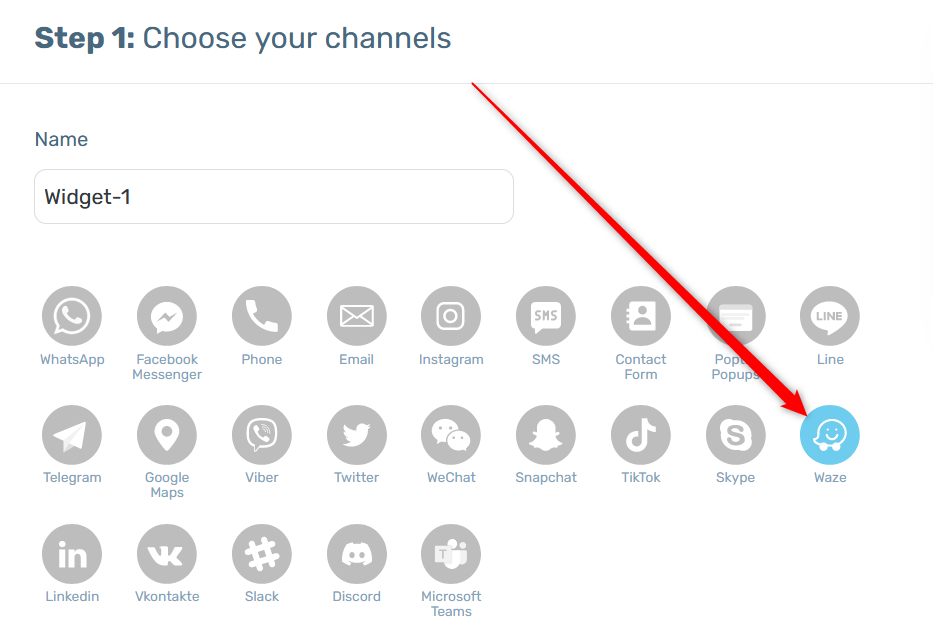
Step 1: Go to Chaty on WordPress Admin Dashboard and select the Waze Icon.
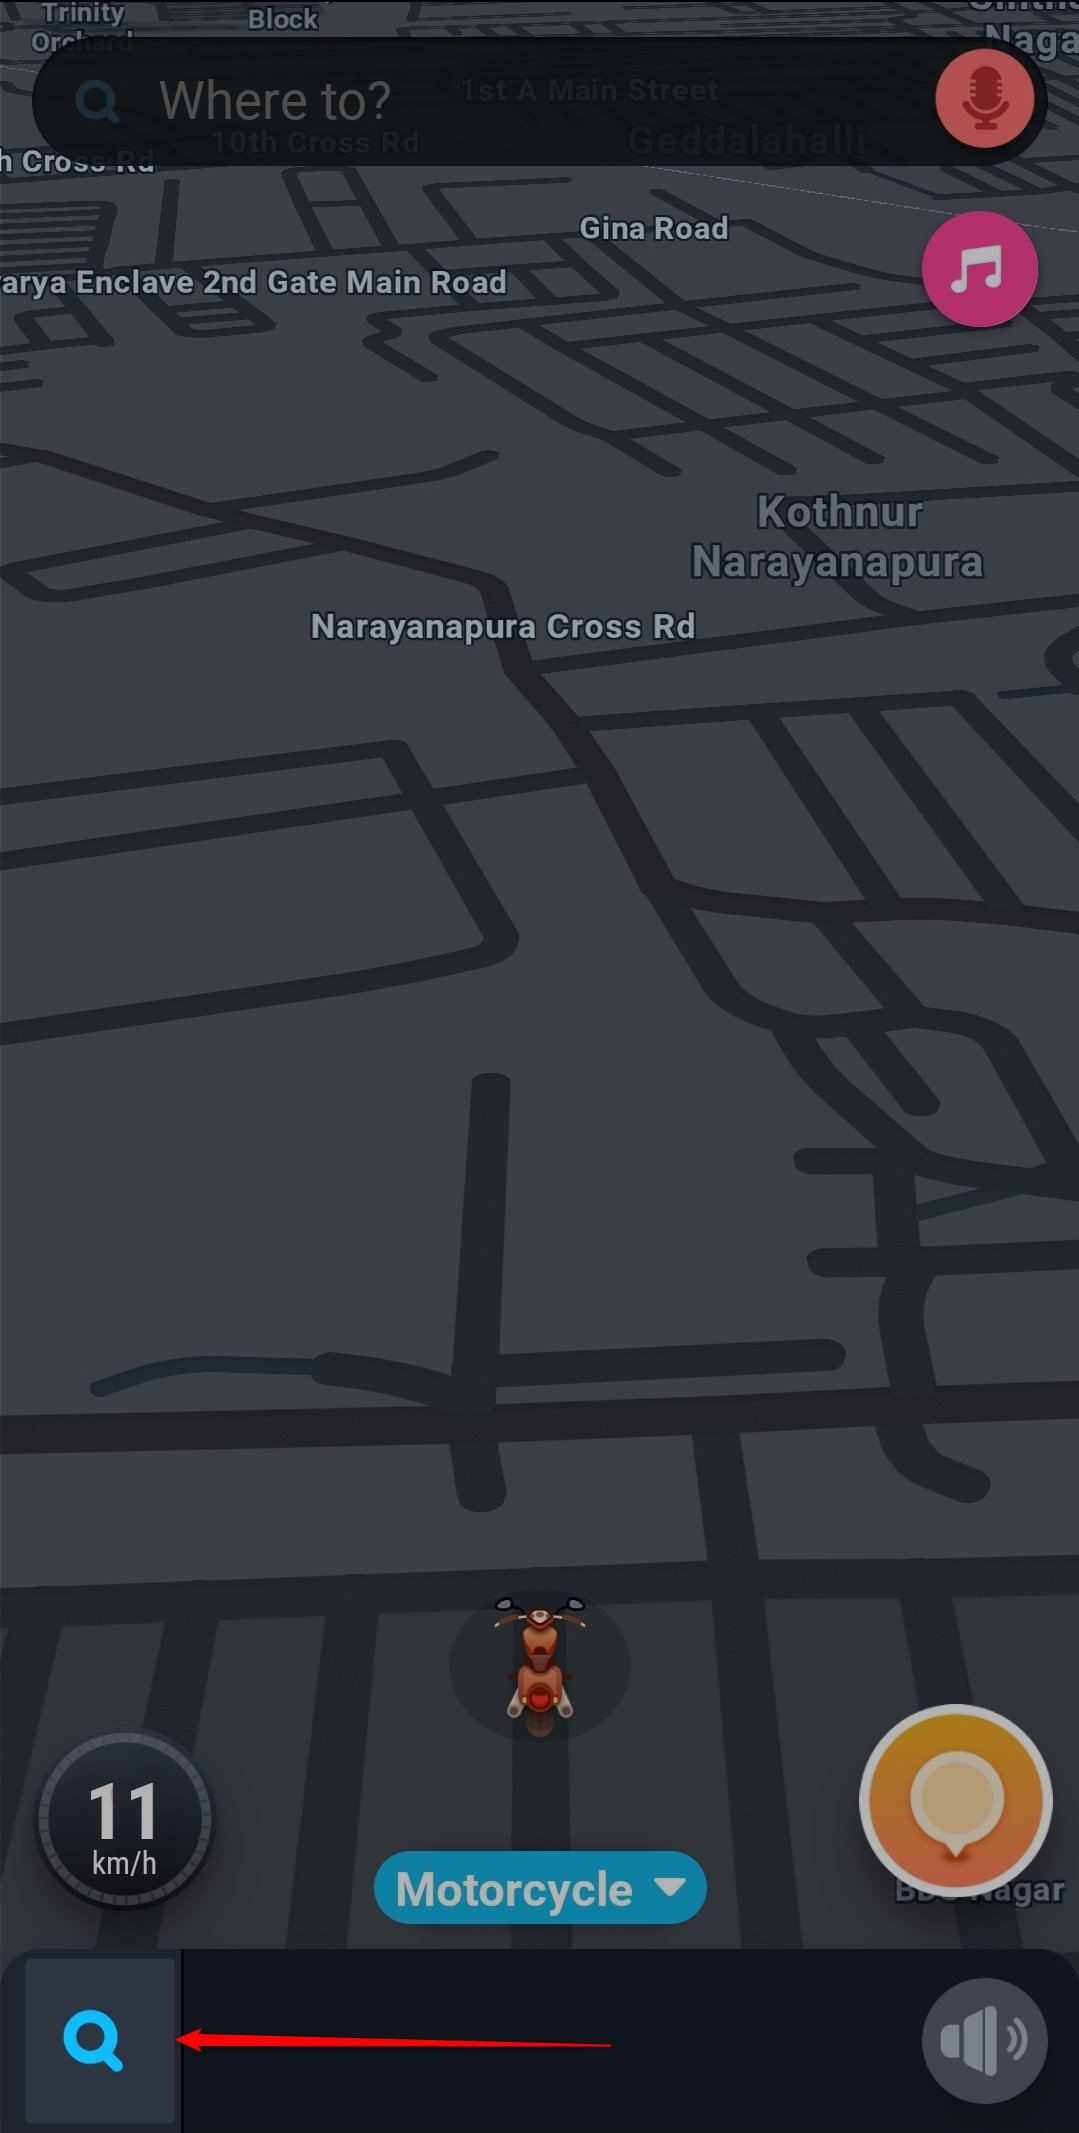
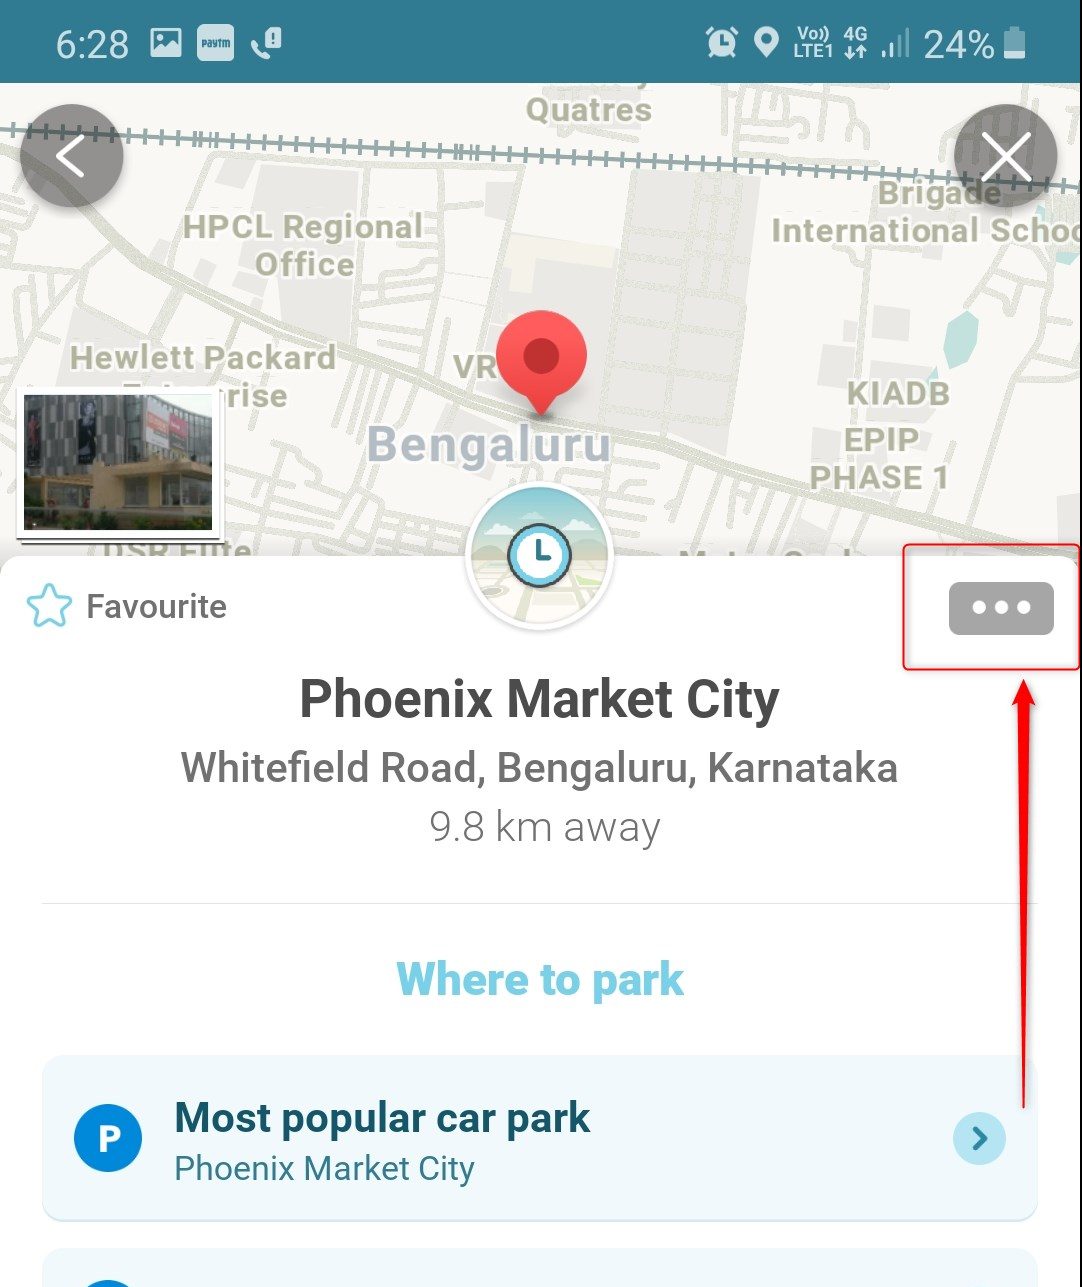
Step 2: Go to Waze App on your Mobile and search for the location that you wish to integrate to Chaty by clicking on the magnifying glass icon on the bottom left, like your Business Address or your Store Address. For example, here I have chosen my desired Address as Phoenix Marketcity, Bangalore, India.
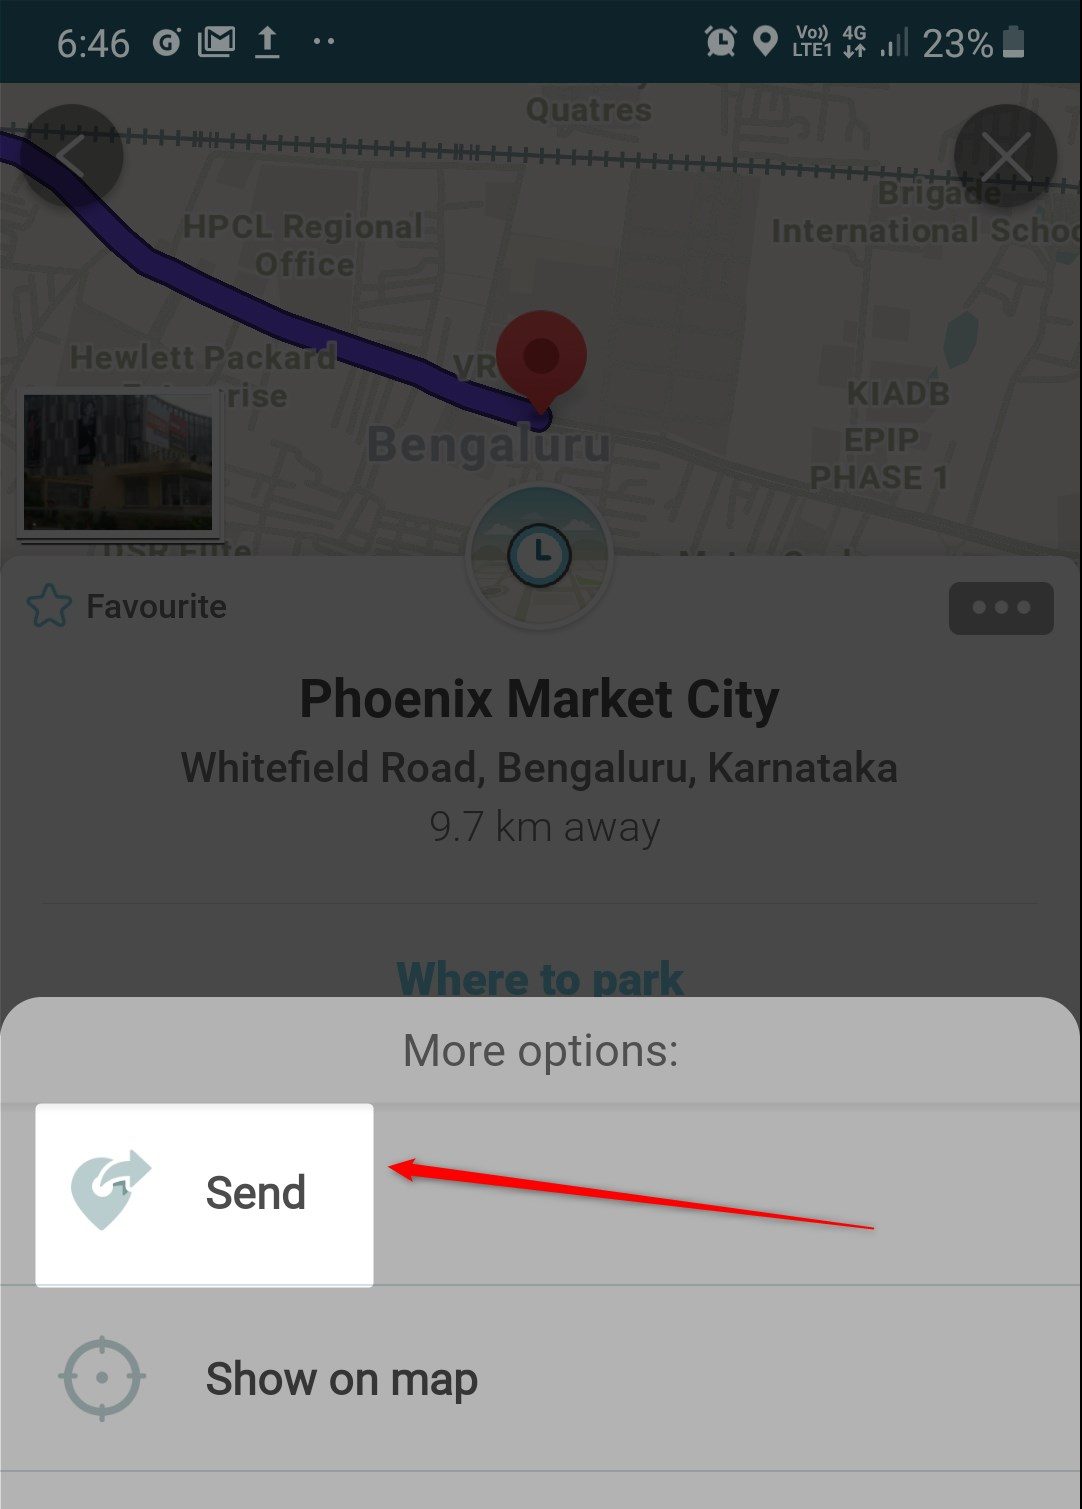
Step 3: Once you select the address from the results, click on the options tab on the right in form of three dots.
Step 4: From here, select the Send option to copy the link to clipboard, like this:
Step 5: Once you paste the share location option to your clipboard/notes, copy the link part only, as highlighted:
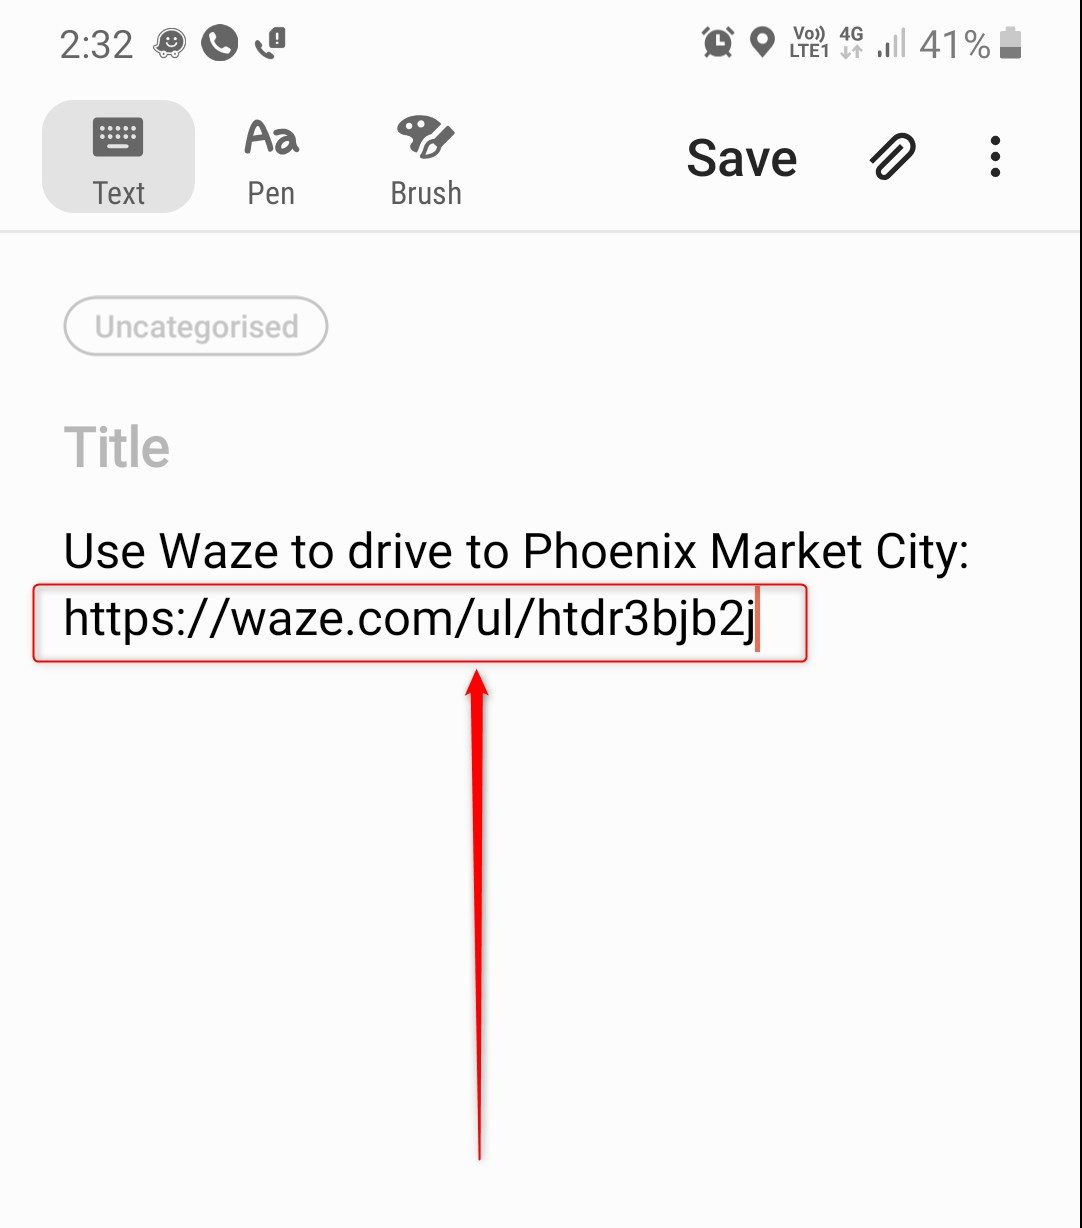
Step 6: Paste the copied part of the link to your Waze Icon field on the Chaty Plugin, as explained:

Additional Note: You can also change the icon appearance and On Hover Text or even upload a custom image for paid plugins from the above settings displayed.
Once you are happy with the changes made, just click on Save Widget.
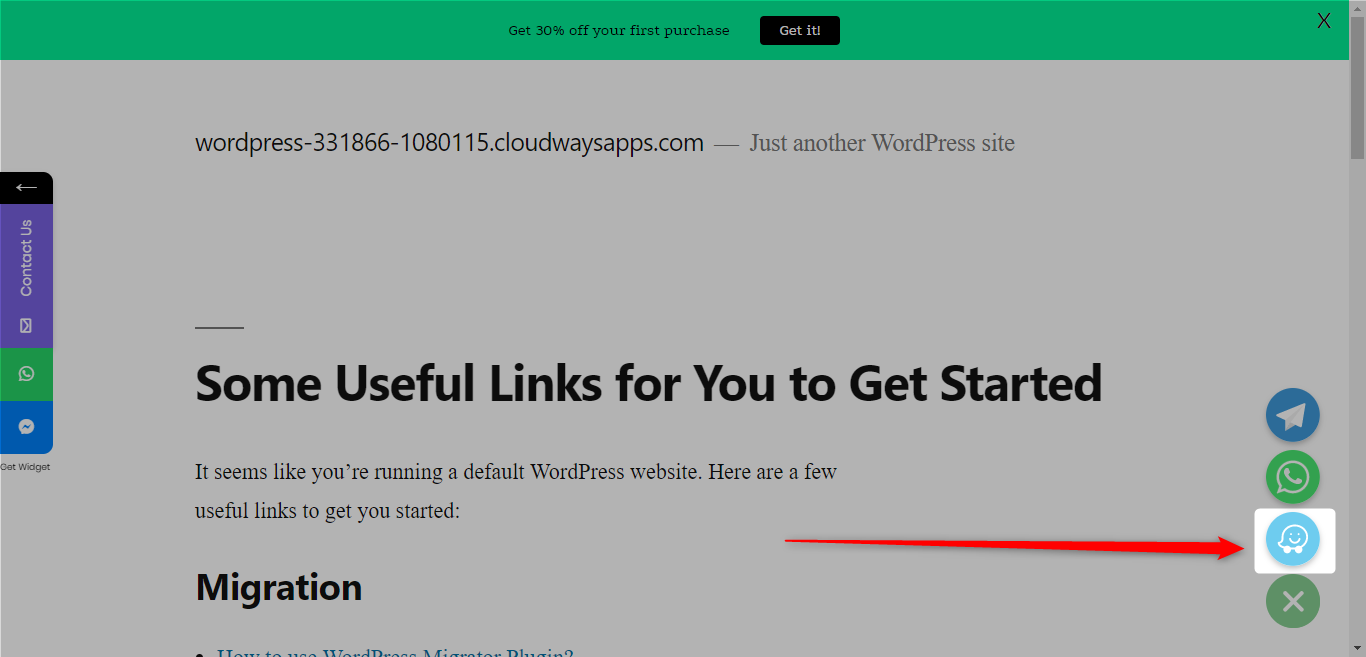
A Waze icon may look like this on Chaty when installed on a website (image for reference purpose only):
To learn more about how to use the Chaty plug-in click here, and don’t forget to check our entire Chaty knowledgebase to make the most out of it.