In this guide we’ll show you how to add a pre-set subject with title and URL merge tags to your email channel. Please note this is a Pro feature.
To learn more about how to use the Chaty plug-in click here, and don’t forget to check our entire Chaty knowledgebase to make the most out of it.
You can set up a pre-set subject for the email channel that will automatically appear in the email subject line when your website visitors click on the channel to send you an email. It can be something like ”New message” or anything else that you think may help your email lead stand out. You can also use merge tags to add the URL or the title of the page your website visitor sent the email from. For example, you can add the URL of a product to the message so that you know which product your customer is referring to when they email you.
So let’s dive in. First, open the Chaty settings from your WordPress dashboard and click on the Email channel in ”Step 1: Choose your channels”. Add your email address and then click on ”Settings”:

In the settings box that will show up, look for ”Pre Set Message” and type your pre-set message subject, for example ”New message from”.
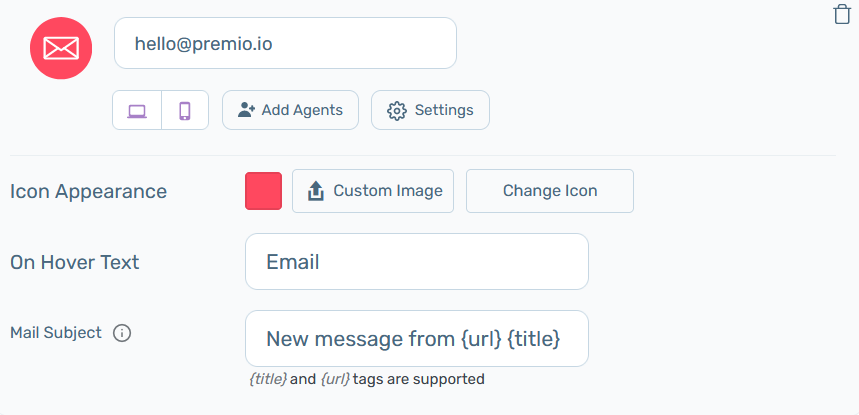
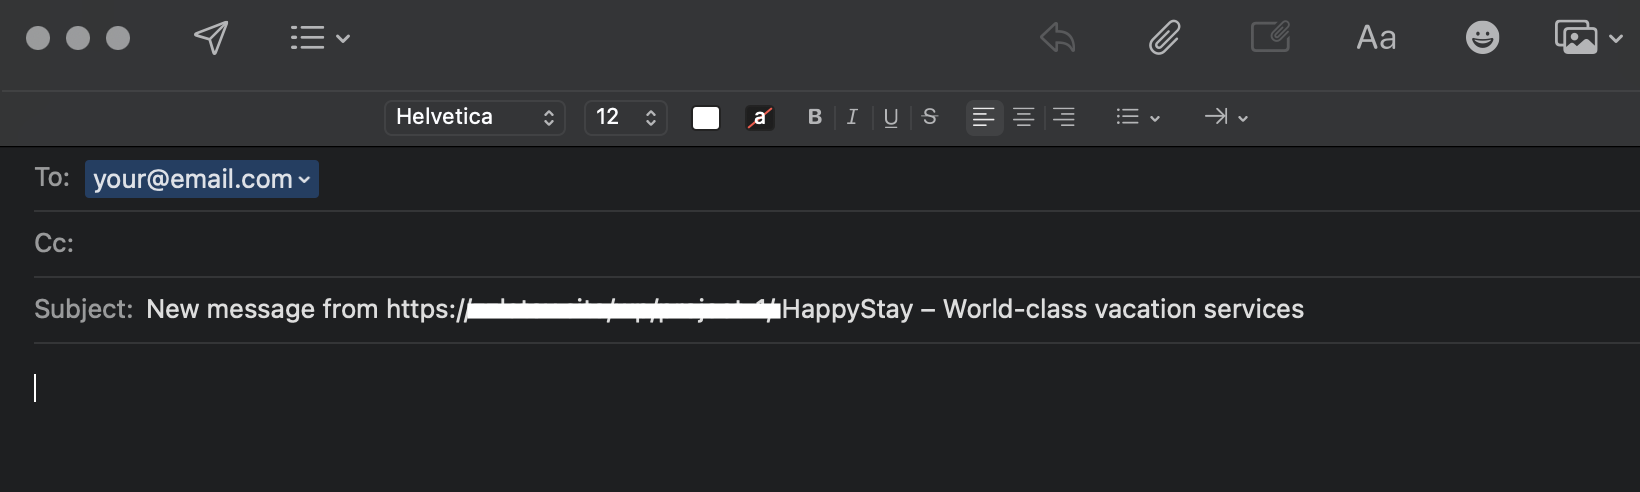
As mentioned, you can also add a title and URL tags to your pre-set message subject. The {title} tag grabs the name of the page the mail was submitted through and the {URL} tag grabs the page URL. So for example if your pre-set message subject is ”New message from!” and you add both title and URL tags, this is how it will look like if your website visitors send an email from your website homepage:
When you’re done personalising the widget according to your needs and preferences, don’t forget to hit the ”Save changes” button.
That’s it! Easy as 1,2,3 ☺️ You can also find our entire Chaty help documentation here: https://premio.io/help/chaty/