In this guide we’ll show you how to add a custom link or JavaScript channel to your Chaty widget.
But first – why would you need a custom link channel? A custom link can be used for various purposes – to redirect to a custom page/ URL on click, to launch a custom JavaScript code (for example, a live chat platform, you can read more about this here) or to create a second channel of the same type, to name a few.
To learn more about how to use the Chaty plug-in click here, and don’t forget to check our entire Chaty knowledgebase to make the most out of it.
So let’s get into it.
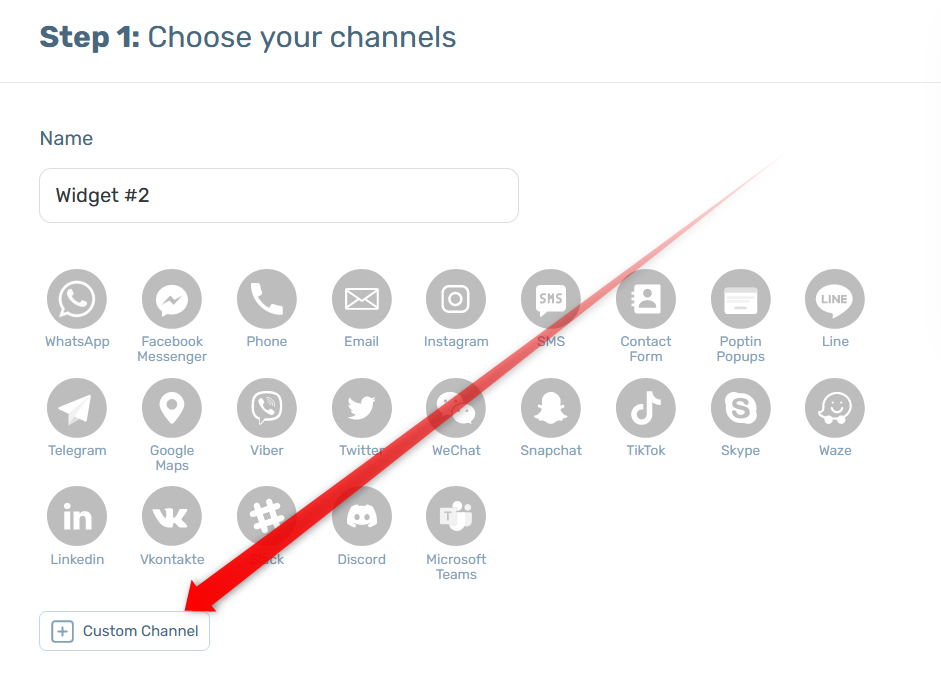
- First, open the Chaty settings and click on one of the five available custom link channels to add it to your widget:
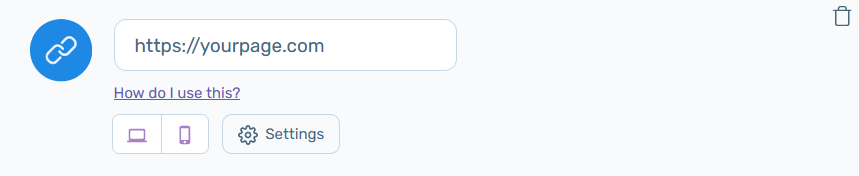
2. Next, type the URL or JavaScript code you’d like to launch, such as a link to your website contact us page or a custom piece of code to open a live chat platform.
3. To further customise your custom link channel, click on the “Settings” button. You will then see some more settings – icon colour, custom icon, channel type, on hover text and whether you want the custom link to open in a new tab or not.
The great thing about the Chaty custom link channel is that you can not only upload your own custom icon through the “Custom image” button, but you can choose from our pre-loaded FontAwesome icon library by clicking on the “Change icon” button!
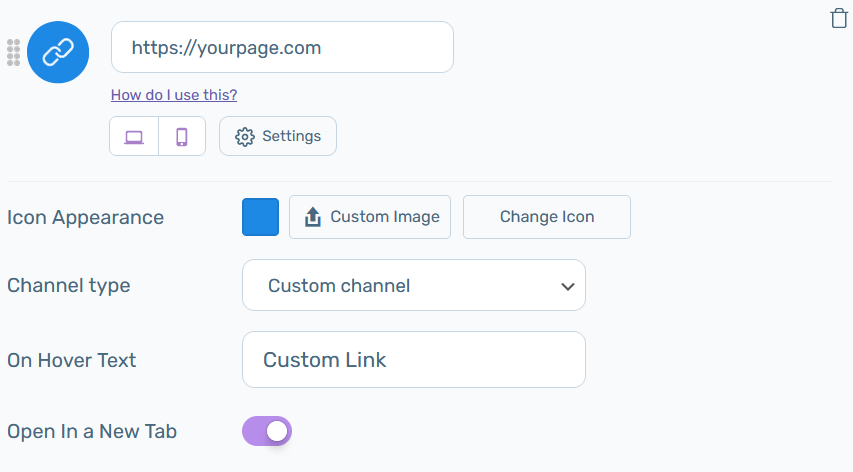
As to the channel type setting, if you want to use the channel with a custom URL or piece of code, you can leave it as it is by default – “custom link channel” type, but if you want to add a second channel of the same type, e.g. a second phone number channel, you can select that from the dropdown.
4. Once you’re done customising your custom link channel, you can proceed with the next steps of setting up and customising your Chaty widget. In the end, depending on your settings and customisations, it may look like this:
