If you are dealing with a large number of files in your WordPress admin area, chances are you have already considered using a backend file manager and organizer. In this blog post, we will be showing you 14 ways the Folders plugin for WordPress can help you structure and facilitate your workflow.
With Folders, you will be able to neatly (bulk) organize your files – be it pages, posts, media files, or different custom post types such as templates, WooCommerce products, and many others – into folder structures, upload new files directly into specific folders, replace any file types in a few clicks and so much more.
And what’s best about it? Even in the free version, you get unlimited folders! Keep on reading to find out what else you can do with the plug-in.
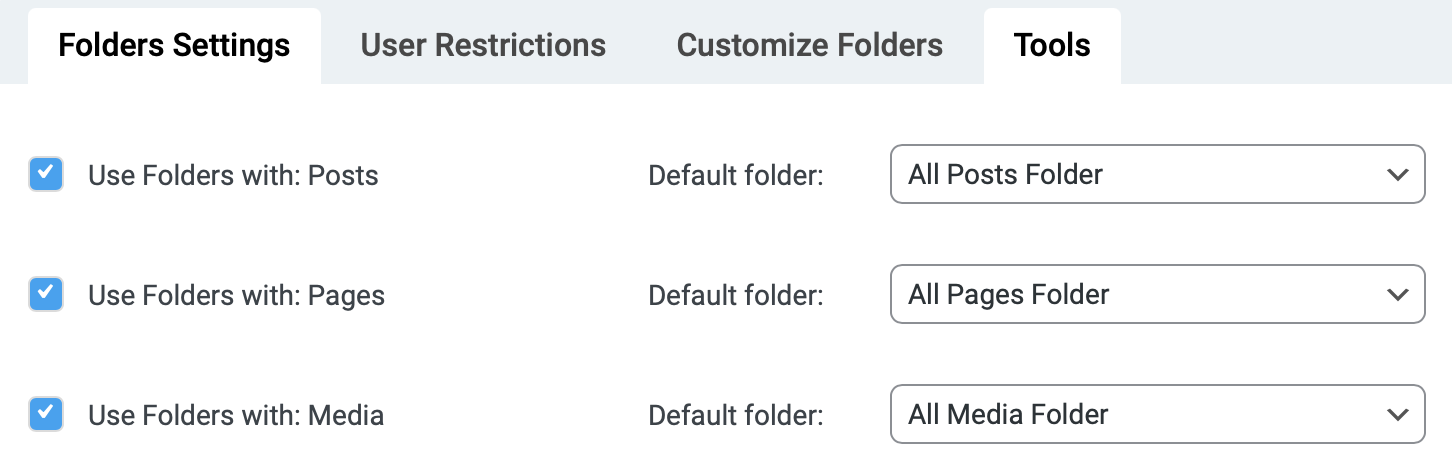
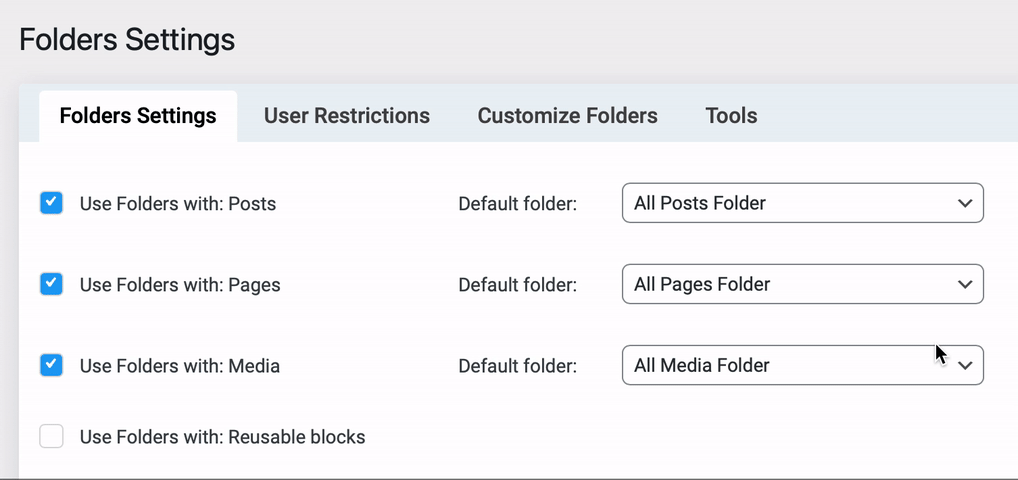
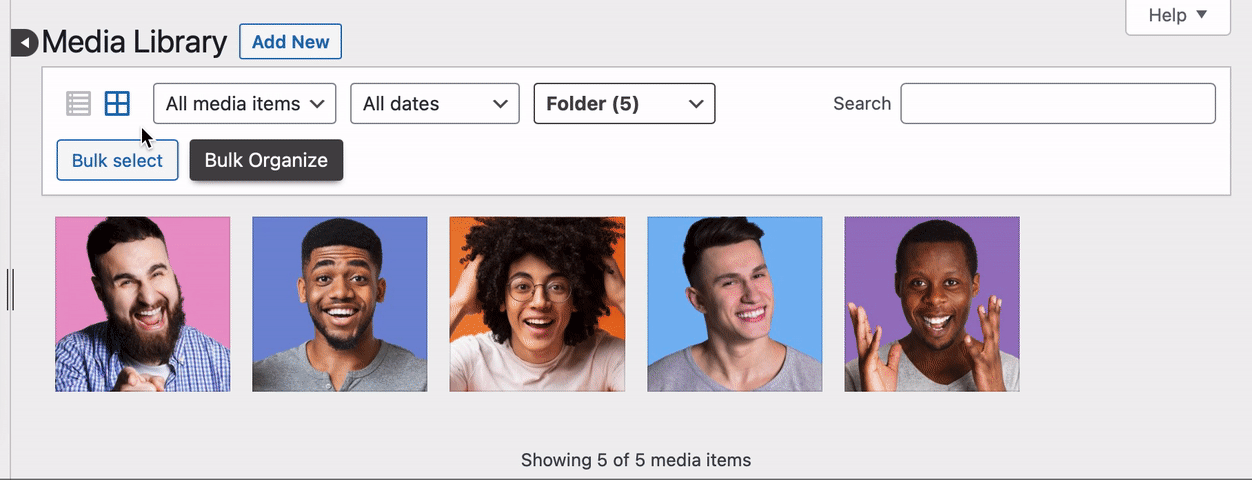
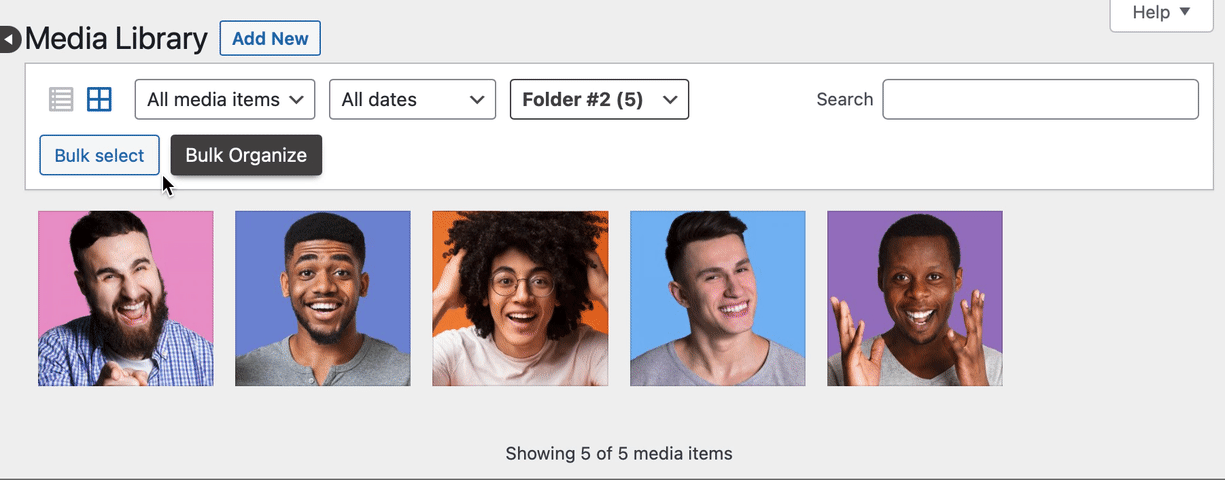
#1. Use Folders with Media, Pages, Posts or any custom post type
Let’s start from the beginning – what can you use Folders with? The good news is that unlike other common backend file managers and organizers, with Folders you can sort not only your media files but also your pages, posts, and different custom post types – think your WooCommerce products, orders, coupons, various forms, site templates, just to name a few. The folders created with the plug-in are entirely virtual, which means that moving a file to a folder doesn’t change the file URL. You can easily choose what you want to use Folders with from the Folders settings in your WordPress dashboard – simply check or uncheck the available options as per your needs. It’s important to mention that in the free version of Folders you can only use the plug-in for your media files, pages and posts.
#2. Customise your Folders appearance and working area as per your taste
By default the Folders interface features a nice pink colour for easier acknowledgement. However, if you prefer the plug-in to match the color and even font of your site, you can easily change to one of the other default colors – dark grey or blue – or add a custom color (although please note custom colors are only available in the paid version of the plug-in) and change the font and font size of the interface.
You can set your preferred colours, font and font size from the Folders settings in your WordPress dashboard. What’s more, you can also adjust the width of the Folders side panel by dragging the panel left or right from the double line icon, or collapse the side panel for more space by clicking on the arrow button.
#3. Upload files to a specific folder and set a default folder
To save time, you can upload files directly into a specific folder. When you click on the WordPress ”Add new” button, you will be given the option to either drop a file to upload it or select a file from your device and choose which folder the file shall be uploaded to.
What’s more, from the Folders settings in your WordPress dashboard you can also set a default folder – meaning a folder that will load every time you enter your Media library, Pages, Posts or any custom post type. For example, you can load a media folder you are currently working on every time you open the Media library.
To do that, you need to choose a default folder from the dropdown next to each post you are using Folders with. In the free version of Folders you can choose among the ”Unassigned files” and ”All files” directories, while in the Folders paid version you can select any custom folder.
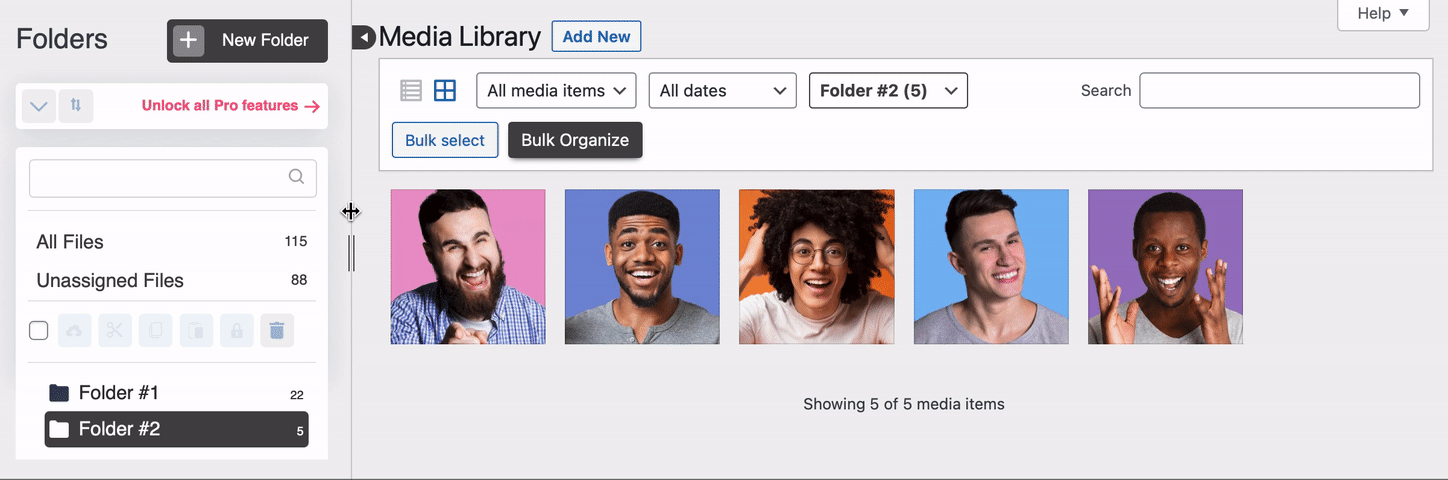
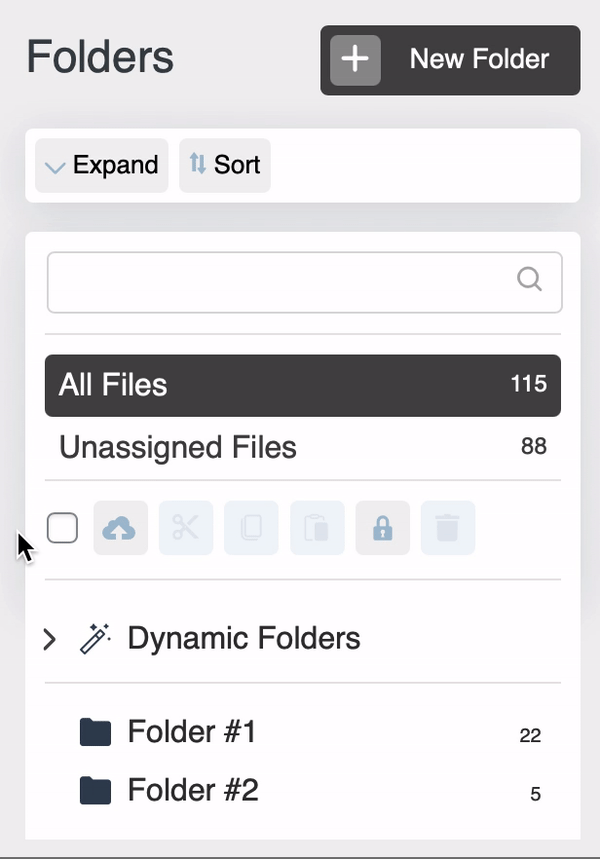
#4. Bulk organise your files
You can use Folders to bulk select multiple files to move into a folder, unassign multiple files from a folder or delete multiple items at once, just to give you a few examples. This will allow much faster sorting of your files.
#5. Use quick actions to speed up your workflow
When developing Folders, we have a simple thing in mind – to improve our users’ workflow. That’s why recently we came up with a modern action bar that features multiple options just a click away.
There is a checkbox that allows you to enable ”multi-select” – to select multiple folders at once – next, you have an upload feature that allows you to upload media folder structures from your personal computer into your WordPress admin panel (to learn more about this, keep on reading!), after that you get cut, copy, paste, lock and delete features. Locked folders stay pinned and cannot be dragged or deleted, so that you can work with them more easily.
The action bar is available in the Folders paid version. From the Folders top bar you can sort folders alphabetically or by newest/ oldest from, or expand and collapse folder structure. There’s also a search bar so you can locate a folder more easily, and right-clicking on any folder will reveal a few more options (also available in the Folders paid version) – to pin a folder (pinned folders will appear on top of all folders), to star a folder (this would add a star/ ”favorite” icon to your folder, so it’s recognizable more easily), to open a folder by default on load and more.
And lastly, from the ”New Folder” button you can create multiple folders at once by separating new folders’ names with a comma.
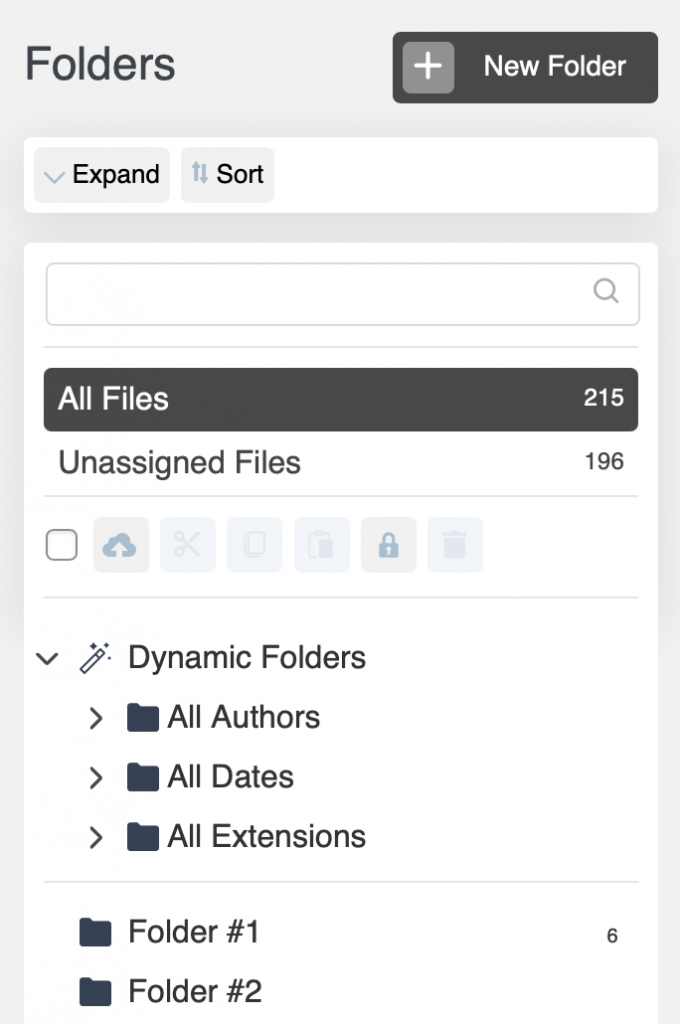
#6. Use dynamic folders
Dynamic folders are meant to help you filter your files in ”folders” based on metadata such as Authors, Dates, Categories, Dates or Extensions. To enable dynamic folders, navigate to the Folders settings in your WordPress dashboard and tick the ”Dynamic folders” setting checkbox. Please note this is available in the paid version of Folders only. When the functionality is activated you will see a ”Dynamic folders” bar on top of your existing folders that will allow you to view files sorted by different criteria such as authors, dates, and so on.
#7. Show your media details on hover
Imagine not having to open every single media file to reveal its upload date, name of the user it was uploaded by, name, file type, size, dimensions, alternative text, title, or file URL – and instead, being able to quickly visualize any of these as per your needs by doing a quick hover motion?
It’s true – this feature is available in the paid version of Folders. To enable it, navigate to the Folders settings in your WordPress dashboard and tick the ”Show media details on hover” checkbox. Below you will see a dropdown from where you can select which of the above-mentioned details you wish to visualize. The end result may look like this:
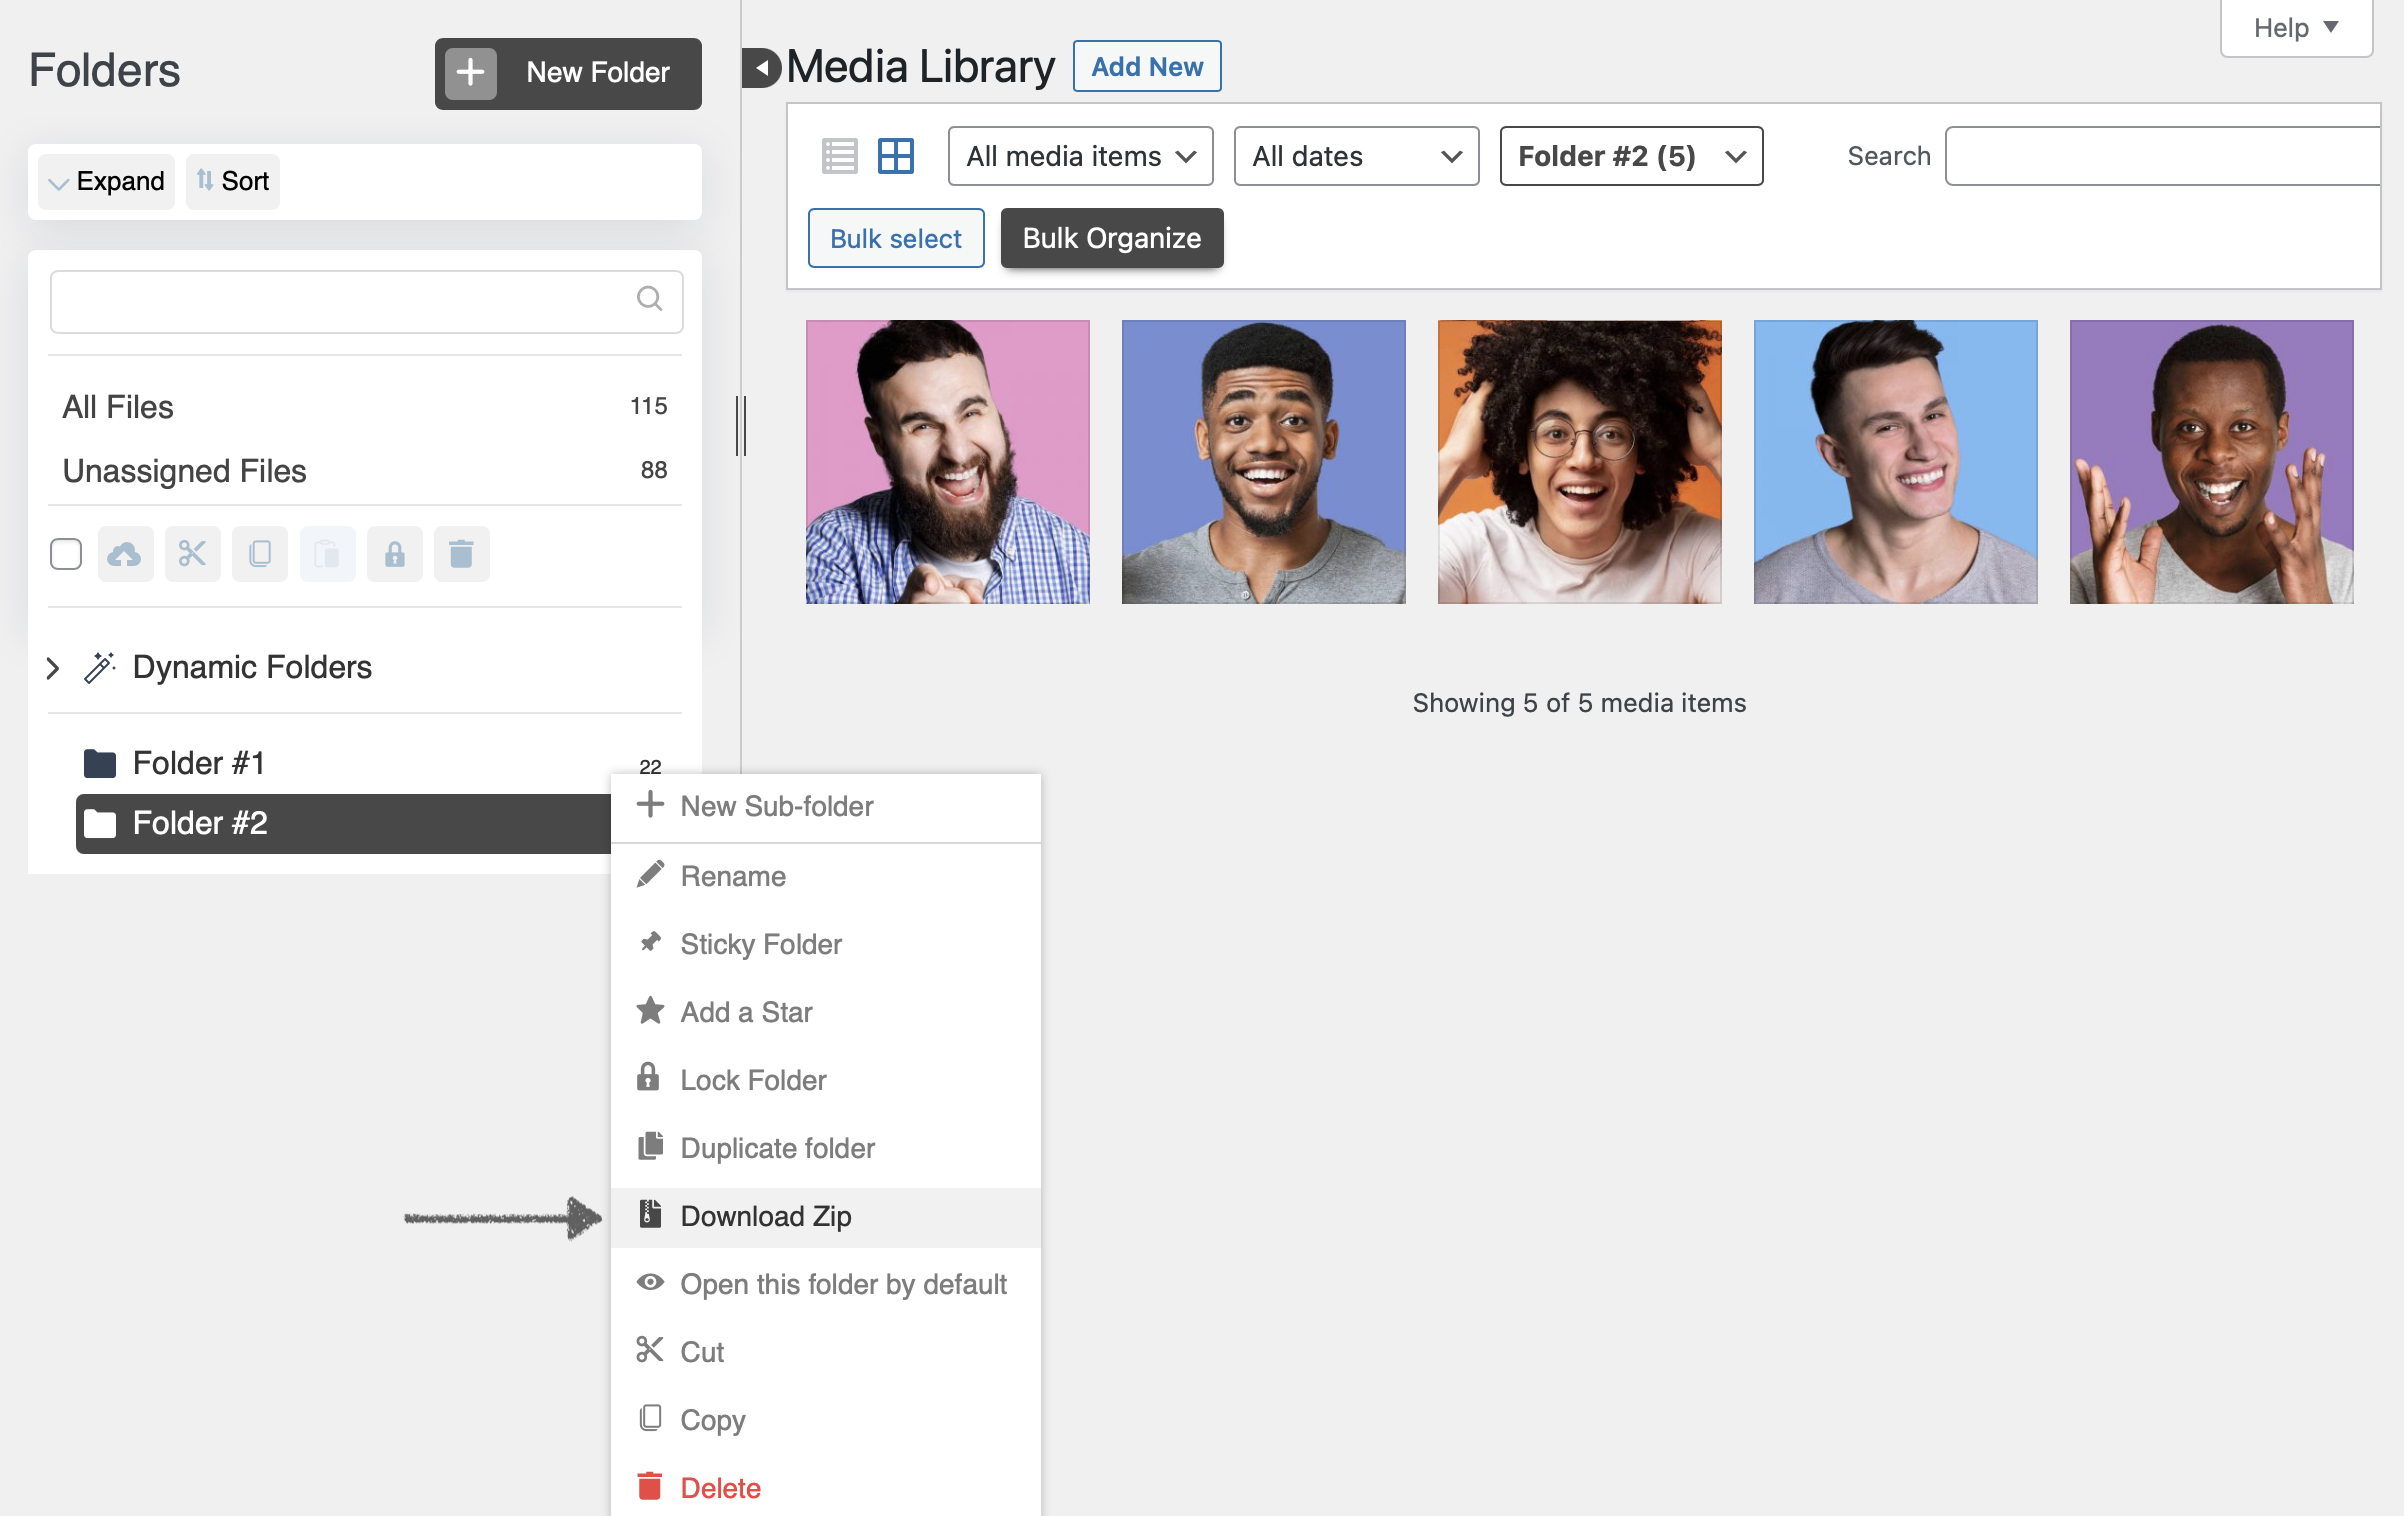
#8. Download a media folder as .zip file
If you need to export numerous media files at the same time for any reason, for example if you are looking for some sort of backup solution, you can do this by downloading a media folder as .zip file using the Folders plug-in. This functionality is only available for media folders and in the paid version of the plug-in. To download a folder, right-click on the folder you wish to download and choose the ”Download .zip” option from the menu.
#9. Use a trash bin for your media files – similar to this on a computer
It has probably happened to you too – you work on your website and suddenly you realise something has been deleted by mistake. This is where the Folders trash bin functionality comes in handy.
With the feature activated, similar to the flow on a personal computer, any files that you delete will be temporarily moved to a virtual trash bin nested under the Media library settings to prevent unfixable mistakes. You can delete any items permanently either from the trash bin directly or through bulk selecting the items and clicking on the ”Delete permanently” button in your Folders interface.
To set up the functionality, open the Folders settings from your WordPress dashboard and tick the ”Move files to trash by default before deleting” checkbox, then follow the remaining quick setup steps in our help documentation article. The feature is available in the paid version of Folders.

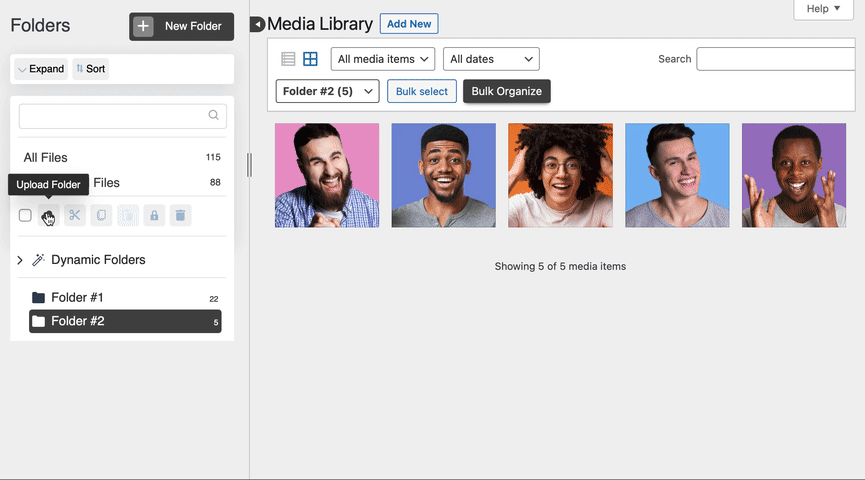
#10. Upload a folder with a structure
Using this functionality you will be able to upload a folder or folder structure directly from your computer and have the folder structure and its content replicated as virtual folders in your Media library. To use the functionality, click on the ”Upload Folder” button in the Folders’s action bar and select the folder or folder structure you want to upload. This can save you a lot of time creating folders and subfolders and rearranging files within them if you already have the entire structure ready on your device. The functionality is available in the paid version of the Folders plug-in.
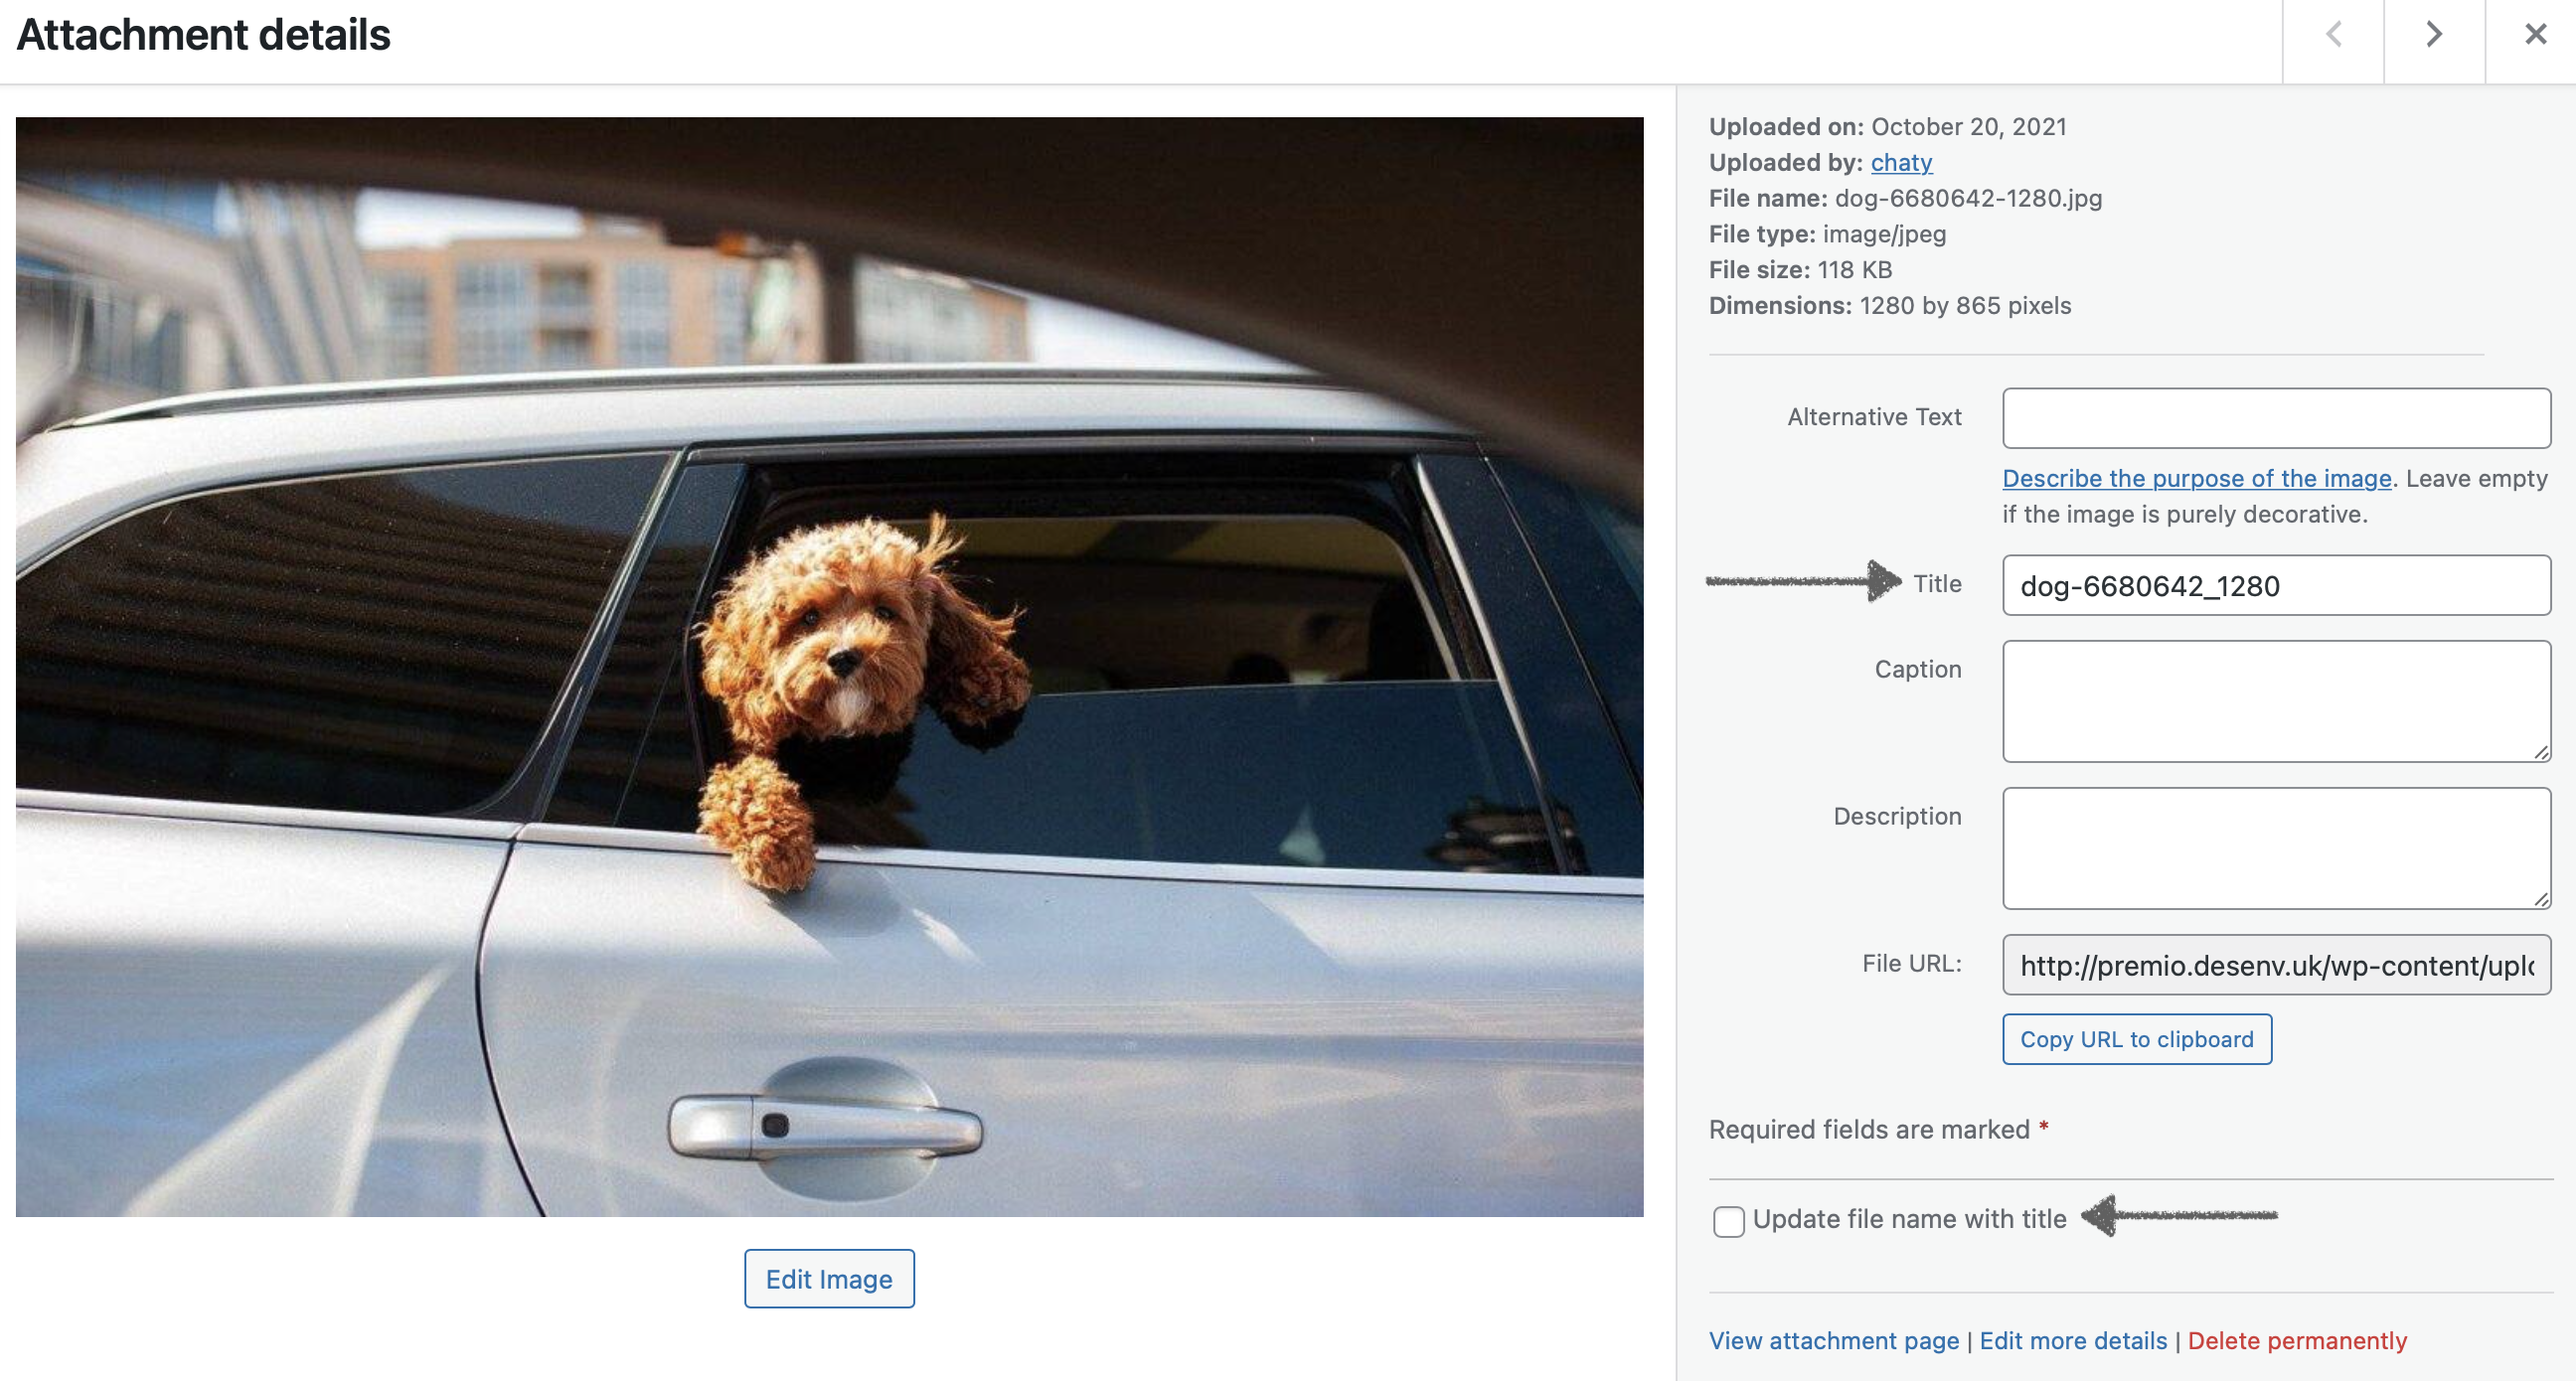
#11. Automatically rename a media file
Using this feature of Folders you can replace the actual file name of a media file with a title of your choice directly from the WordPress editor.
Keep in mind the feature will not work for bulk actions and for pages or posts. Here is an example of how the functionality works – let’s say you give an image the title ”Cute dog”, but the actual file name is dog-6680642_1280.jpg.
Using the Folders auto rename functionality, you will be able to automatically rename that filename to ”cute-dog.jpg”. Natively, if there is more than one file with the same name, the latest one will be given a number, for example ”cute-dog-1.jpg”.
To activate the feature, enable the ”Auto Rename file based on title” setting from the Folders settings in your WordPress dashboard, open a media file, put your custom file name in the ”Title” field and tick the ”Update file name with title” checkbox. The feature is available in the paid version of the plug-in.
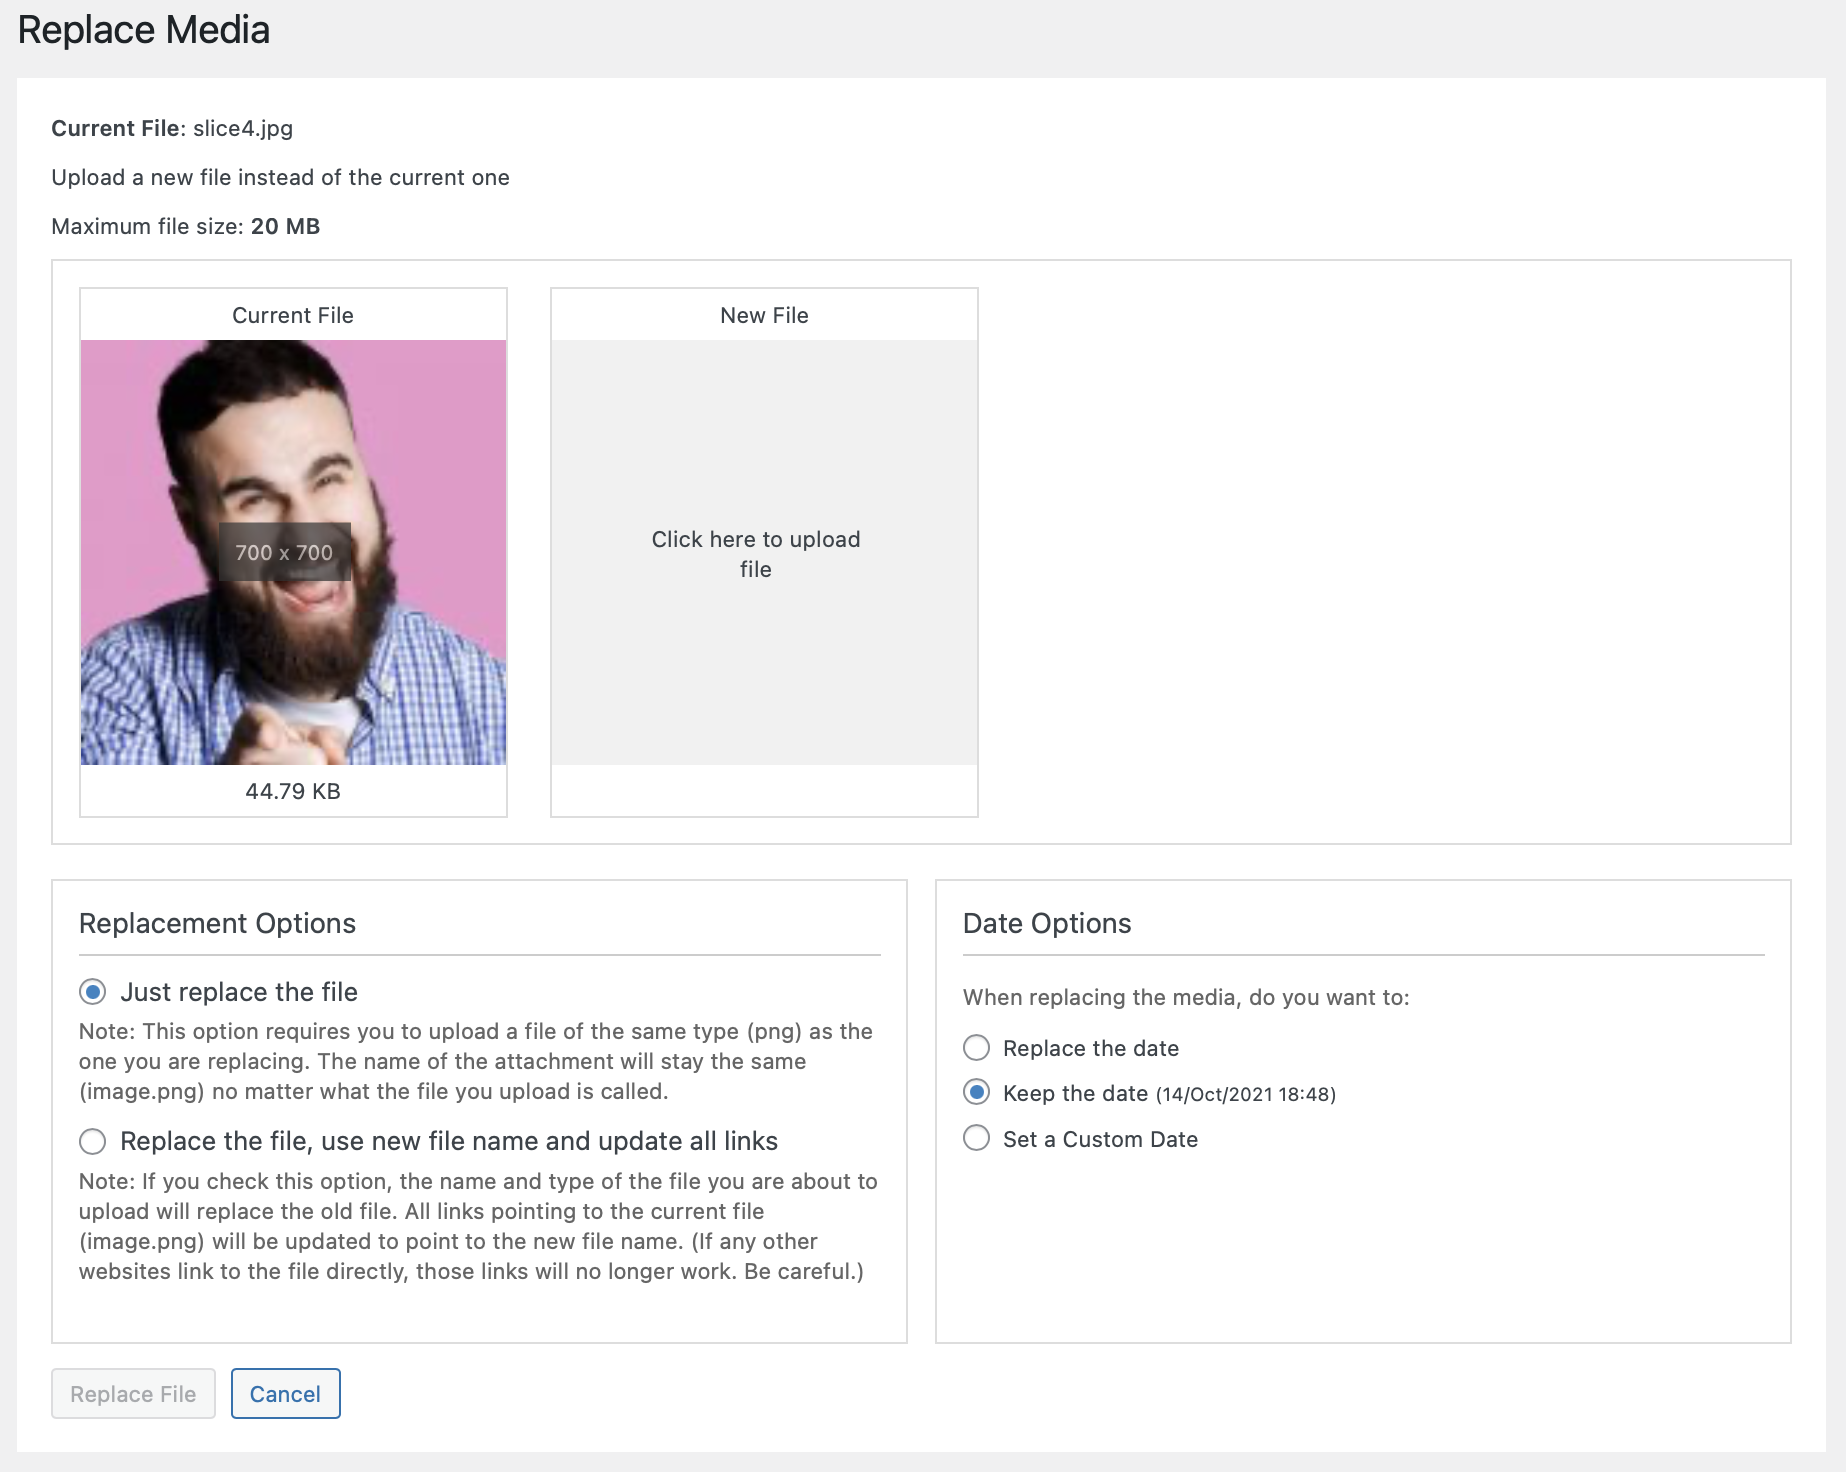
#12. Replace any file type
With the replace functionality you can replace any file type and the change will reflect on all pages or posts the file is used on. Folders free users can benefit from the functionality for media files while users of the paid version of the plug-in can replace any file type.
What’s more, free users can choose to either ”just replace the file” – meaning the name of the attachment will stay the same no matter what the newly uploaded file is called – while paid users can also opt for the ”replace the file and use the new file name and update all relevant links” option instead.
By choosing this option, the name and file type of the newly uploaded file will replace the old file and all links pointing to the current file will be updated to point to the new file name. It’s important to note that if any other websites link to the file directly, those links will no longer work.
For both replace options you can also choose date options: to replace the date, keep the date, add a custom date from the dropdown calendar that will open or – for the second replace option – choose to put the newly uploaded file in the Uploads folder with the current month.
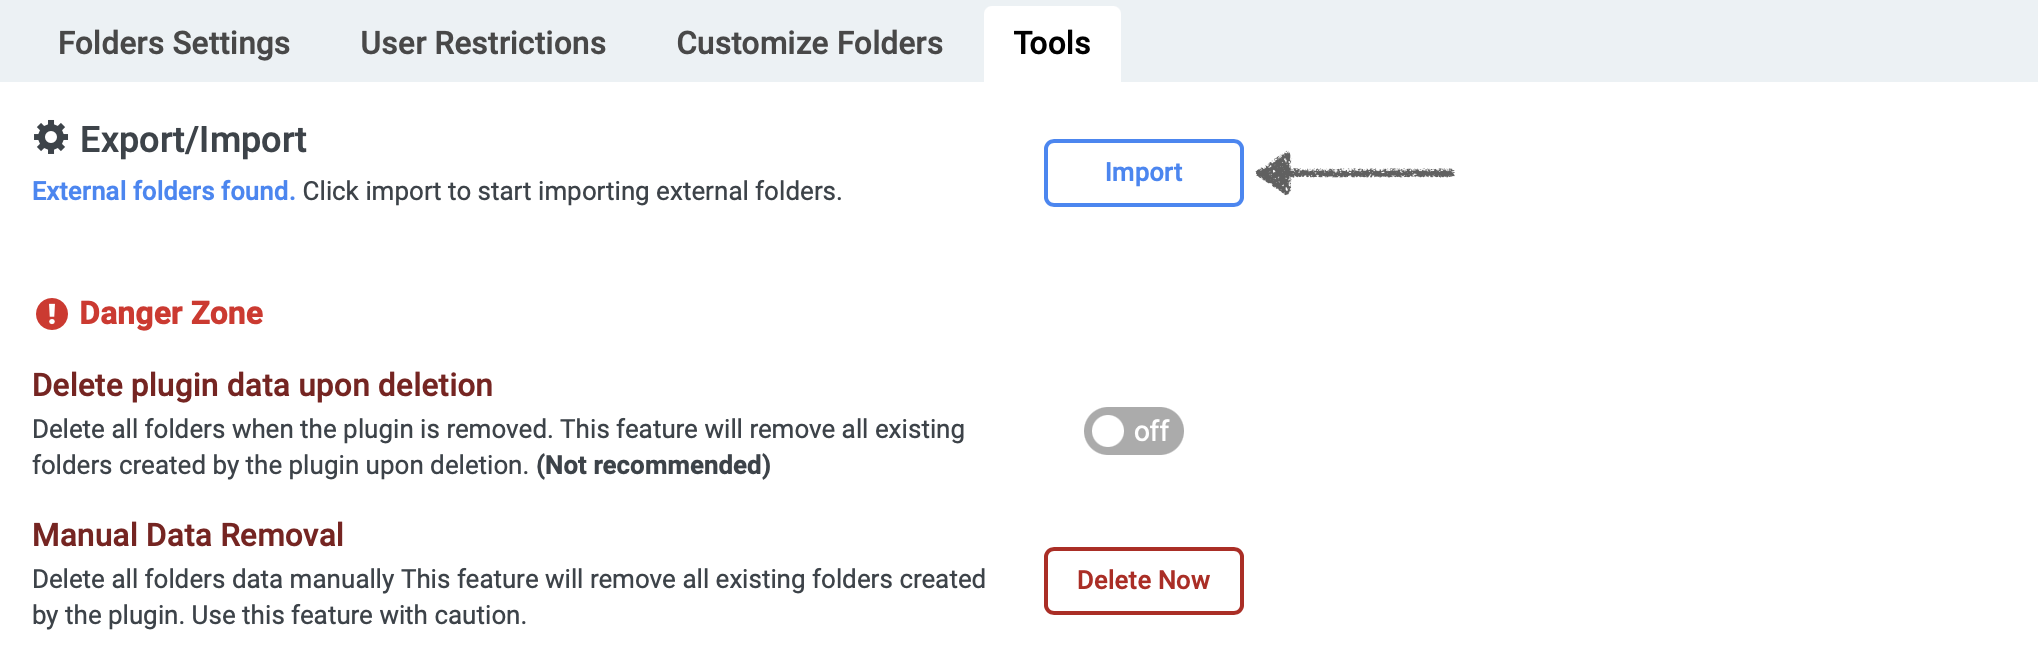
#13. Import folders from third-party plug-ins (an export functionality is coming soon!)
If you have been using another backend manager and organizer such as FileBird, Enhanced Media Library, Wicked Folders, Real Media Library, or WP Media Folder, and consider switching to Folders for any reason, you can now import all existing folders created with any of these plug-ins so that you don’t have to go through all the sorting again. If you have any of the above mentioned plug-ins installed on your site when installing Folders for the first time, you will be asked if you wish to import any existing folders that have been detected. If you prefer to do this at a later stage, you will need to navigate to the Folders settings in your WordPress dashboard and open the ”Tools” menu to be able to view and import any external folders detected. This functionality is available in the Folders free version.
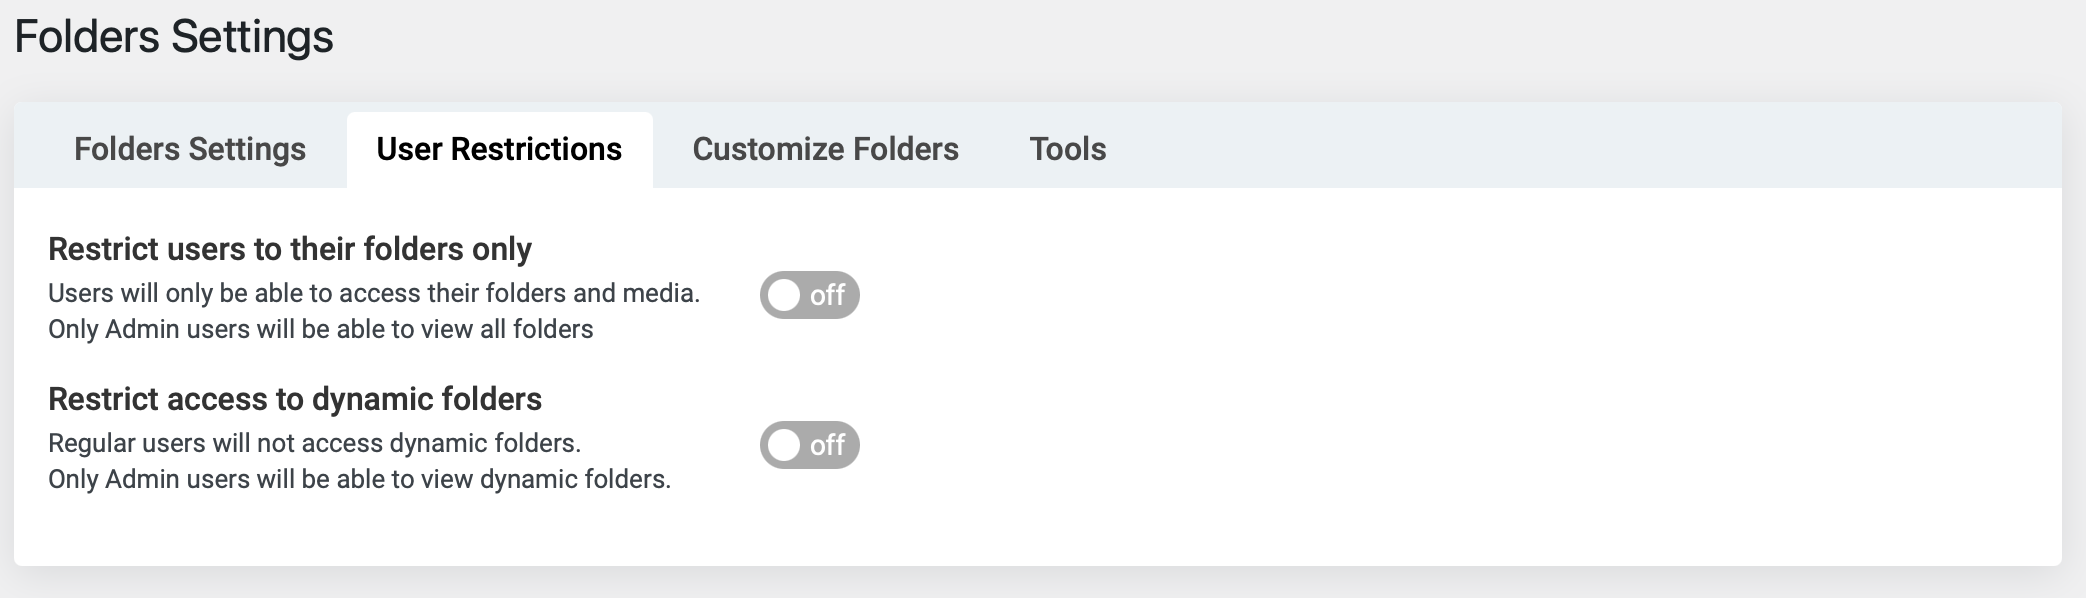
#14. Restrict folders access for specific user roles
With this Folders functionality a user will be able to create their own folders and access and view them only. Admin users will be able to see all folders created by other users and all files inside them.
You can also restrict non-admin users from viewing dynamic folders. To enable any of the restriction functionalities, go to the Folders settings in your WordPress dashboard, click on ”User restrictions” and choose the option you need.
And that’s it. We hope you found any of these functionalities useful and that Folders can help you improve your efficiency and workflow. If you have any feature suggestions, please feel free to drop us a line at any time! You can also check out our entire Folders help documentation to learn more about how to use the plug-in and make the most of it.