In this blog post we’ll discuss the latest additions to the My Sticky Menu plug-in welcome (notification) bar – a few awesome features you can use in different ways for maximum conversion. If you haven’t done that yet, make sure to read our other blog about the My Sticky Menu welcome bar where you’ll learn why you should use a notification bar on your website.
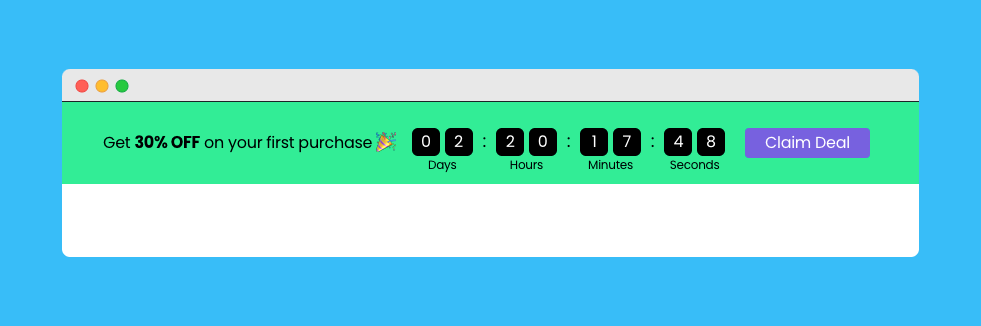
#1. Add a countdown timer to your welcome bar
One of the new things you can achieve with the plug-in is add a countdown timer element to your welcome bar. You can use this feature to announce a temporary or upcoming event such as a sale on the top or bottom of your webpage to draw more attention to your message and increase your chances of conversion and sale. You can choose from two modes – to start the countdown from a specific date and time (in a specific timezone depending on your location and target audience) or to start the countdown from the moment the welcome bar appears (on page load or depending on the selected triggers). If you go for the first mode, you’ll need to select the starting and ending date for the timer. If you opt for the second mode, you’ll need to add the minutes and seconds from which the countdown will count backwards. In either mode, the timer will count backward until it reaches 0:00:00 from your selected date.
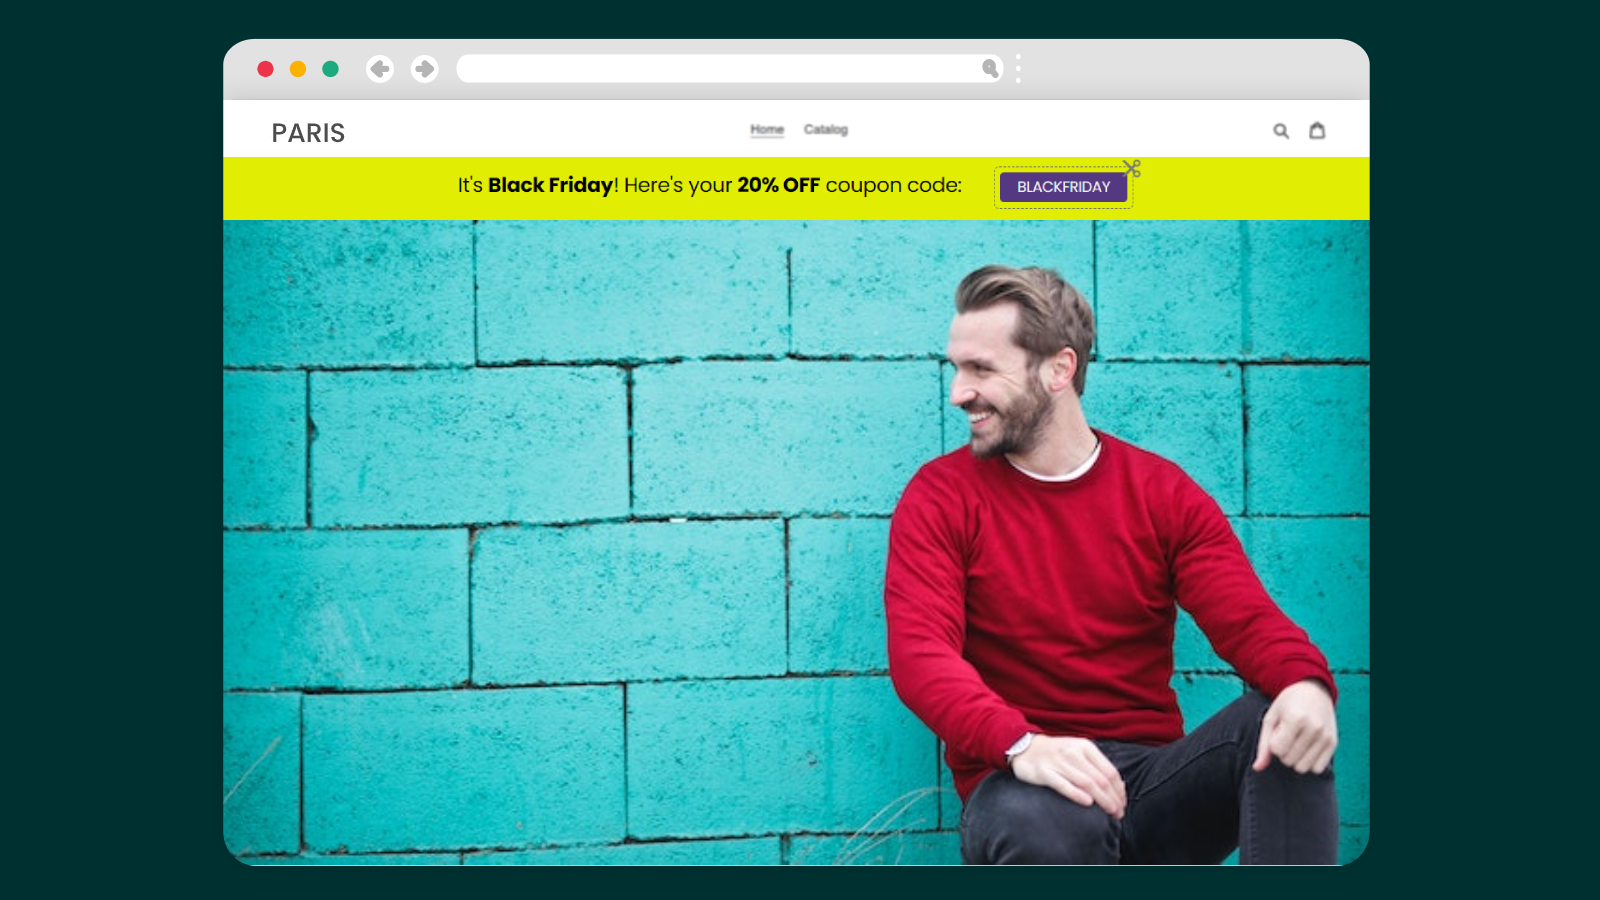
#2. Display a coupon code at the top of your site
The next feature we have prepare for you is the ability to add a coupon code to your welcome bar. This functionality too can be helpful in times of sale or an exclusive offer, for example if you wish to “reward” your website visitors for a specific engagement with an element on your site. With more people stating they’d more likely splurge into a purchase when there’s a discount code, showing a coupon code in the welcome bar can create a sense of urgency and drastically increase your conversion rate. When enabled, your visitors will be able to view a coupon after submission, which means after they click on the button in the welcome bar – for example, you can add a button that says “Get the code” and, when clicked on, it will reveal the actual code. They can then click on the coupon code to copy it and use it on your website when placing a purchase. The first step of the setup would be to set the actual coupon code (name) you want to show to your audience. You will then need to type a custom bar text that will be displayed on the left side of the coupon, for example “Congrats! Here’s your coupon code!”.
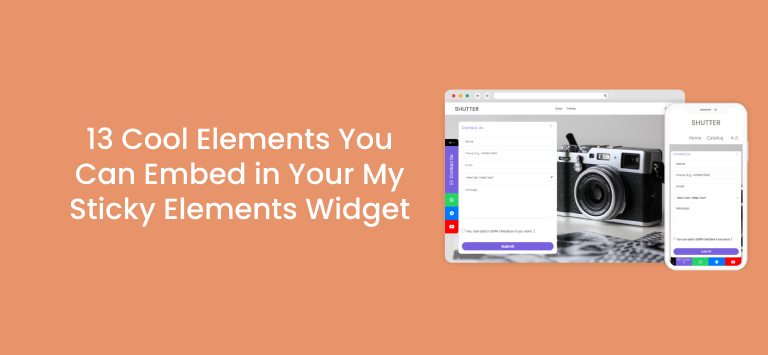
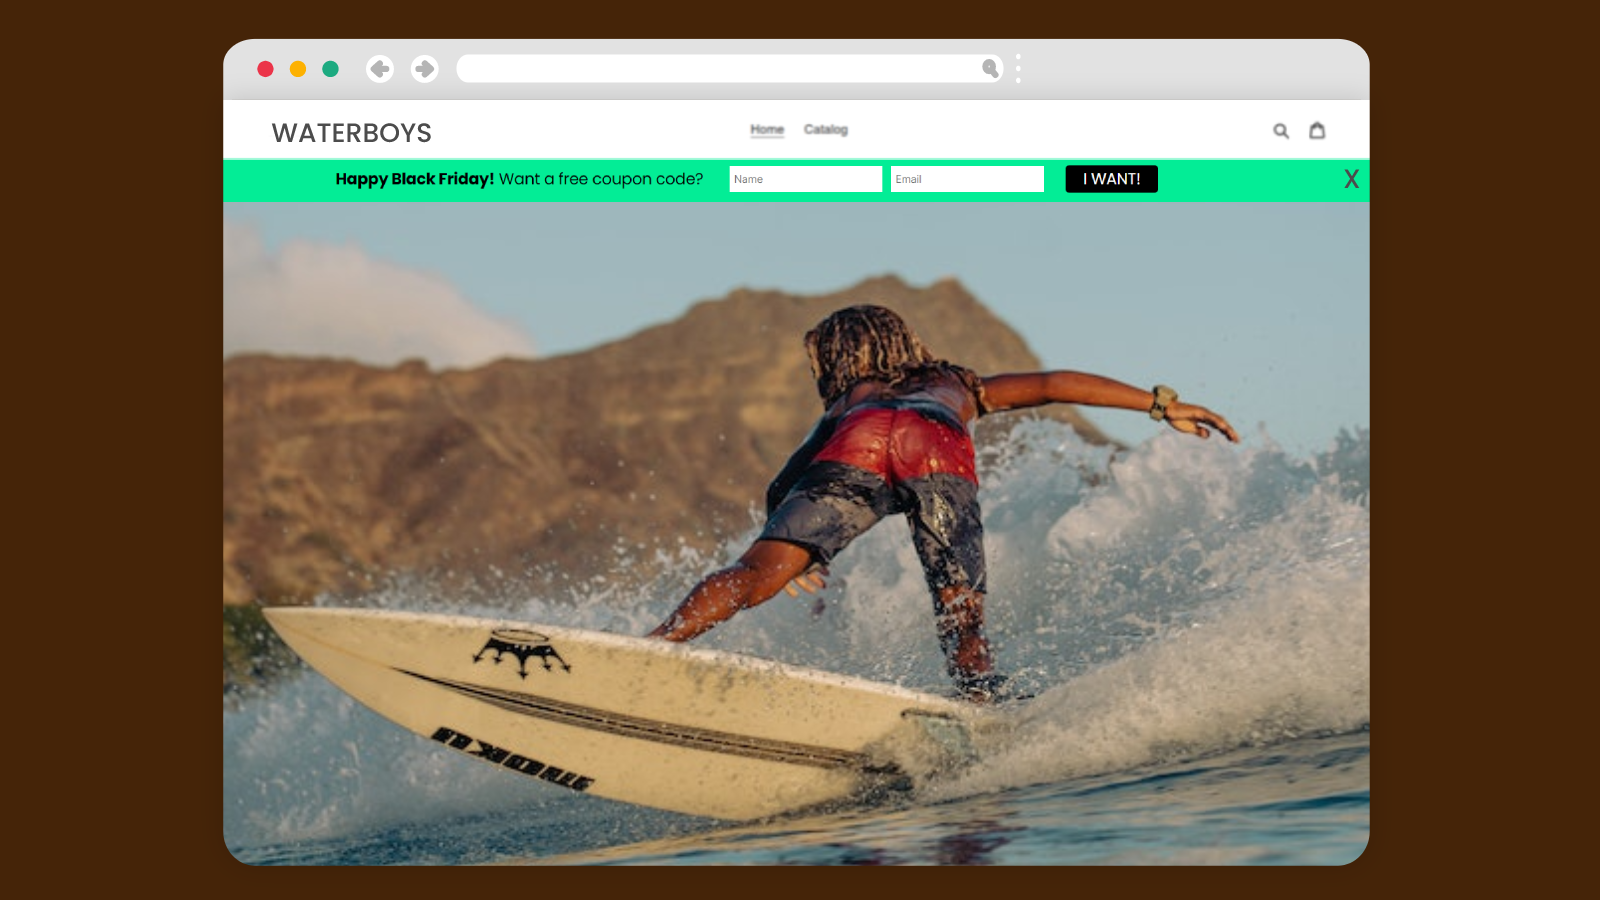
#3. Add a contact form to your welcome bar
With the My Sticky Menu plug-in welcome bar you can now add a simplified 2-step contact form to your welcome bar that will appear at the top or bottom of your website based on your welcome bar settings. Using this feature, you can offer a fast and easy way for your website visitors to contact you in a few clicks. You as a site owner will receive the leads either in your local database or by email (the latter is available for our Pro users only). To enable the feature, you’ll need to choose the desired mode – to collect your visitors’ name and email or name and phone number through the minimalistic contact form. If you receive the leads via email as well, you will need to add one or more email addresses, a “sender name” (the name that will appear as the sender name in your email) and the email subject, for which you can also use {name}, {phone}, {email}, {date} and {hour} merge tags.
#4. Use the contact form to receive inquiries for a product or “quick buy”
A great use case of the My Sticky Menu welcome bar contact form is to set it up as a distinguishable “make an inquiry” or “quick purchase” option at the top of your site. In recent years it’s becoming more and more popular for merchants to encourage quick purchases, so instead of having your website visitor to through the entire process of adding an item to their cart, then viewing their cart and finally, moving to checkout where they’ll be required to add a lot of details, full names, email address and full address, to name a few, you can benefit from the welcome bar contact form to receive faster purchases or inquiries for a product by receiving a callback if you add the phone field or – if you go for the email field, you can fetch the details about the desired item and, as a store owner, can then manually create an order for your customer. Buyers will see this as a benefit to simplify and speed up their purchase process and for you it will result in a quicker sale. The best part is you don’t need to add any intrusive button or popup to benefit from this feature – floating bars are subtle, yet they don’t lack in power in producing more leads and sales.
#5. Grow your mailing list using the welcome bar contact form
A great way to use the new My Sticky Menu welcome bar functionality – the contact form – is to help you build a stronger email marketing base. As we mentioned, as a site owner, you will receive the leads in your local database. You can then export the .csv file of the leads and upload it to your email marketing platform of preference, in order to be able to manage these contacts further according to your needs and preferences – for example, you can set them up to receive your newsletter or some offers customers cannot resist. Collecting visitors’ emails not only through a subscribe form, but also through a contact form on your website is a great way to increase your chances of collecting such valuable information for your email list and bigger marketing strategy picture.
So wait no more – make sure you are using the latest version of the My Sticky Menu plug-in to ensure you are getting the latest features and fixes – and proceed with setting up your next welcome bar. With Black Friday and the holiday season around the corner, you can unlash your creativity and make the most out of this period of increased sales for a long-lasting grow of your client base, mailing list and sales.
You can check out our knowledge base for technical instructions on setting up each of the features discussed and, as always, for any questions or concerns you can refer to our helpful support team. Happy creating!